

DwC's DIY Stair Runner
I’m a home DIY blogger now, remember? Lol. Just kidding. But enough of you have asked me how we do our stair runners that I felt like it was time to throw a blog post up. Also, if you’ll remember, we got new floors, and so the old runner had to be replaced (and it was definitely, definitely time)(our runners endure a lot of running).
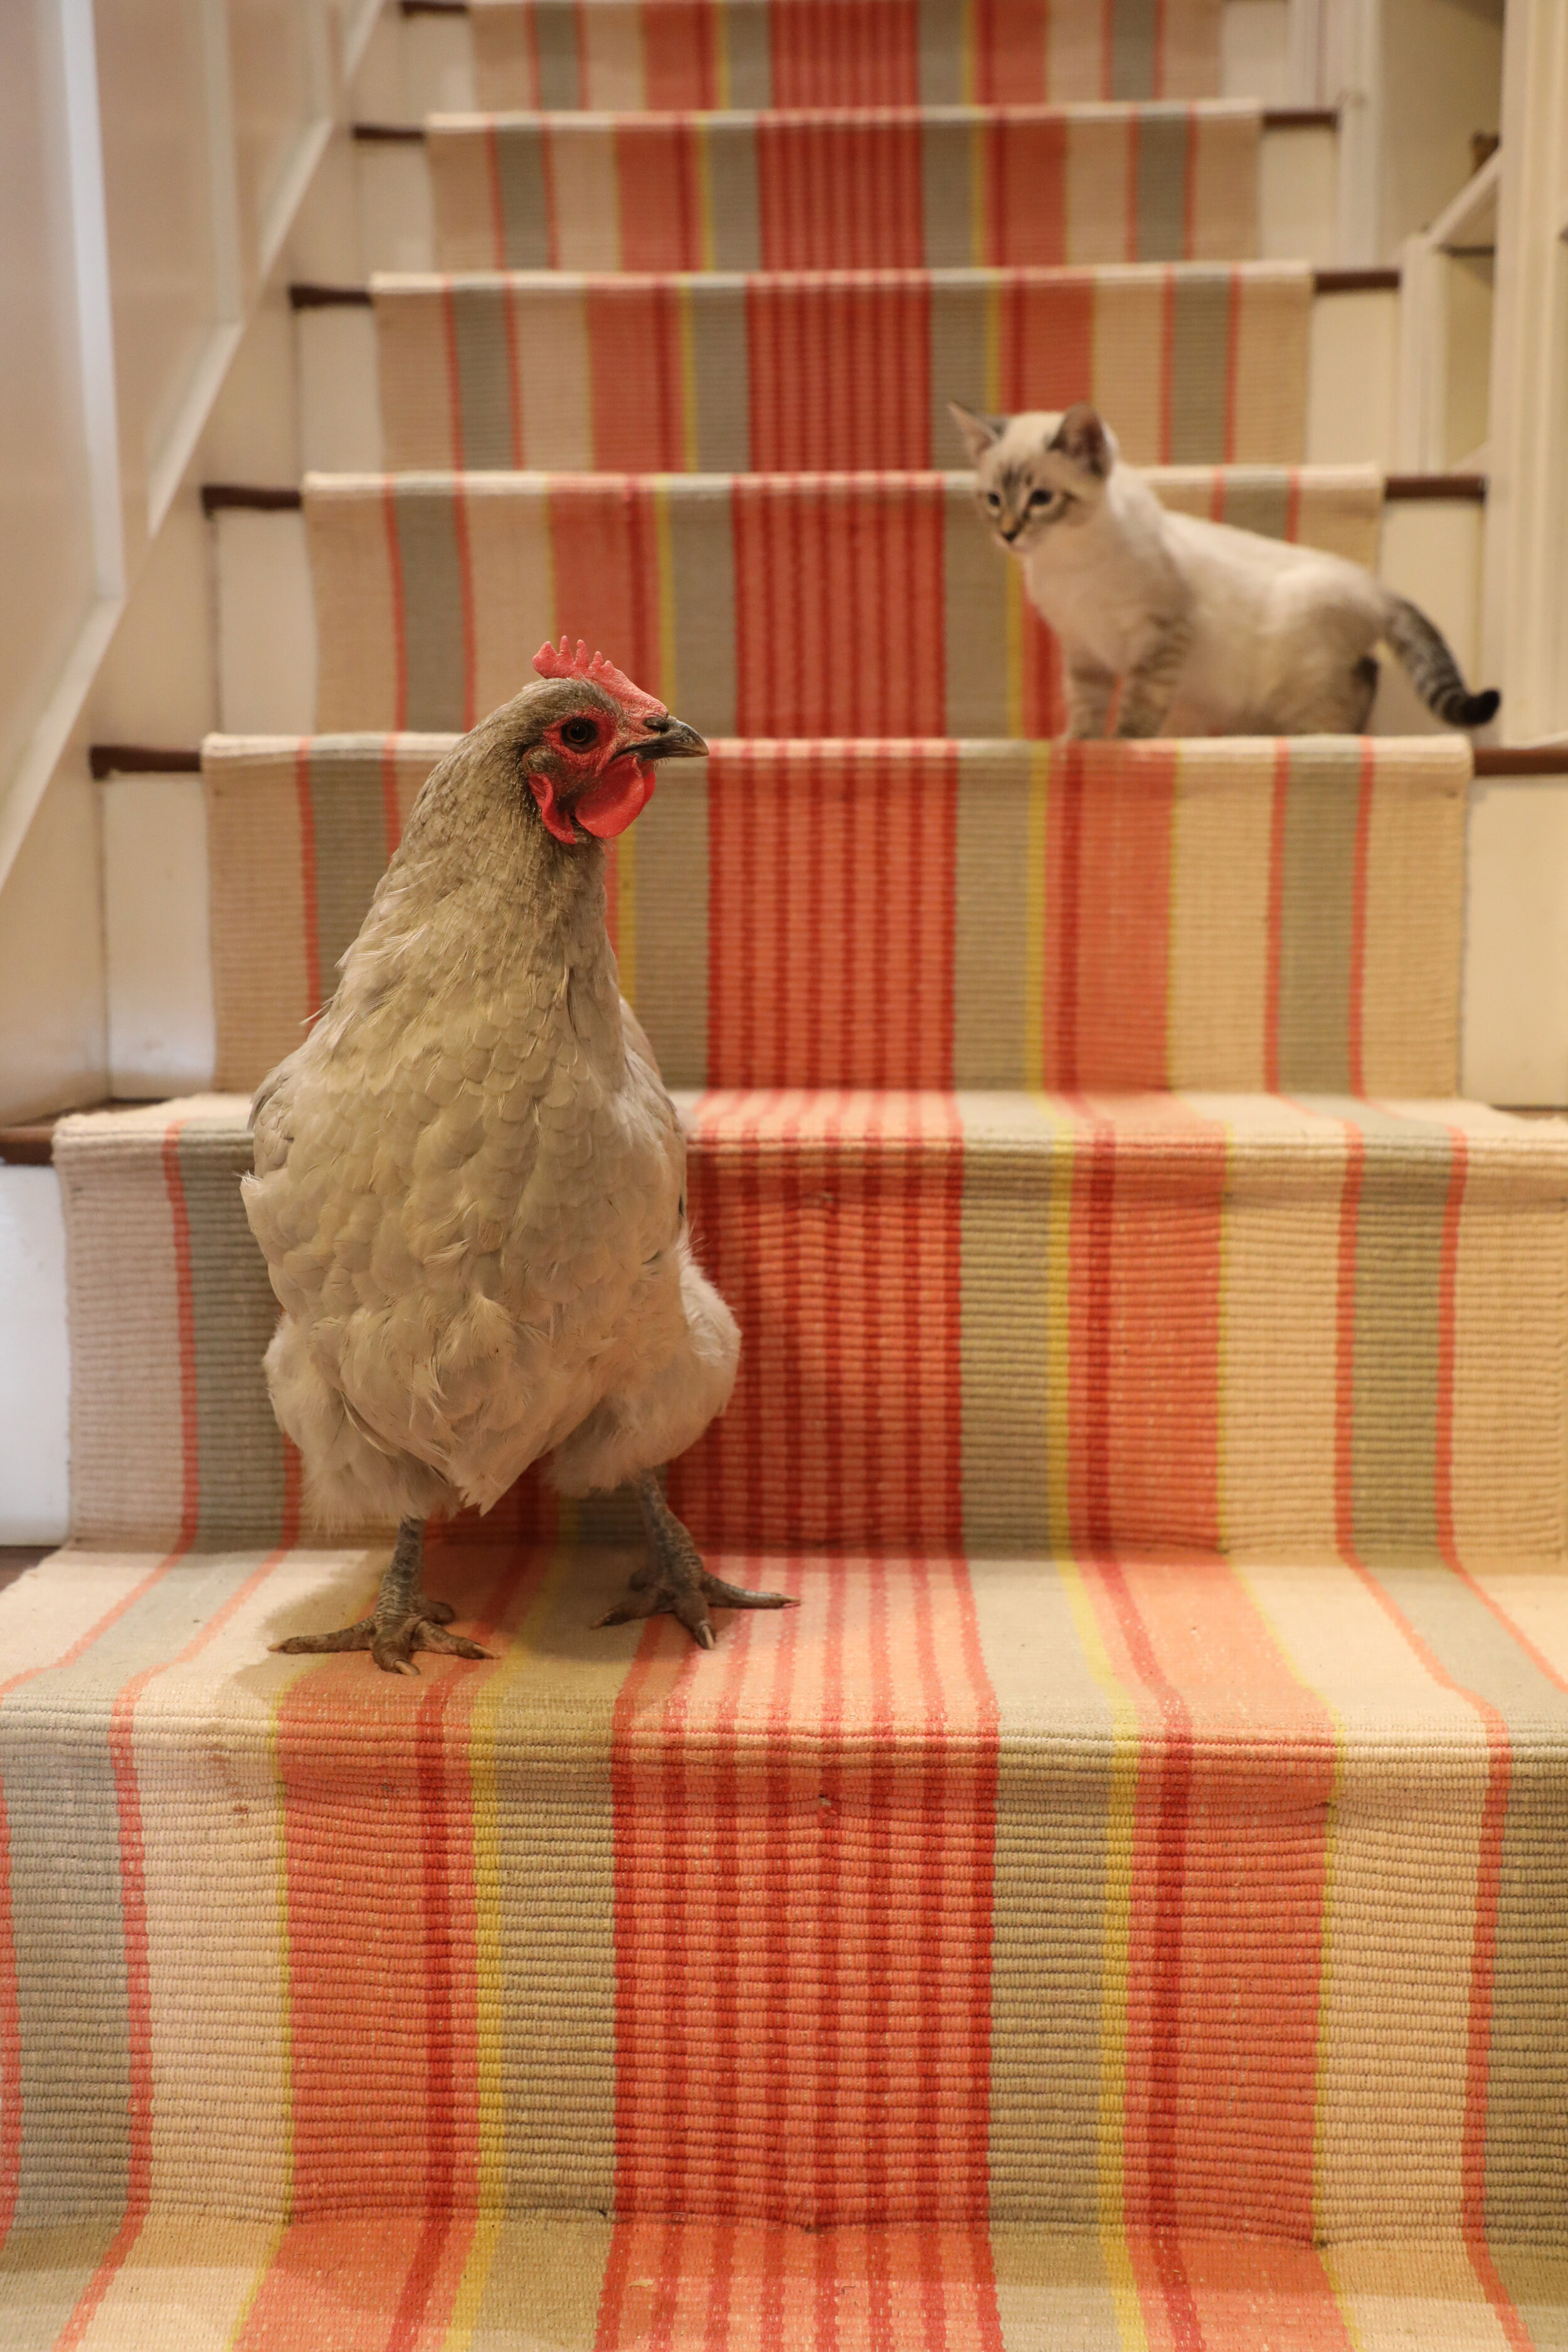
Here’s a look back at the previous version and a very young Gimlet and not so young Veruca Salt:
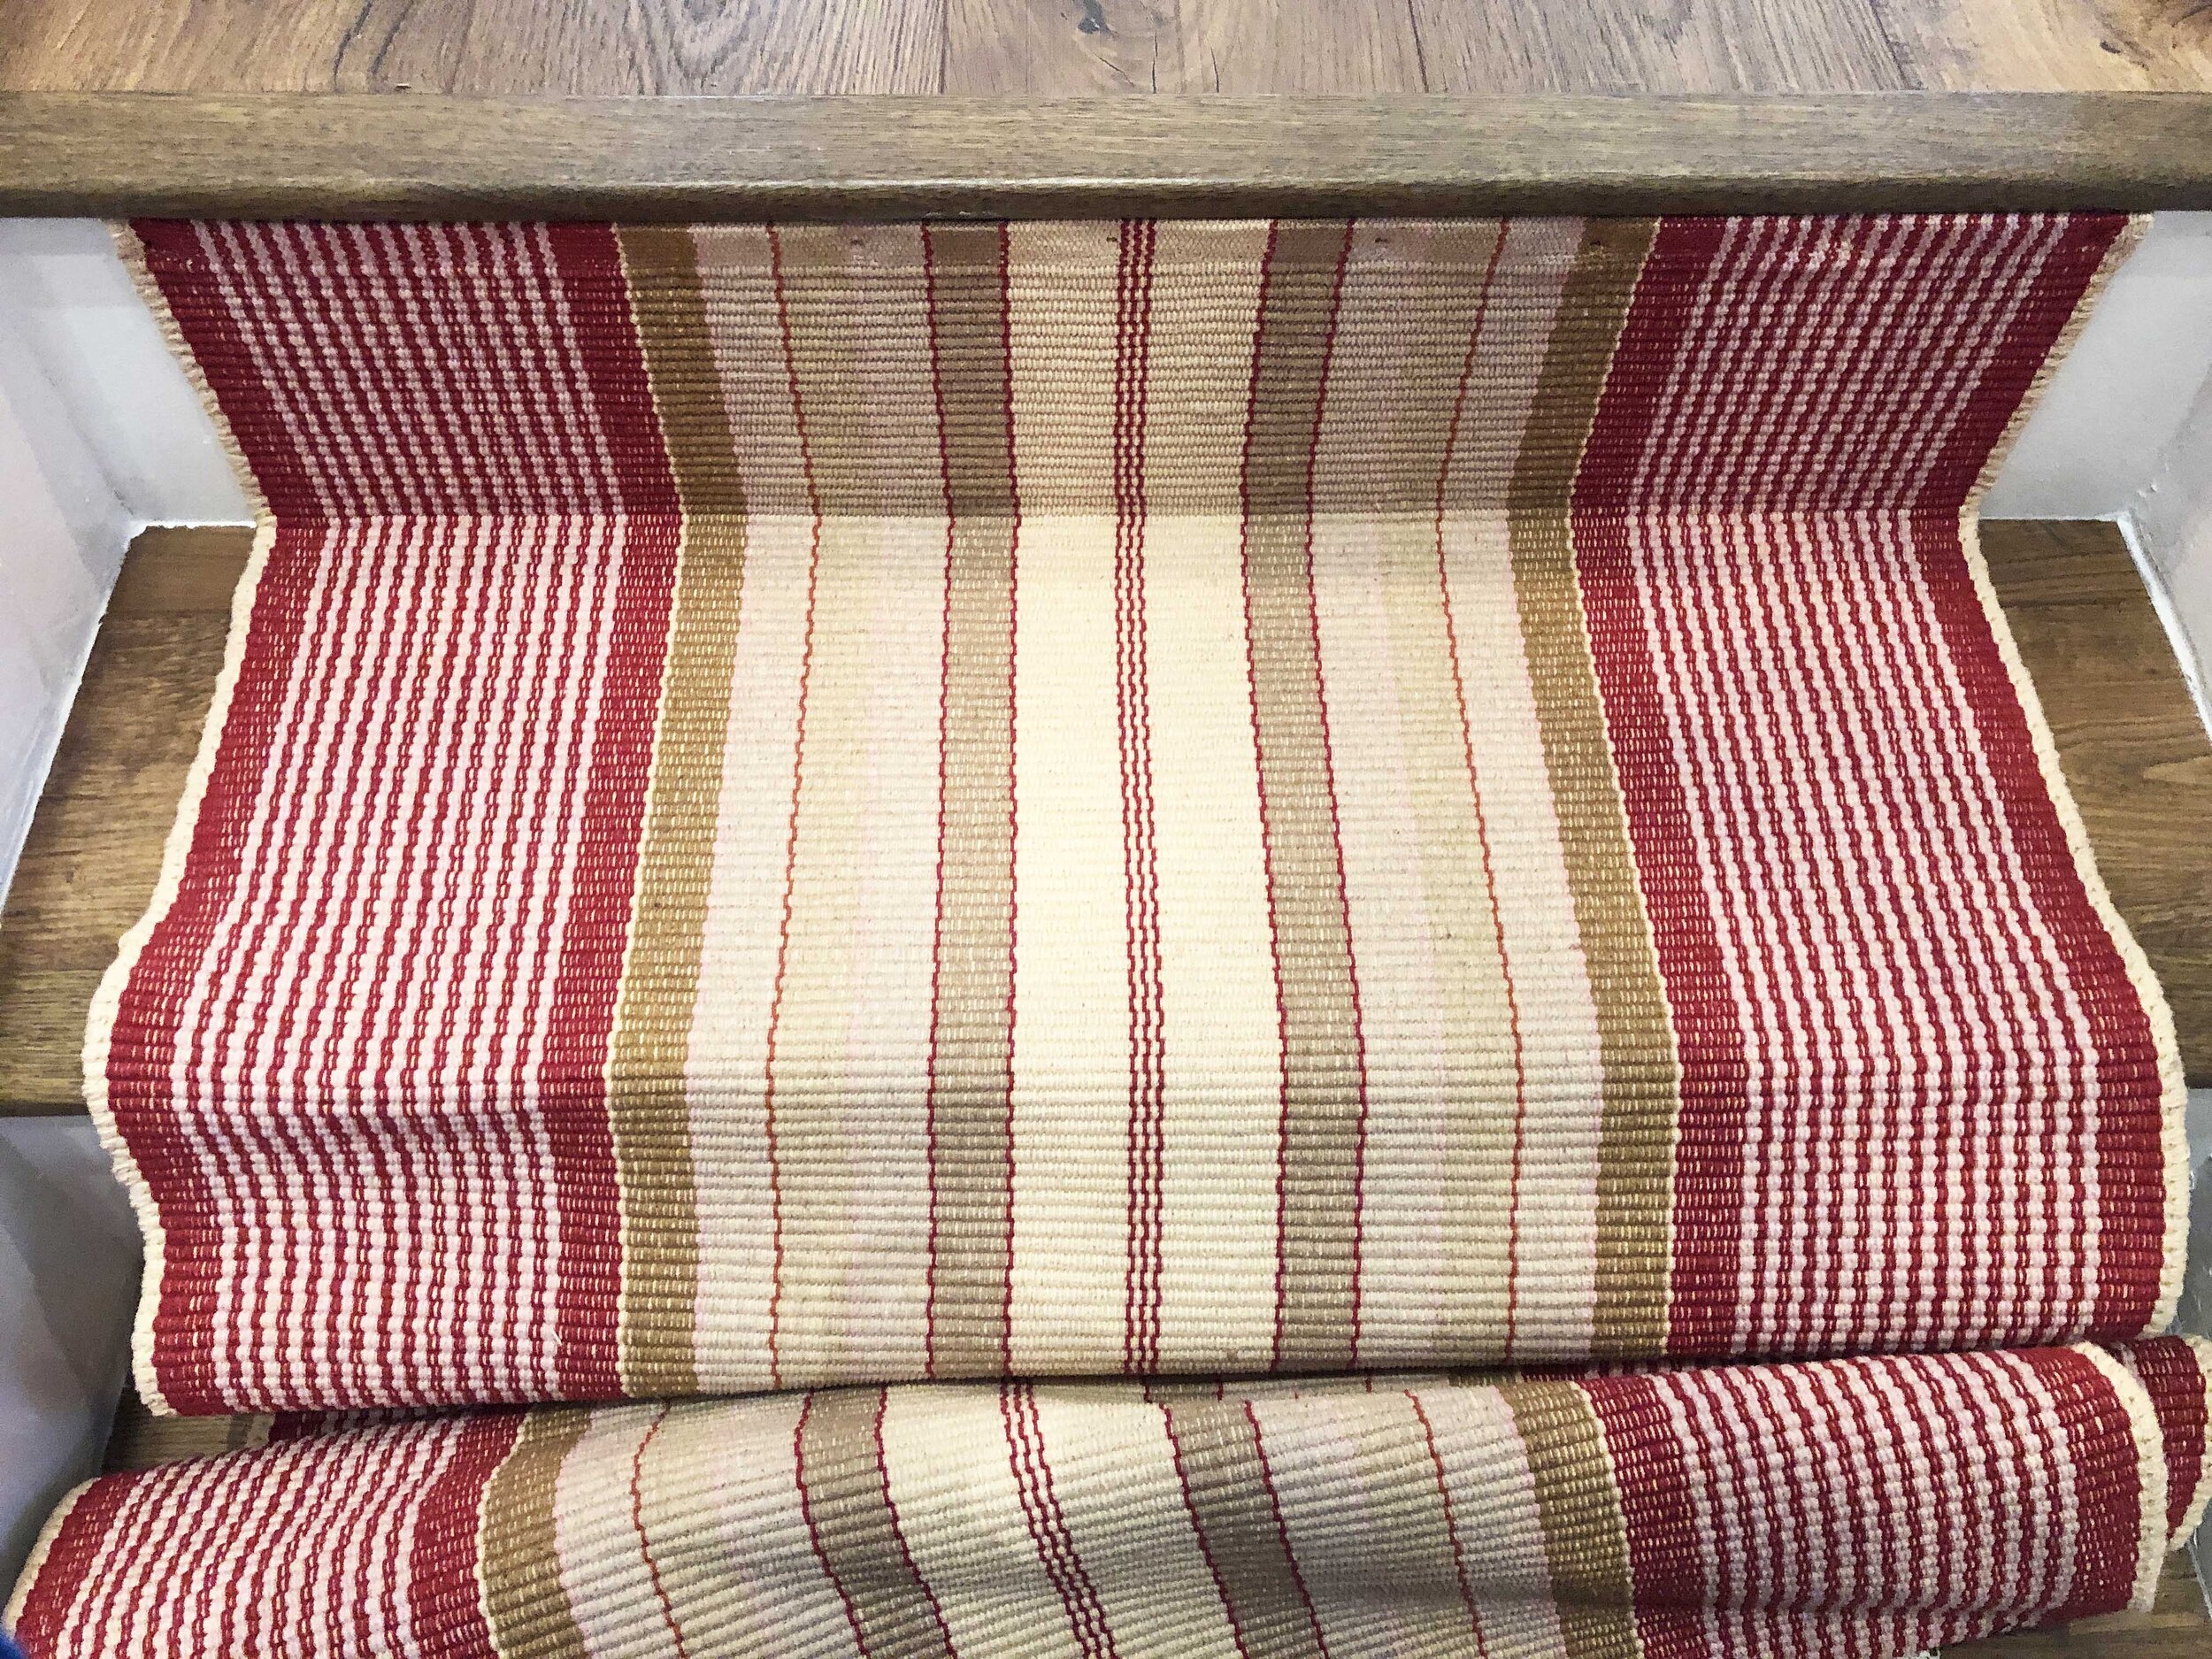
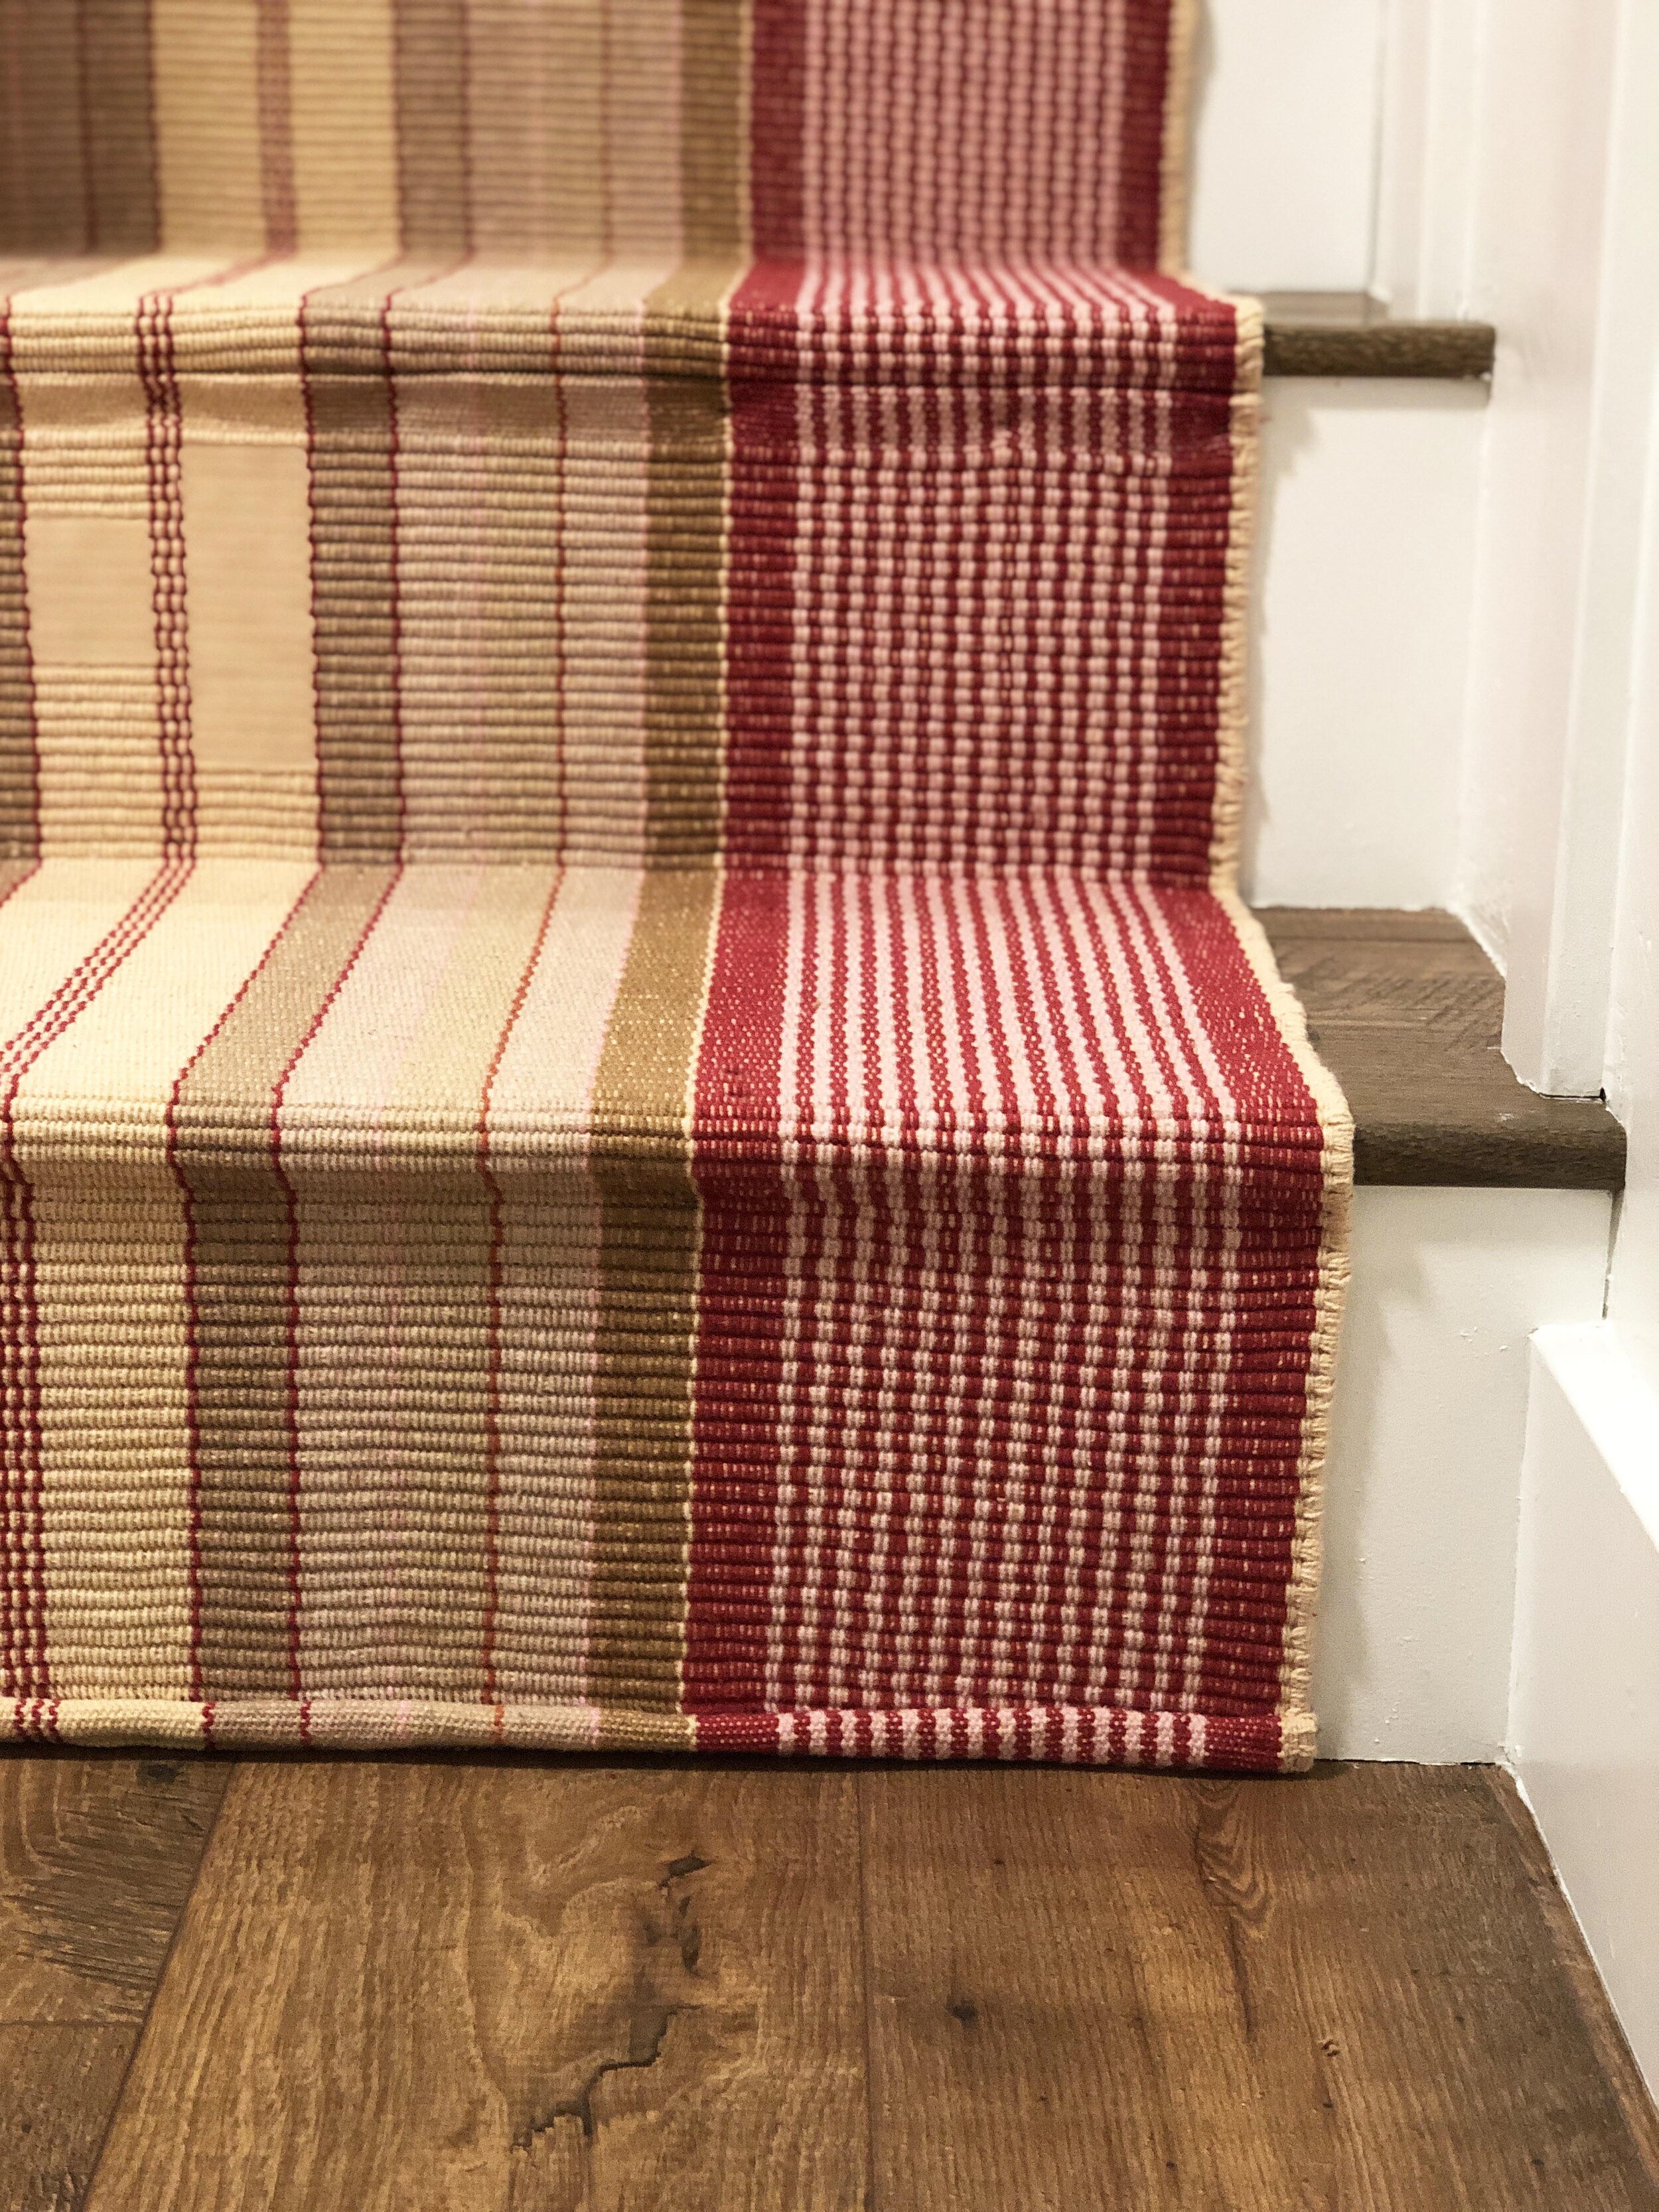
We love the stair runner options from Annie Selke. Both the old one and the new one are from them, and are a very durable 100% cotton flat weave that holds up very well to high traffic. When these rugs are not permanently attached to stairs, they are washable (I use them quite a bit in the rest of our house), but when stapled down, they are pretty easy to spot-clean. Trust me.
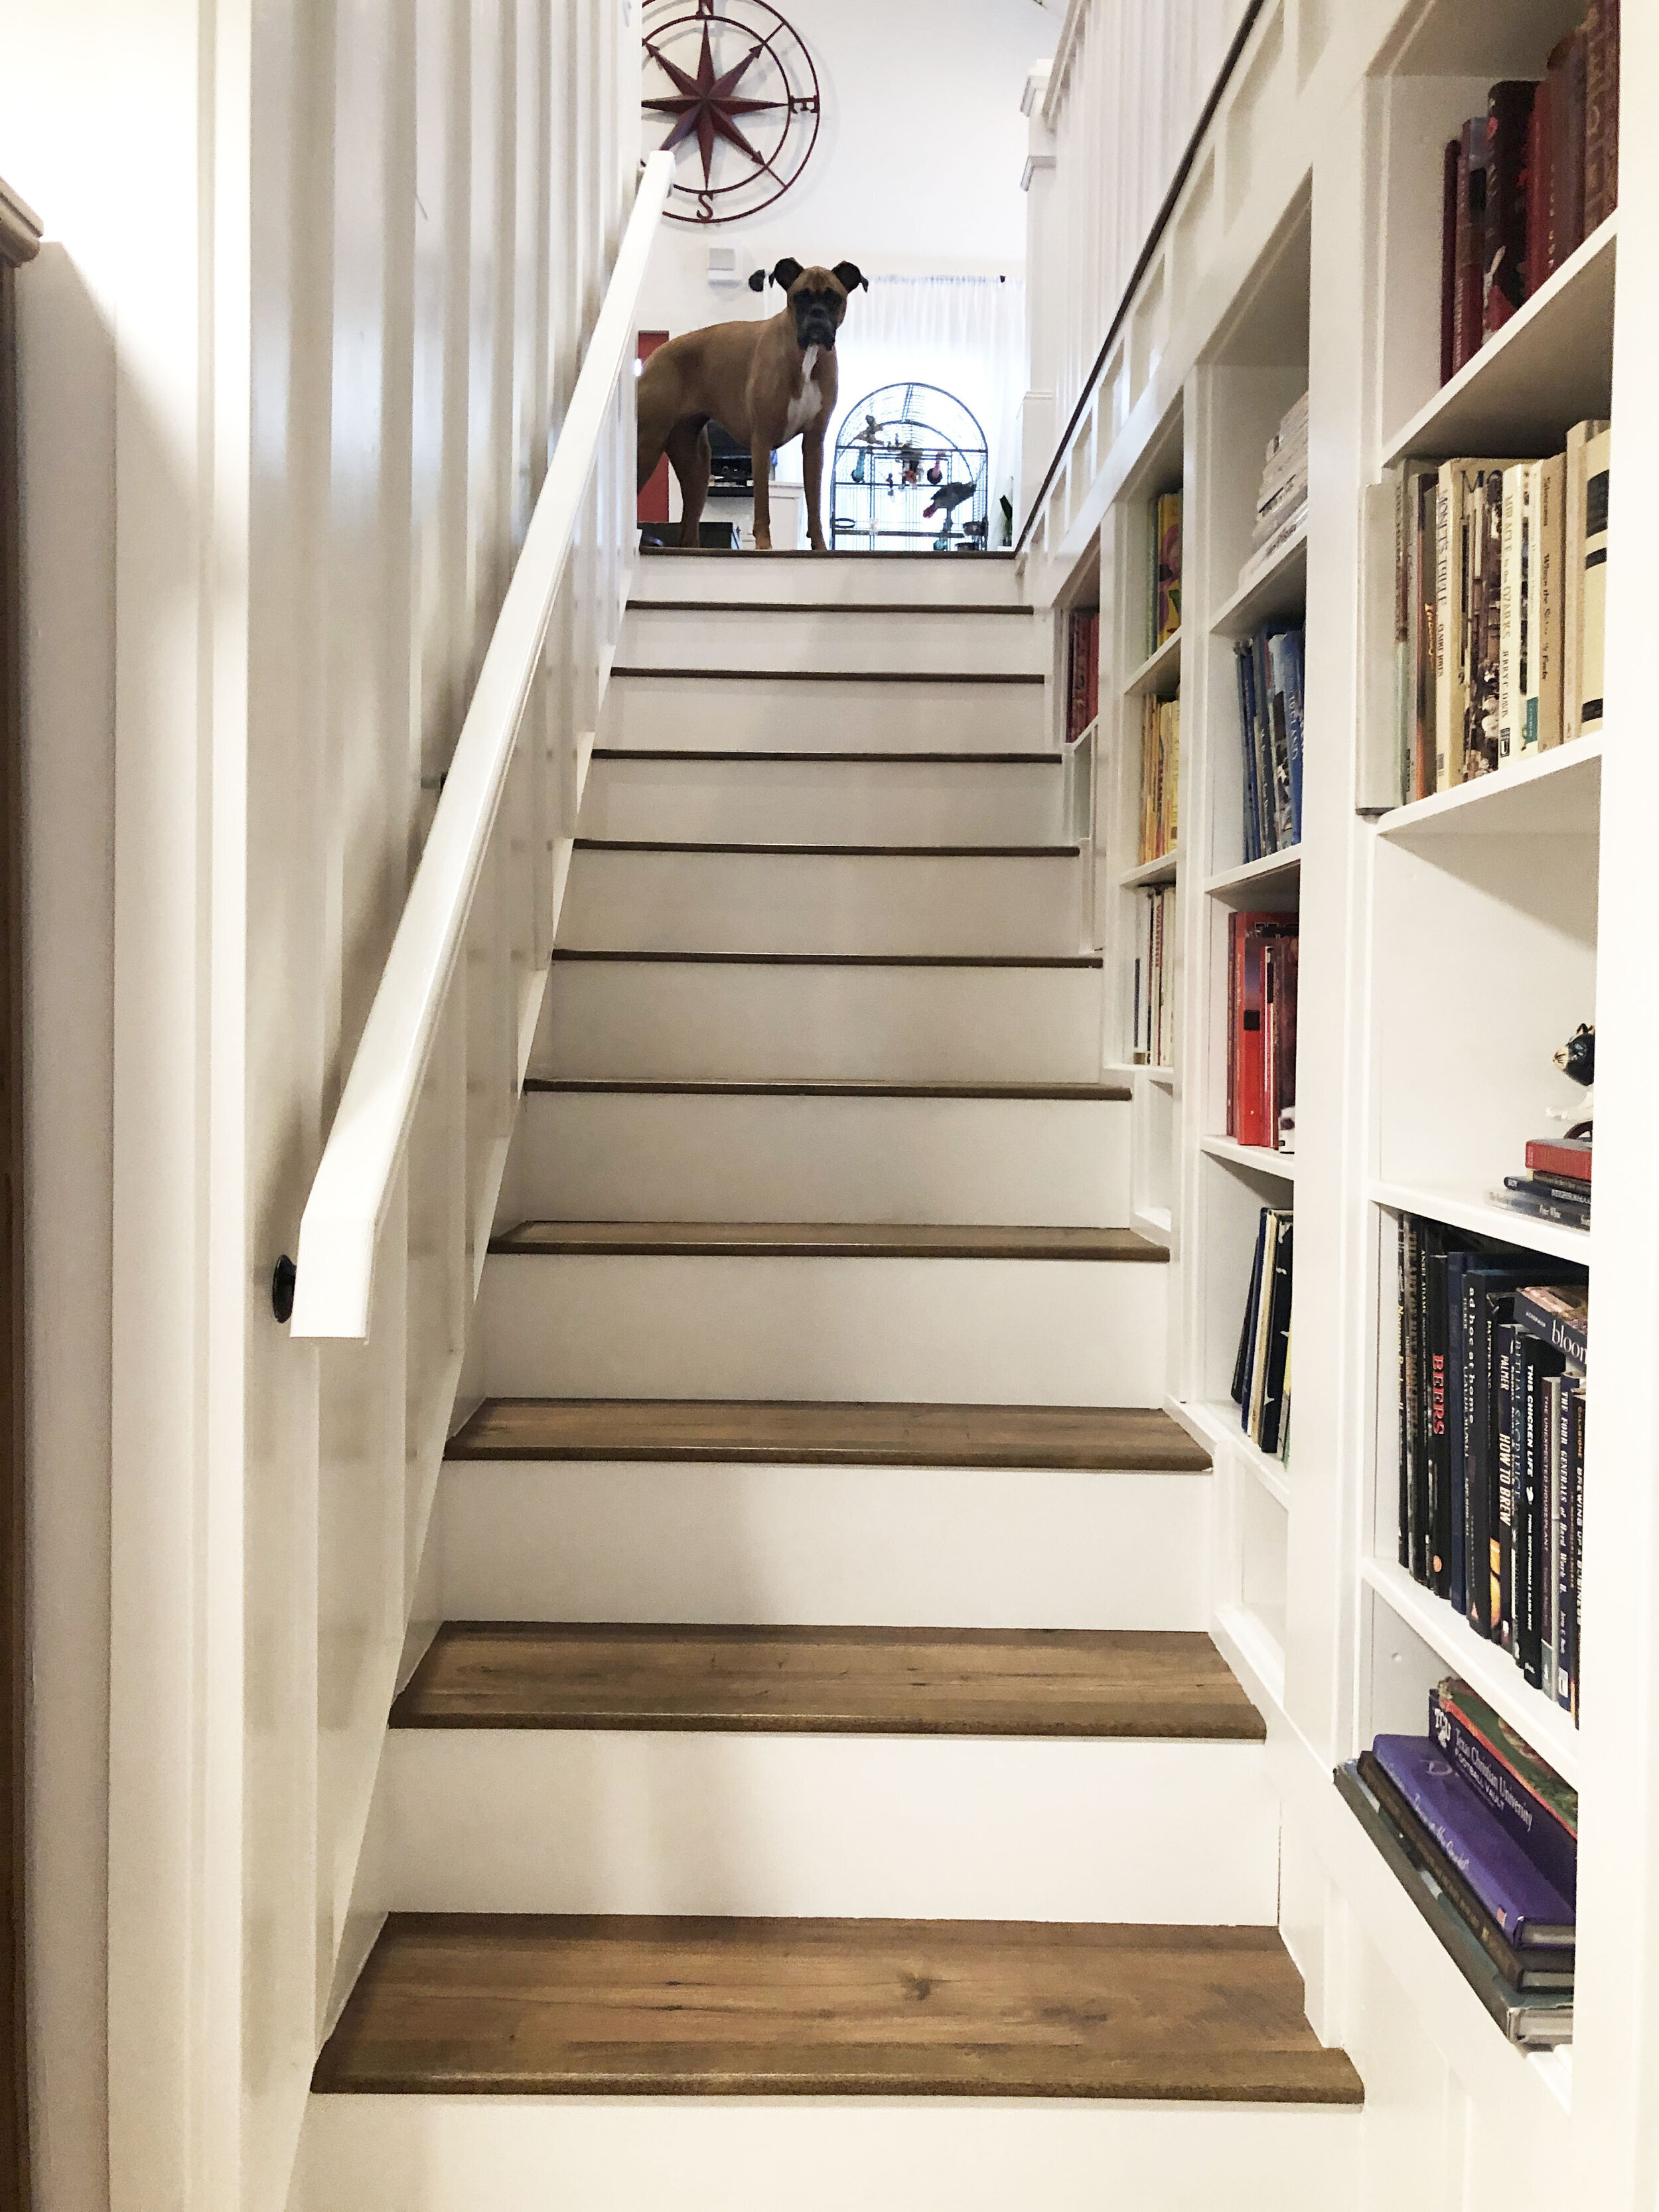
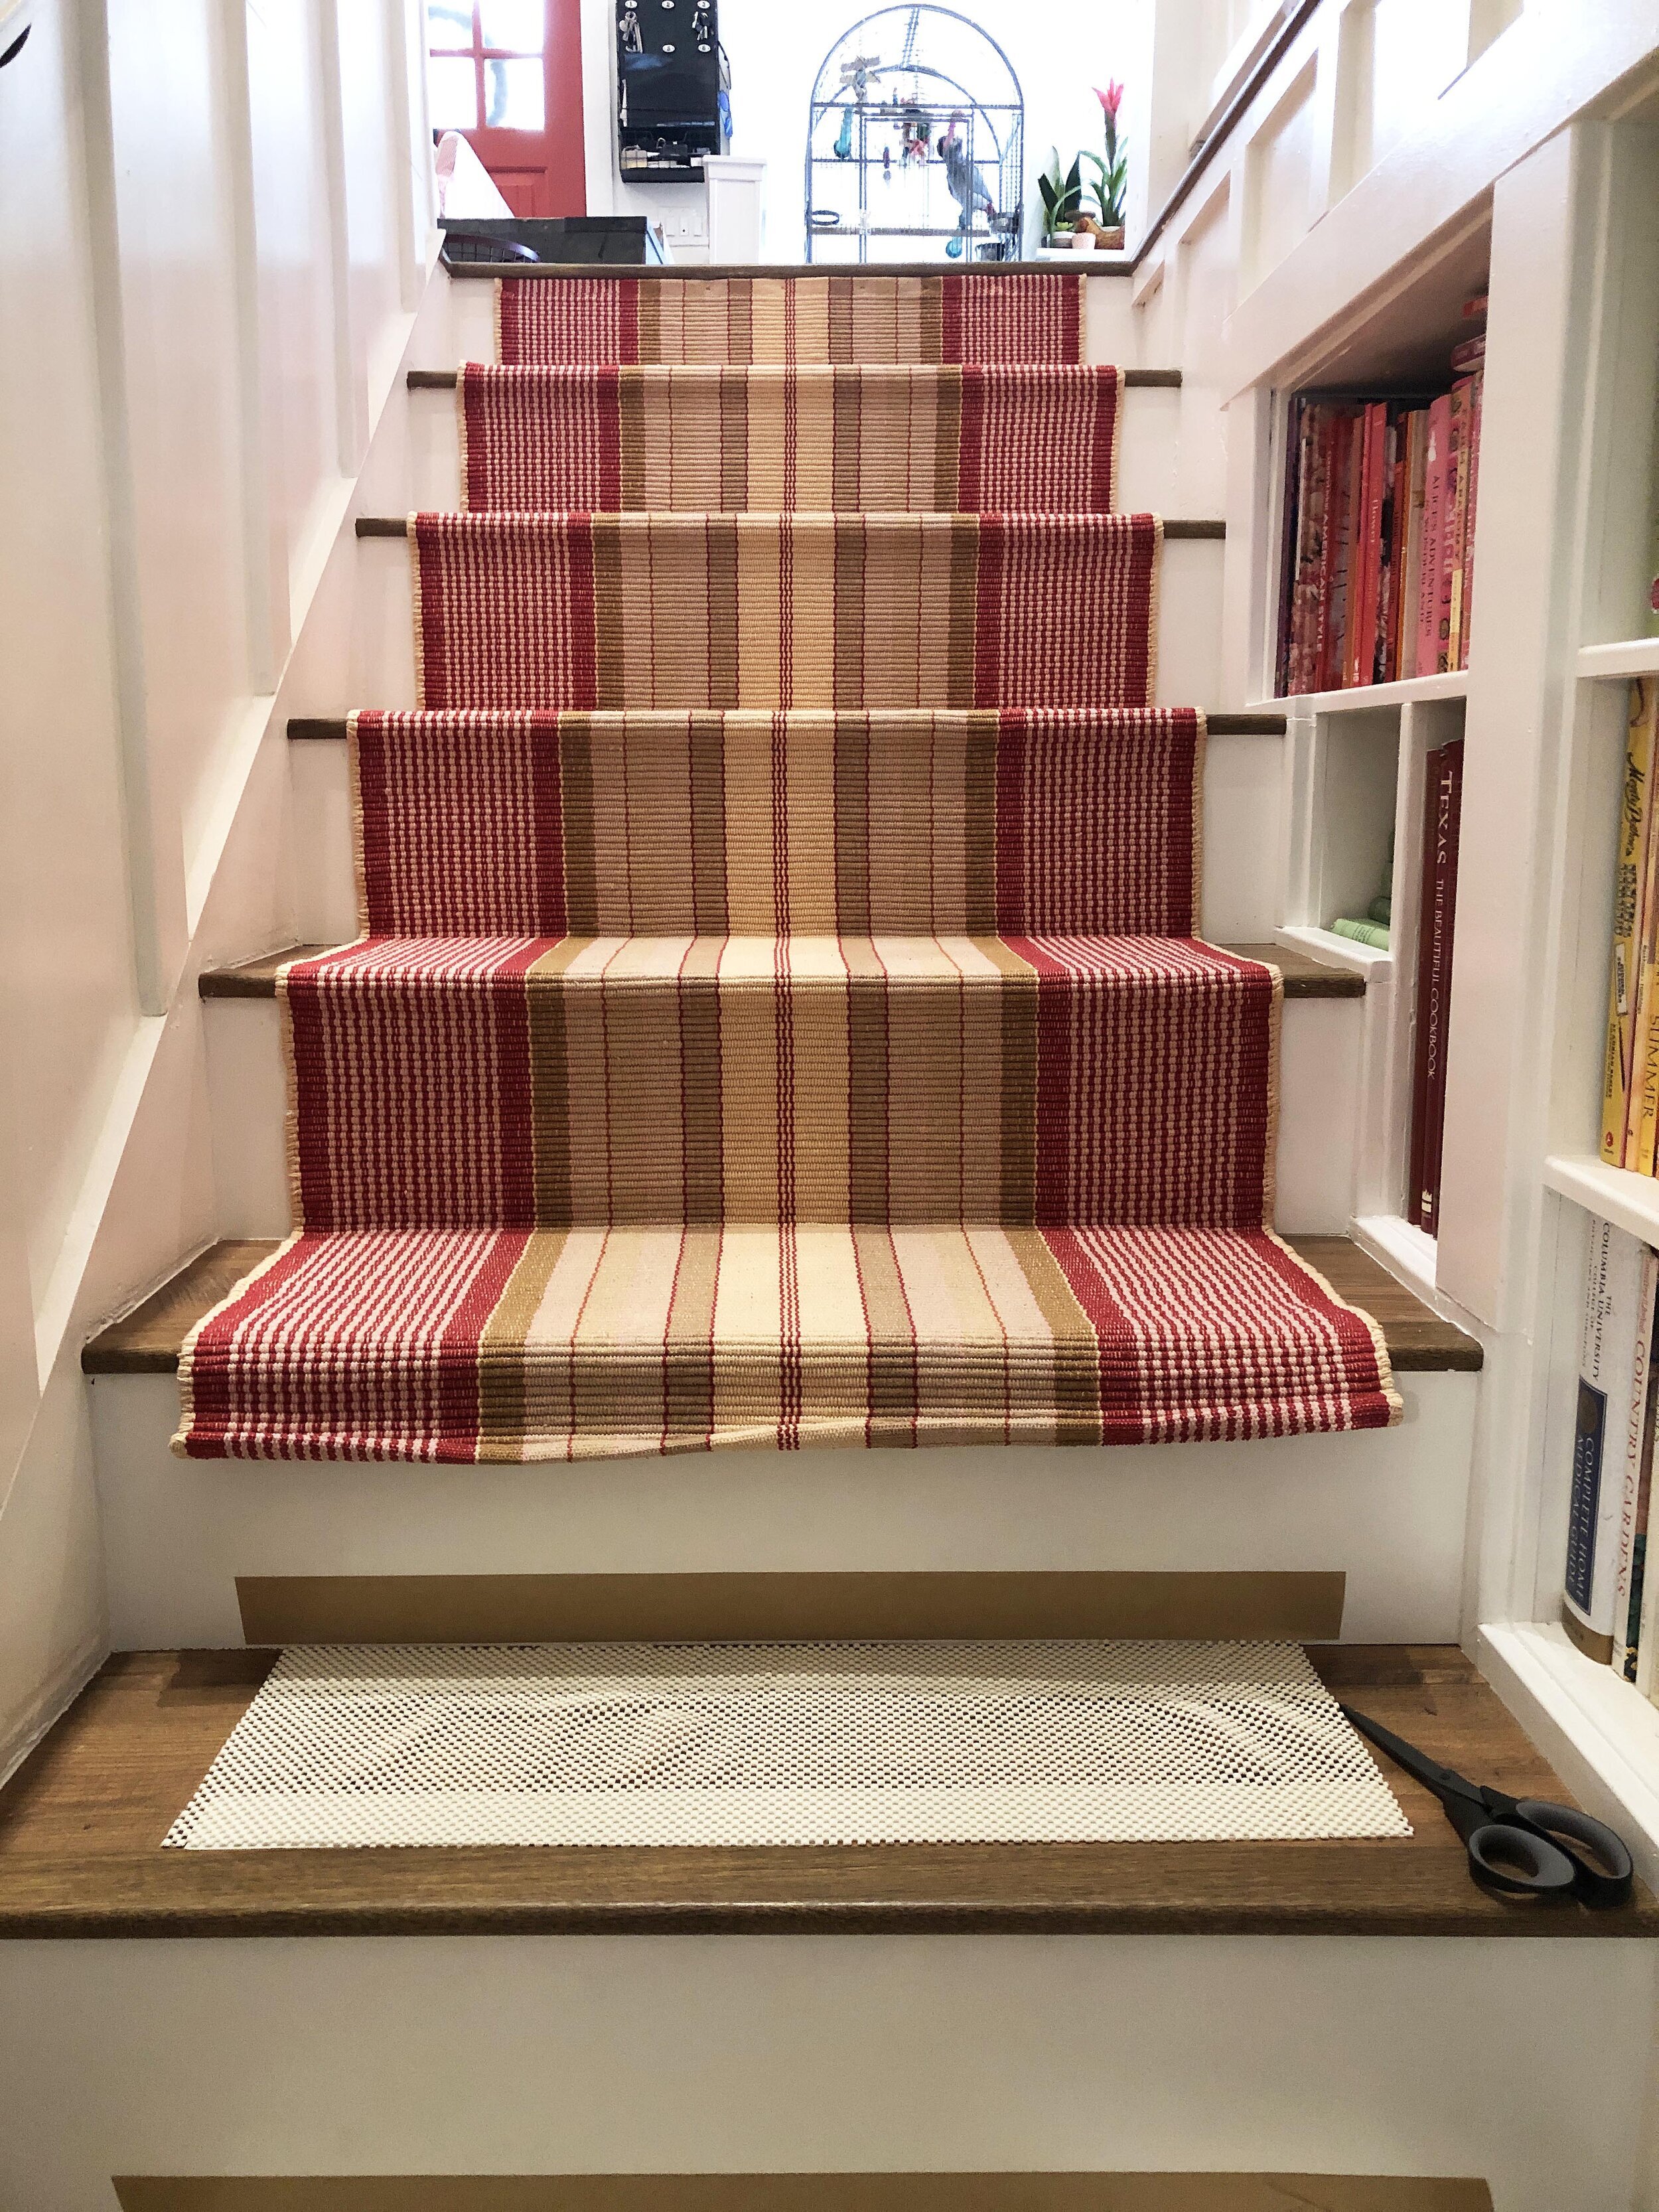
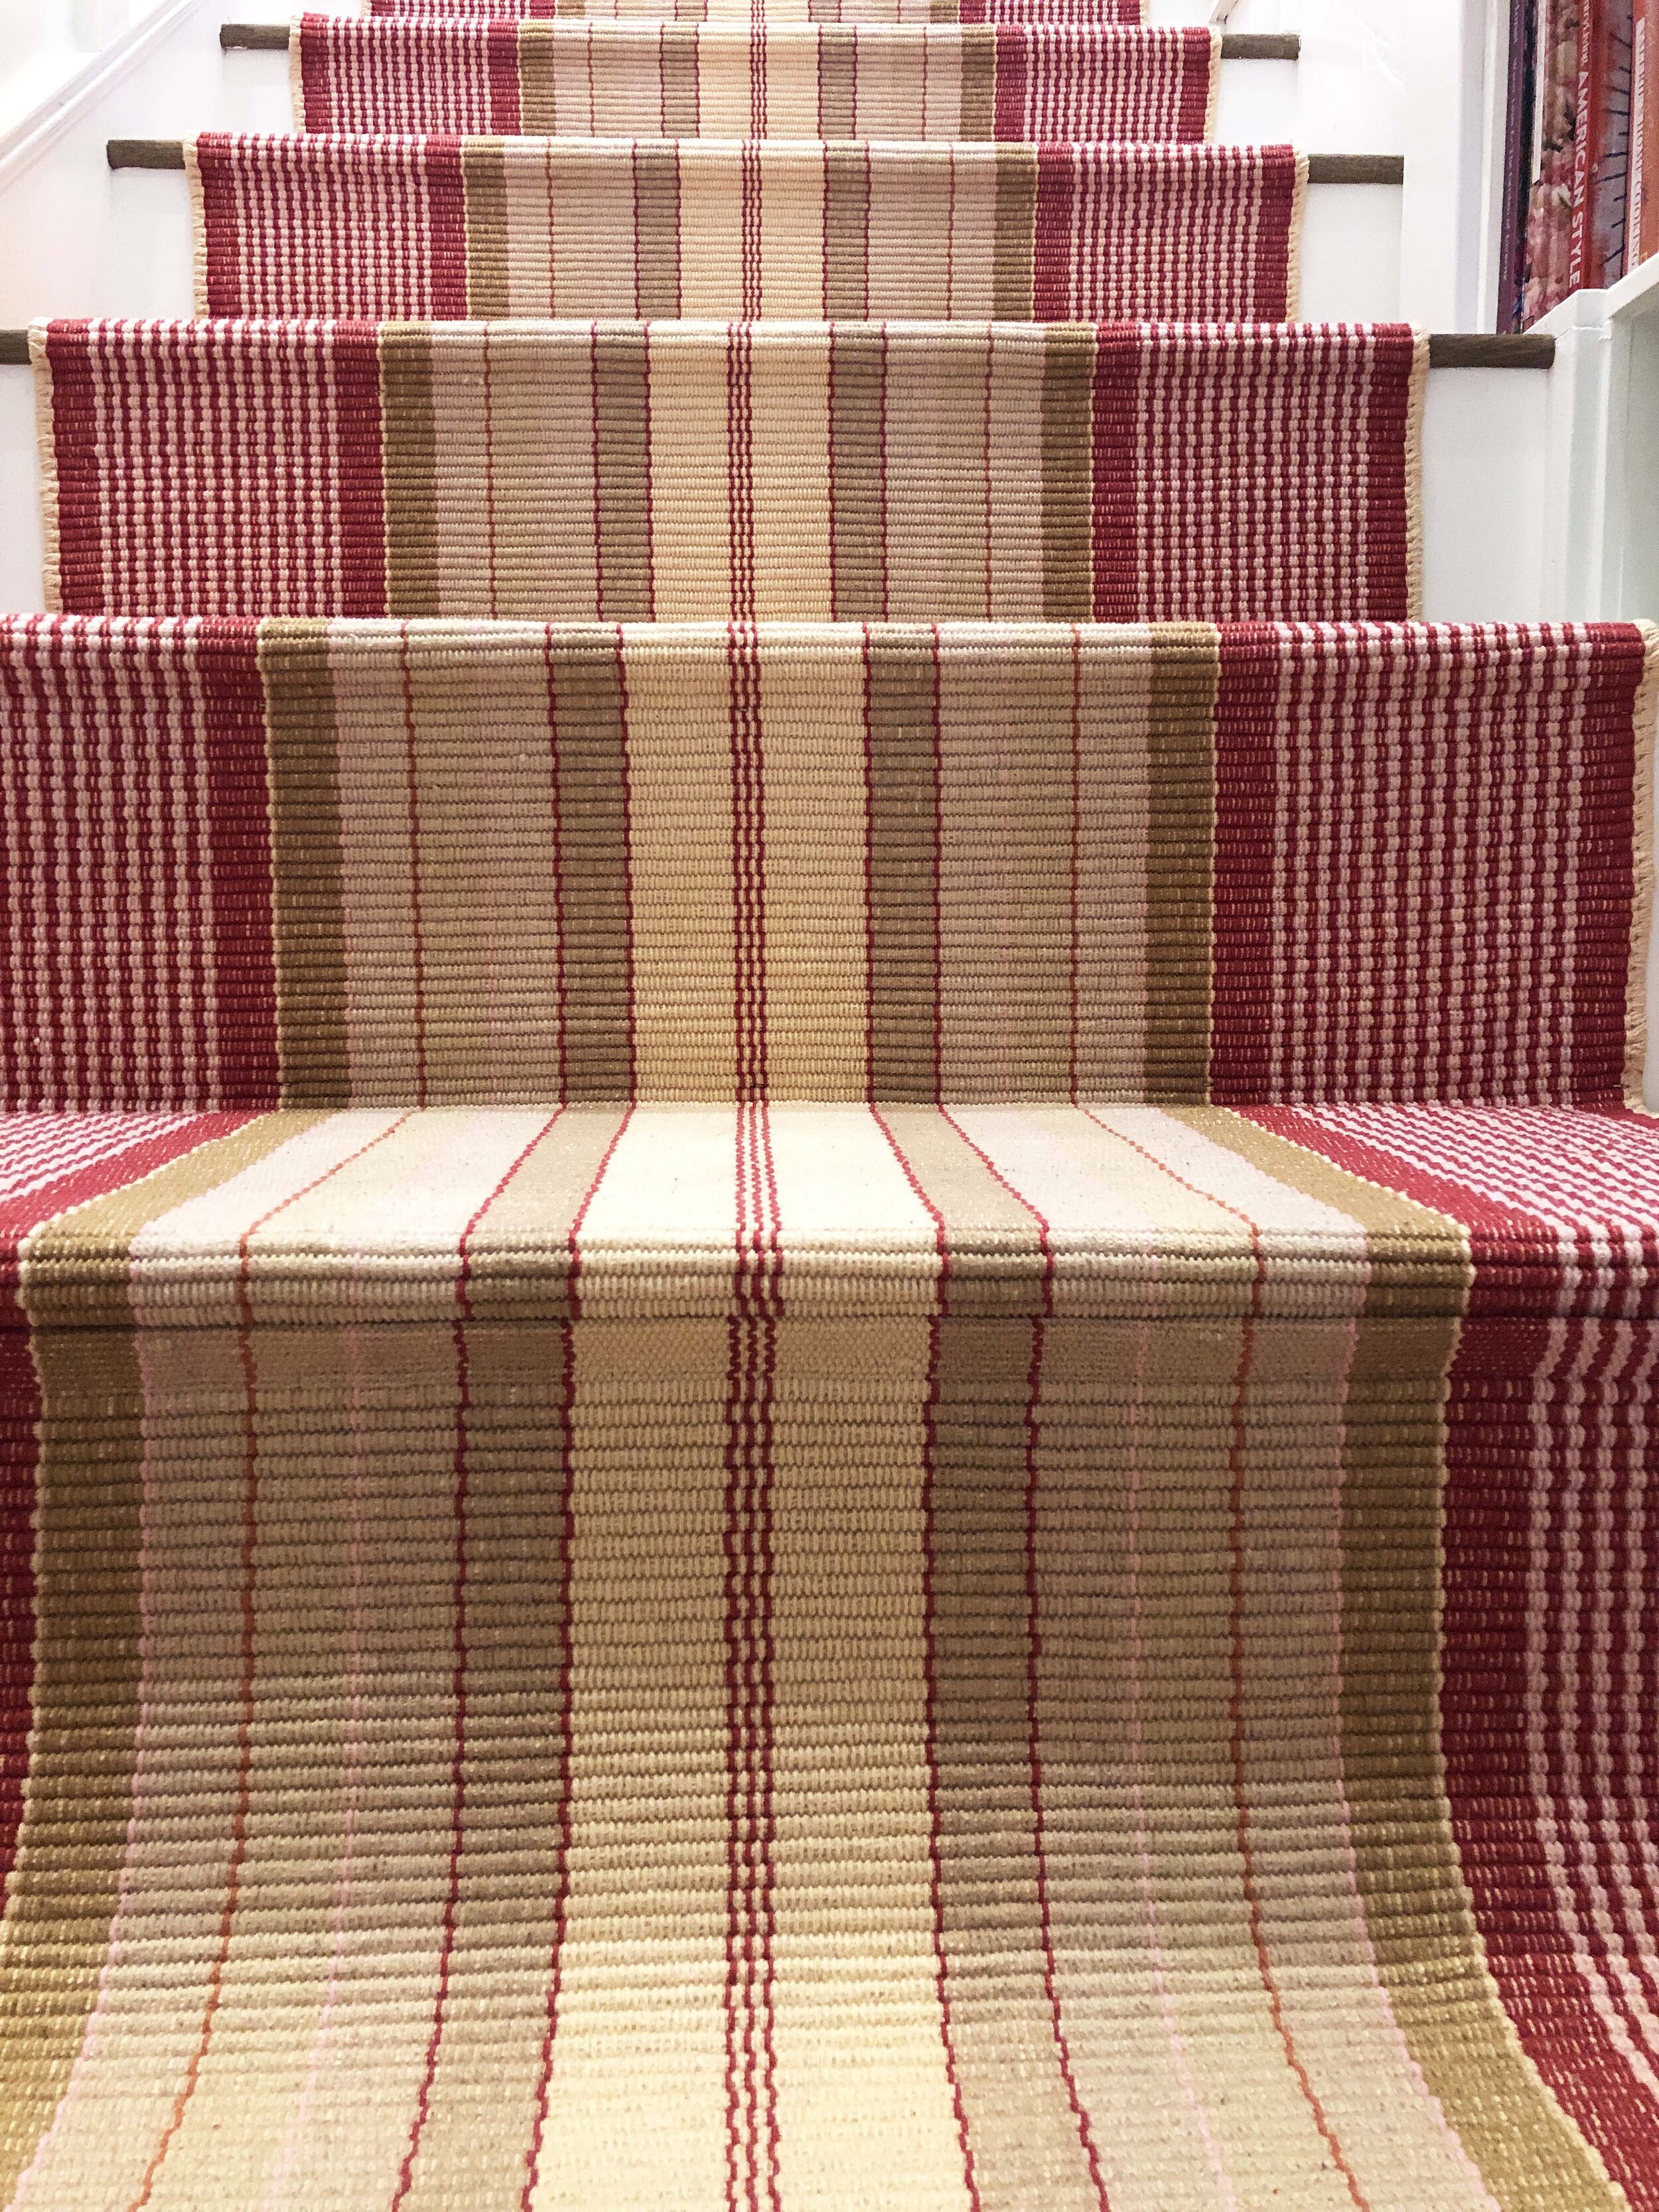
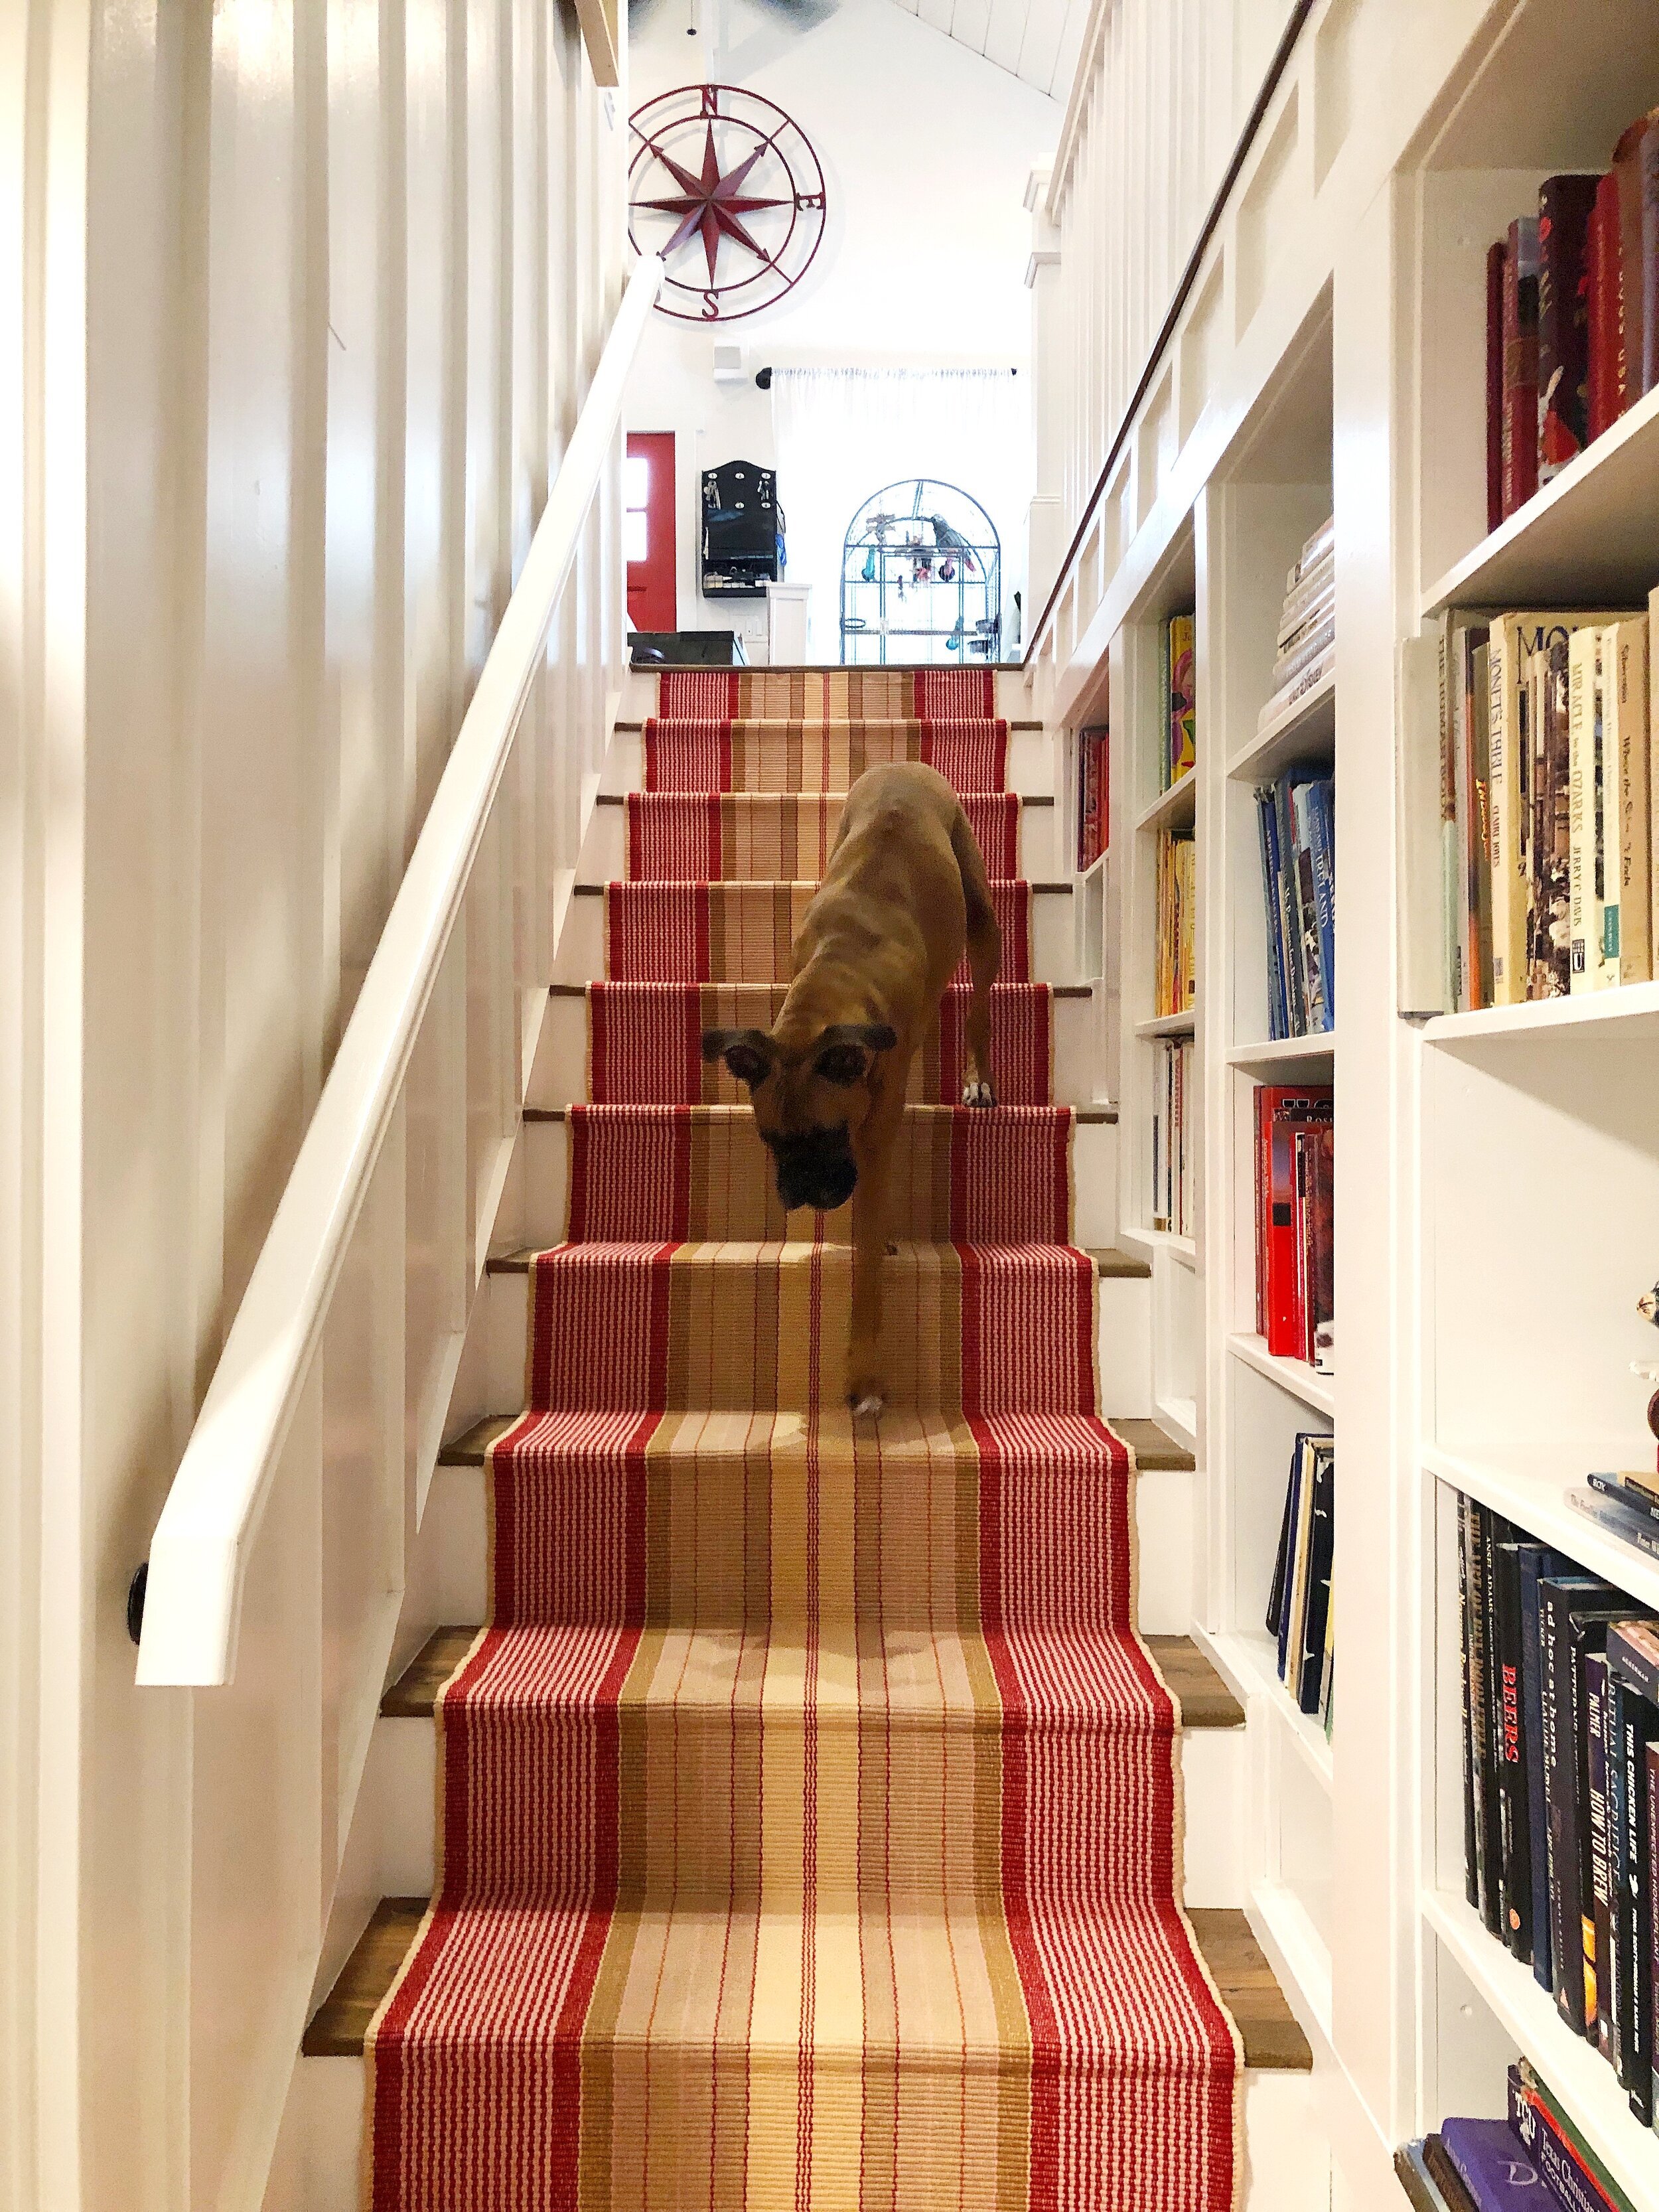
New stair runner (and you can see full-grown Gimlet, and our other cat, Gilly peeking out from the bookshelves on the right)(plus a few other creatures):

The runners come in two lengths (2.5x12’ and 2.5x8’), so you’ll have to order as many as will cover the length of your stairs. Figure the overall length of your staircase by measuring the rise (the vertical face of each stair) , plus the run (the actual part you step on), and multiply that by how many steps. Our stairs require one 8’ runner plus one 12’ runner, but unfortunately they were out of the 12’, so we wound up doing three 8 footers. It winds up being a little more leftover but eh, whuddayagunnadew?
What you’ll need for this project:
however many runners you need
an equivalent amount of runner rug pad
carpet/rug tape, 2-3 rolls (I love this kind, and also use it to hold all of our other rugs in place)
2 pairs of sharp scissors—one for cutting rugs, and one that can get gummed up cutting tape)
a pneumatic air gun
air gun staples (we used 18 gauge 1/4” narrow crown staples)
hot glue gun (with plenty of glue sticks and probably an extension cord running to it because most likely you don’t have an outlet right next to the stairs)
Step 1
Make sure your stairs are clean and free of debris………..and creatures.
Step 2
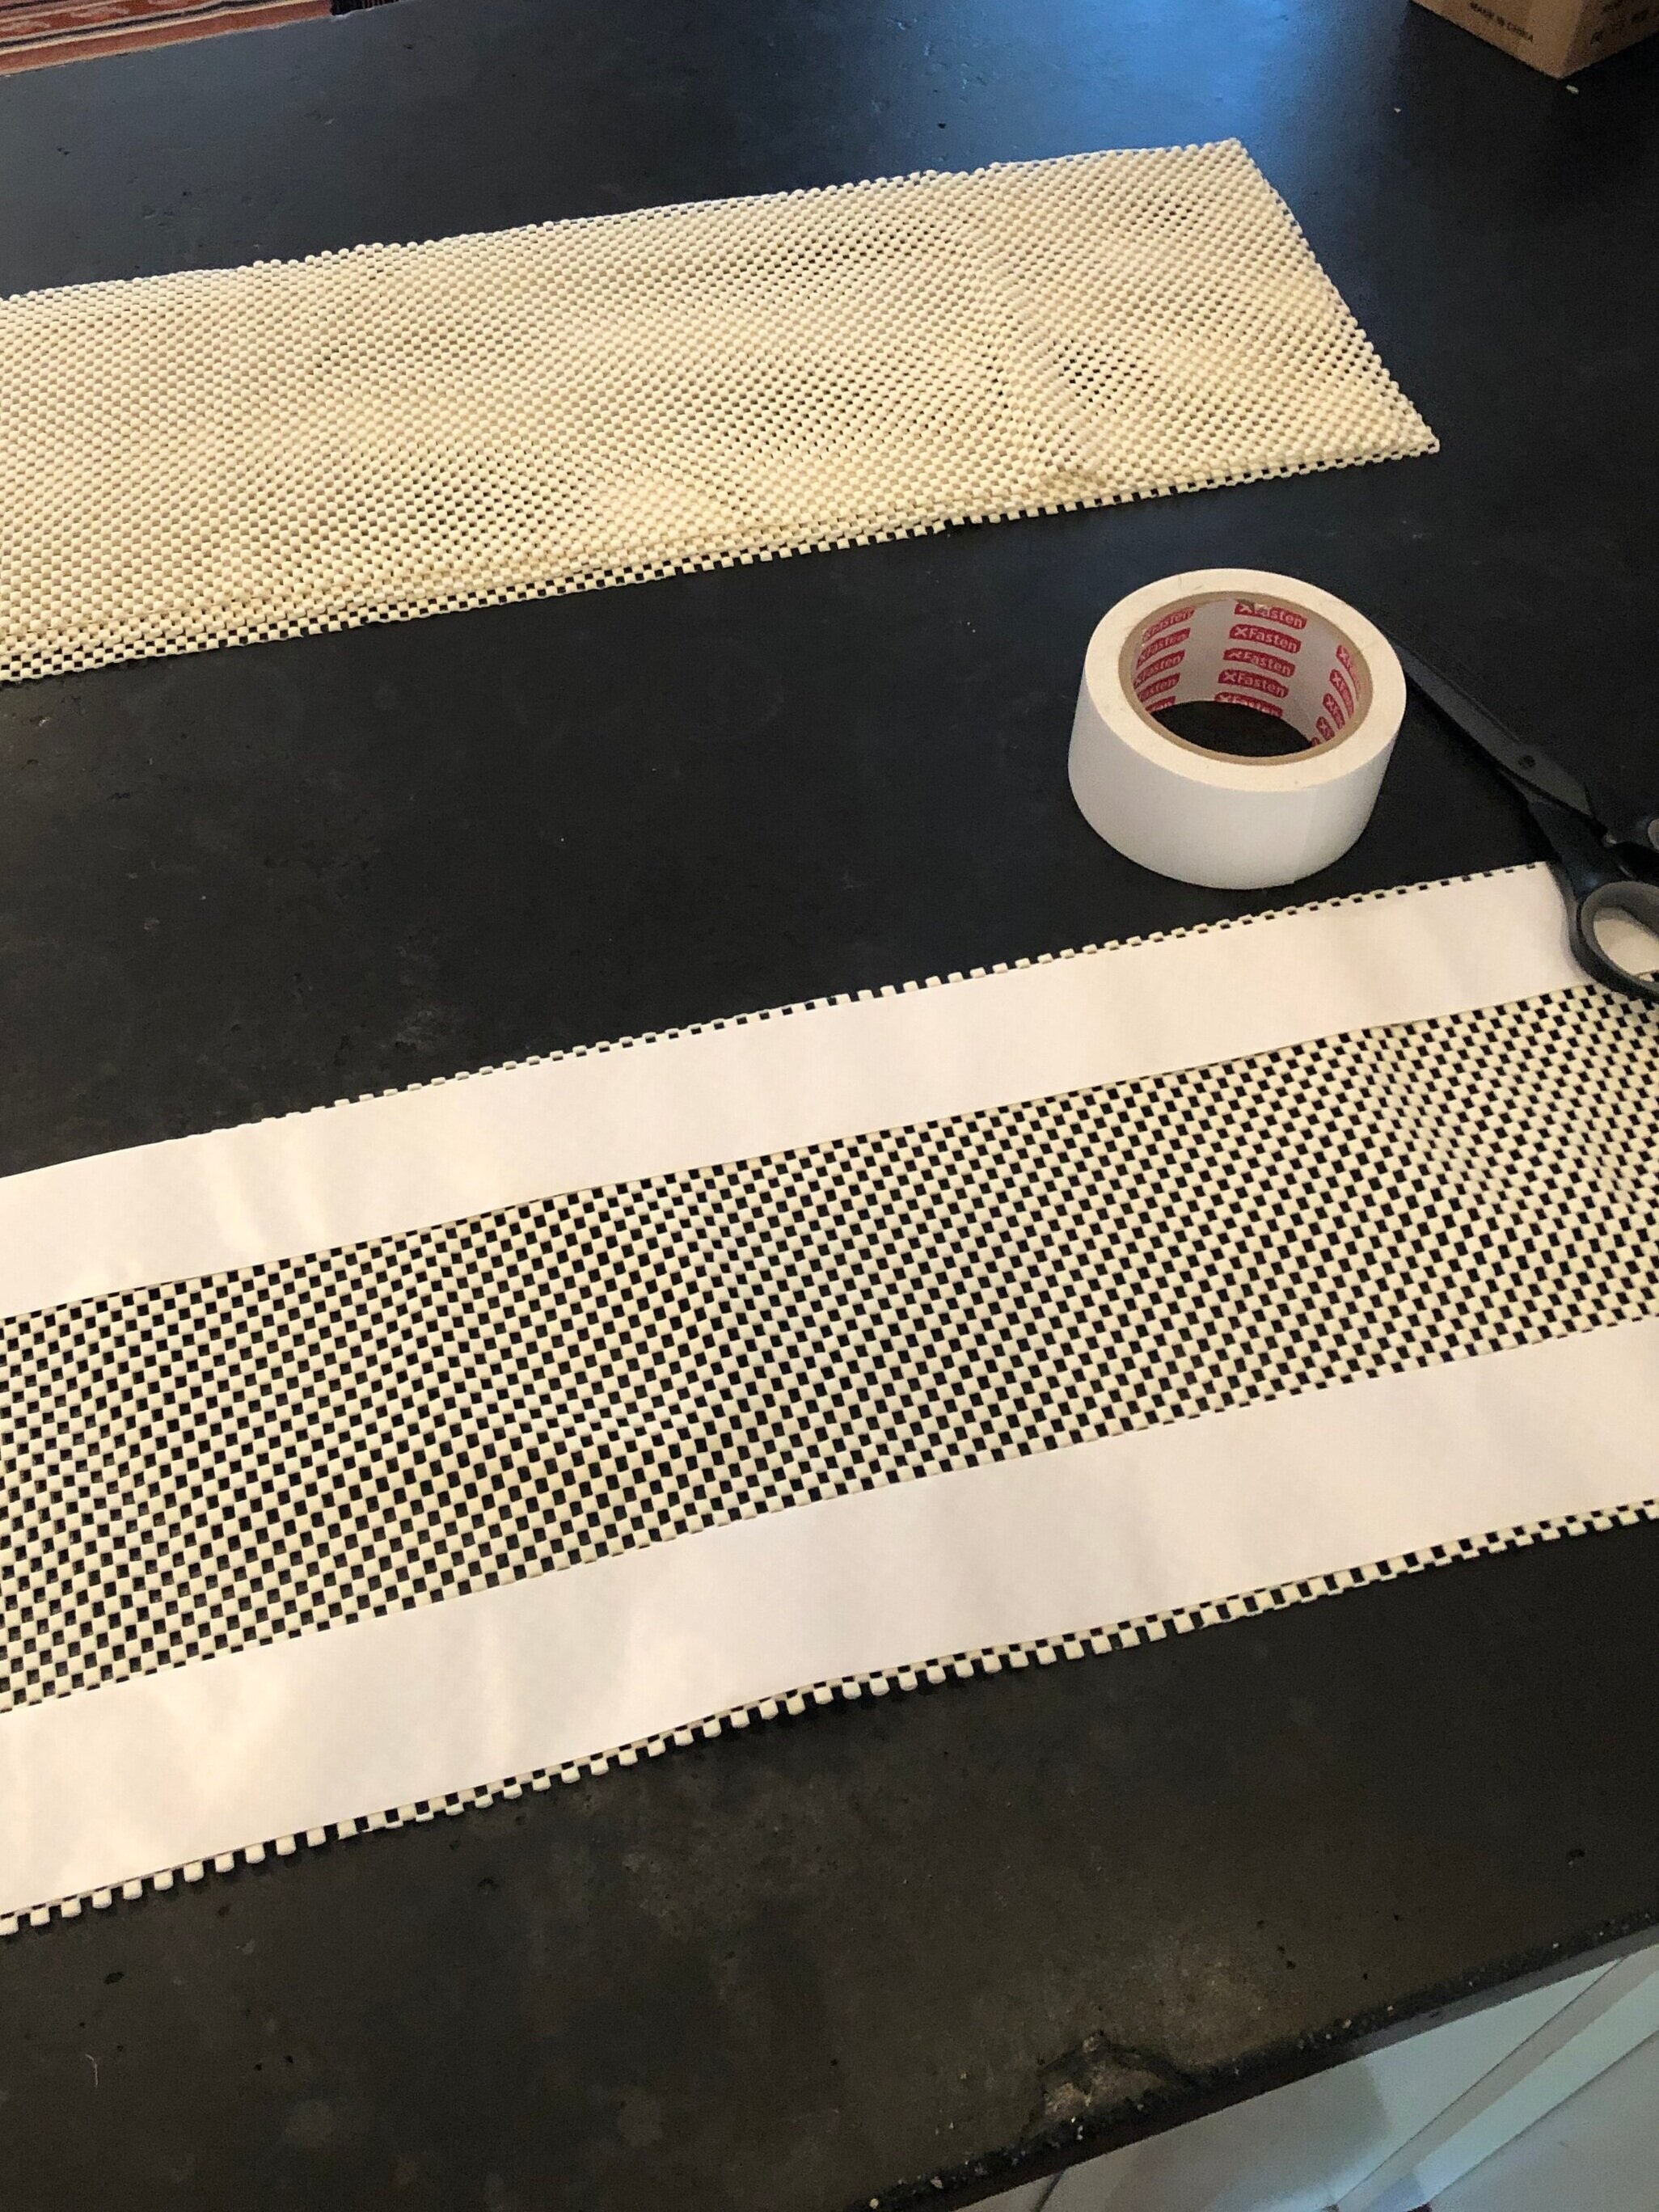
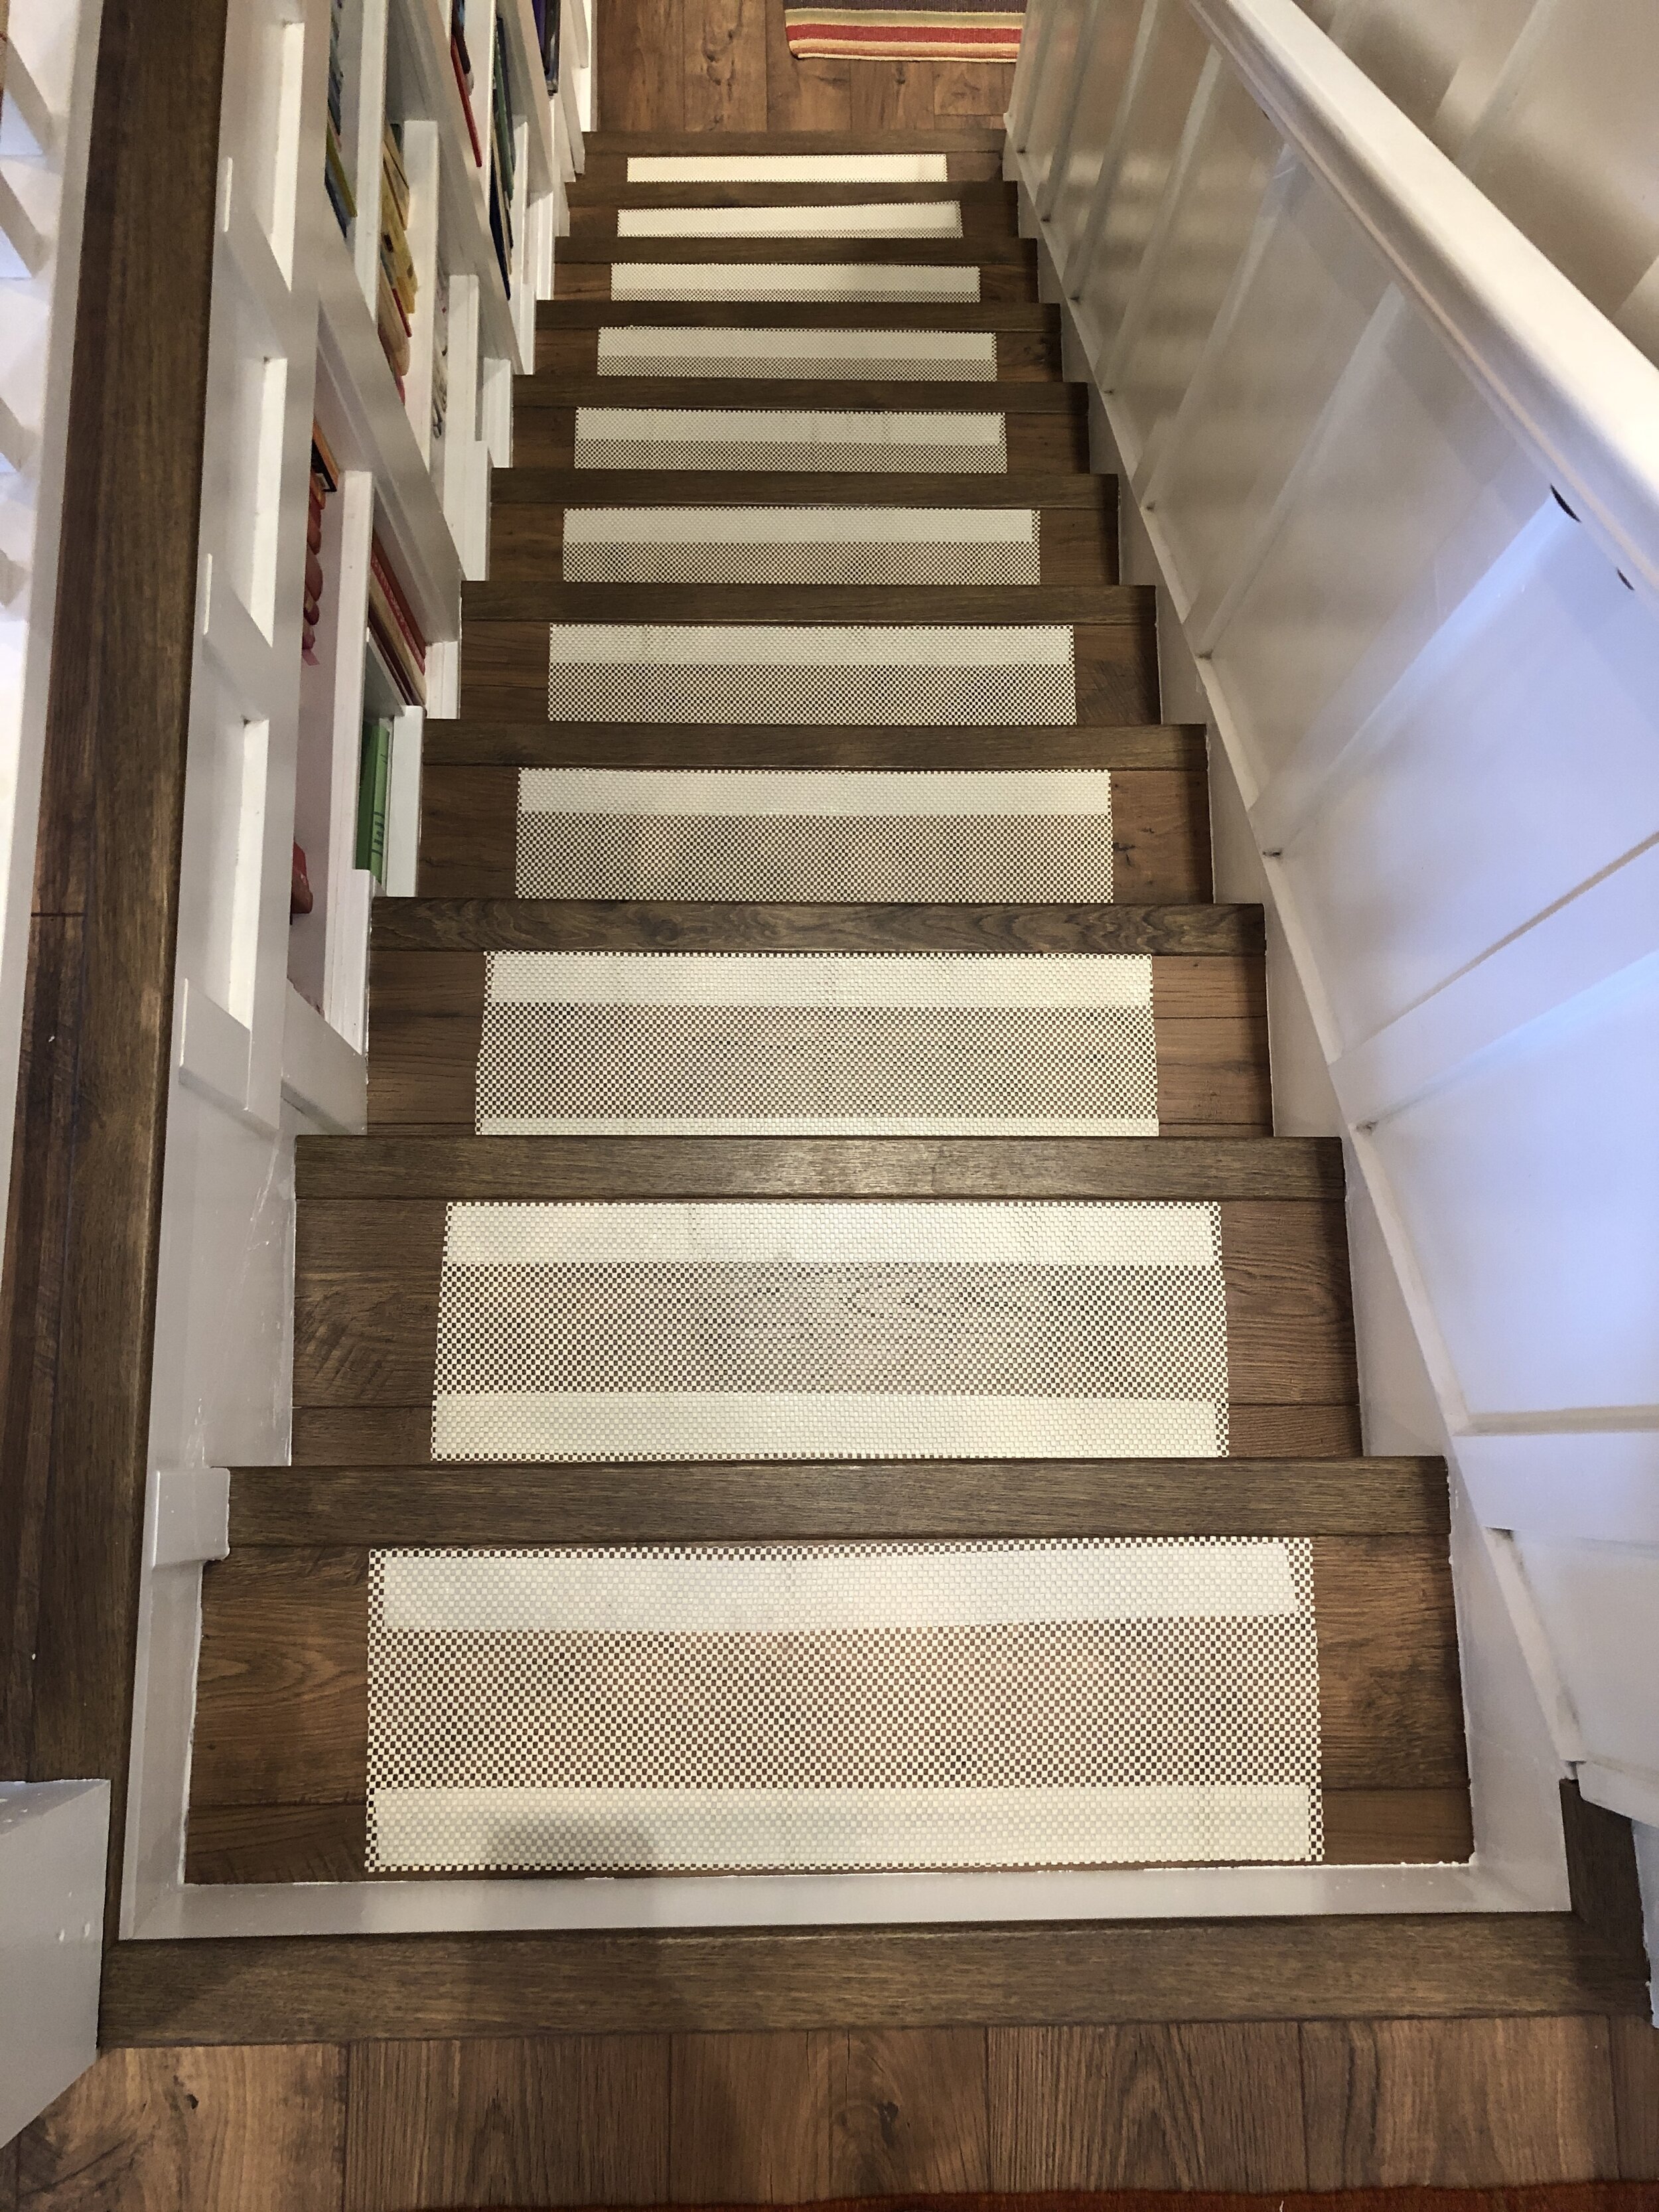
Cut your rug pad into sections that match the depth of each stair run, and are slightly less in width than the stair runner’s width. The Annie Selke runners are 2.5’ wide, so I made my rug pad sections 2’ wide and 8” deep (the depth of my stair run, less the bullnose edge).
Step 3
Next, I ran double-sided carpet tape across the front and back edges of each section of pad, leaving the tape backing in place.
Step 4
Center each pad on each stair, remove tape backing, and carefully affix each pad to each stair.
Step 5
Next, cut lengths of tape that are just 1” shy of the width of the runner; each step will require three lengths of this tape. Adhere the tape sections as follows:
One across the bullnose of each step (aka the front edge of the part of the step you step on), leaving the protective backing in place.
One across the top of the rise of the stair (aka the front face), just under the bullnose. Leave tape backing in place.
One across the bottom edge of the rise, just above the run. Leave tape backing in place.
I neglected to take a photo of this, so here is a super sloppy drawing which will probably be more confusing than helpful—the tape is represented by the orange rectangles:

Step 6
We’re gonna attach the top edge of the rug and work our way down. Remove the backing from the top most piece of tape (top of the rise, under the bullnose of the very top edge of the stairs), and carefully line up the edge of the rug with the tape and press firmly into place. Then remove the backing from the second piece of tape (bottom of rise), smooth the rug down and press into place.
Step 7
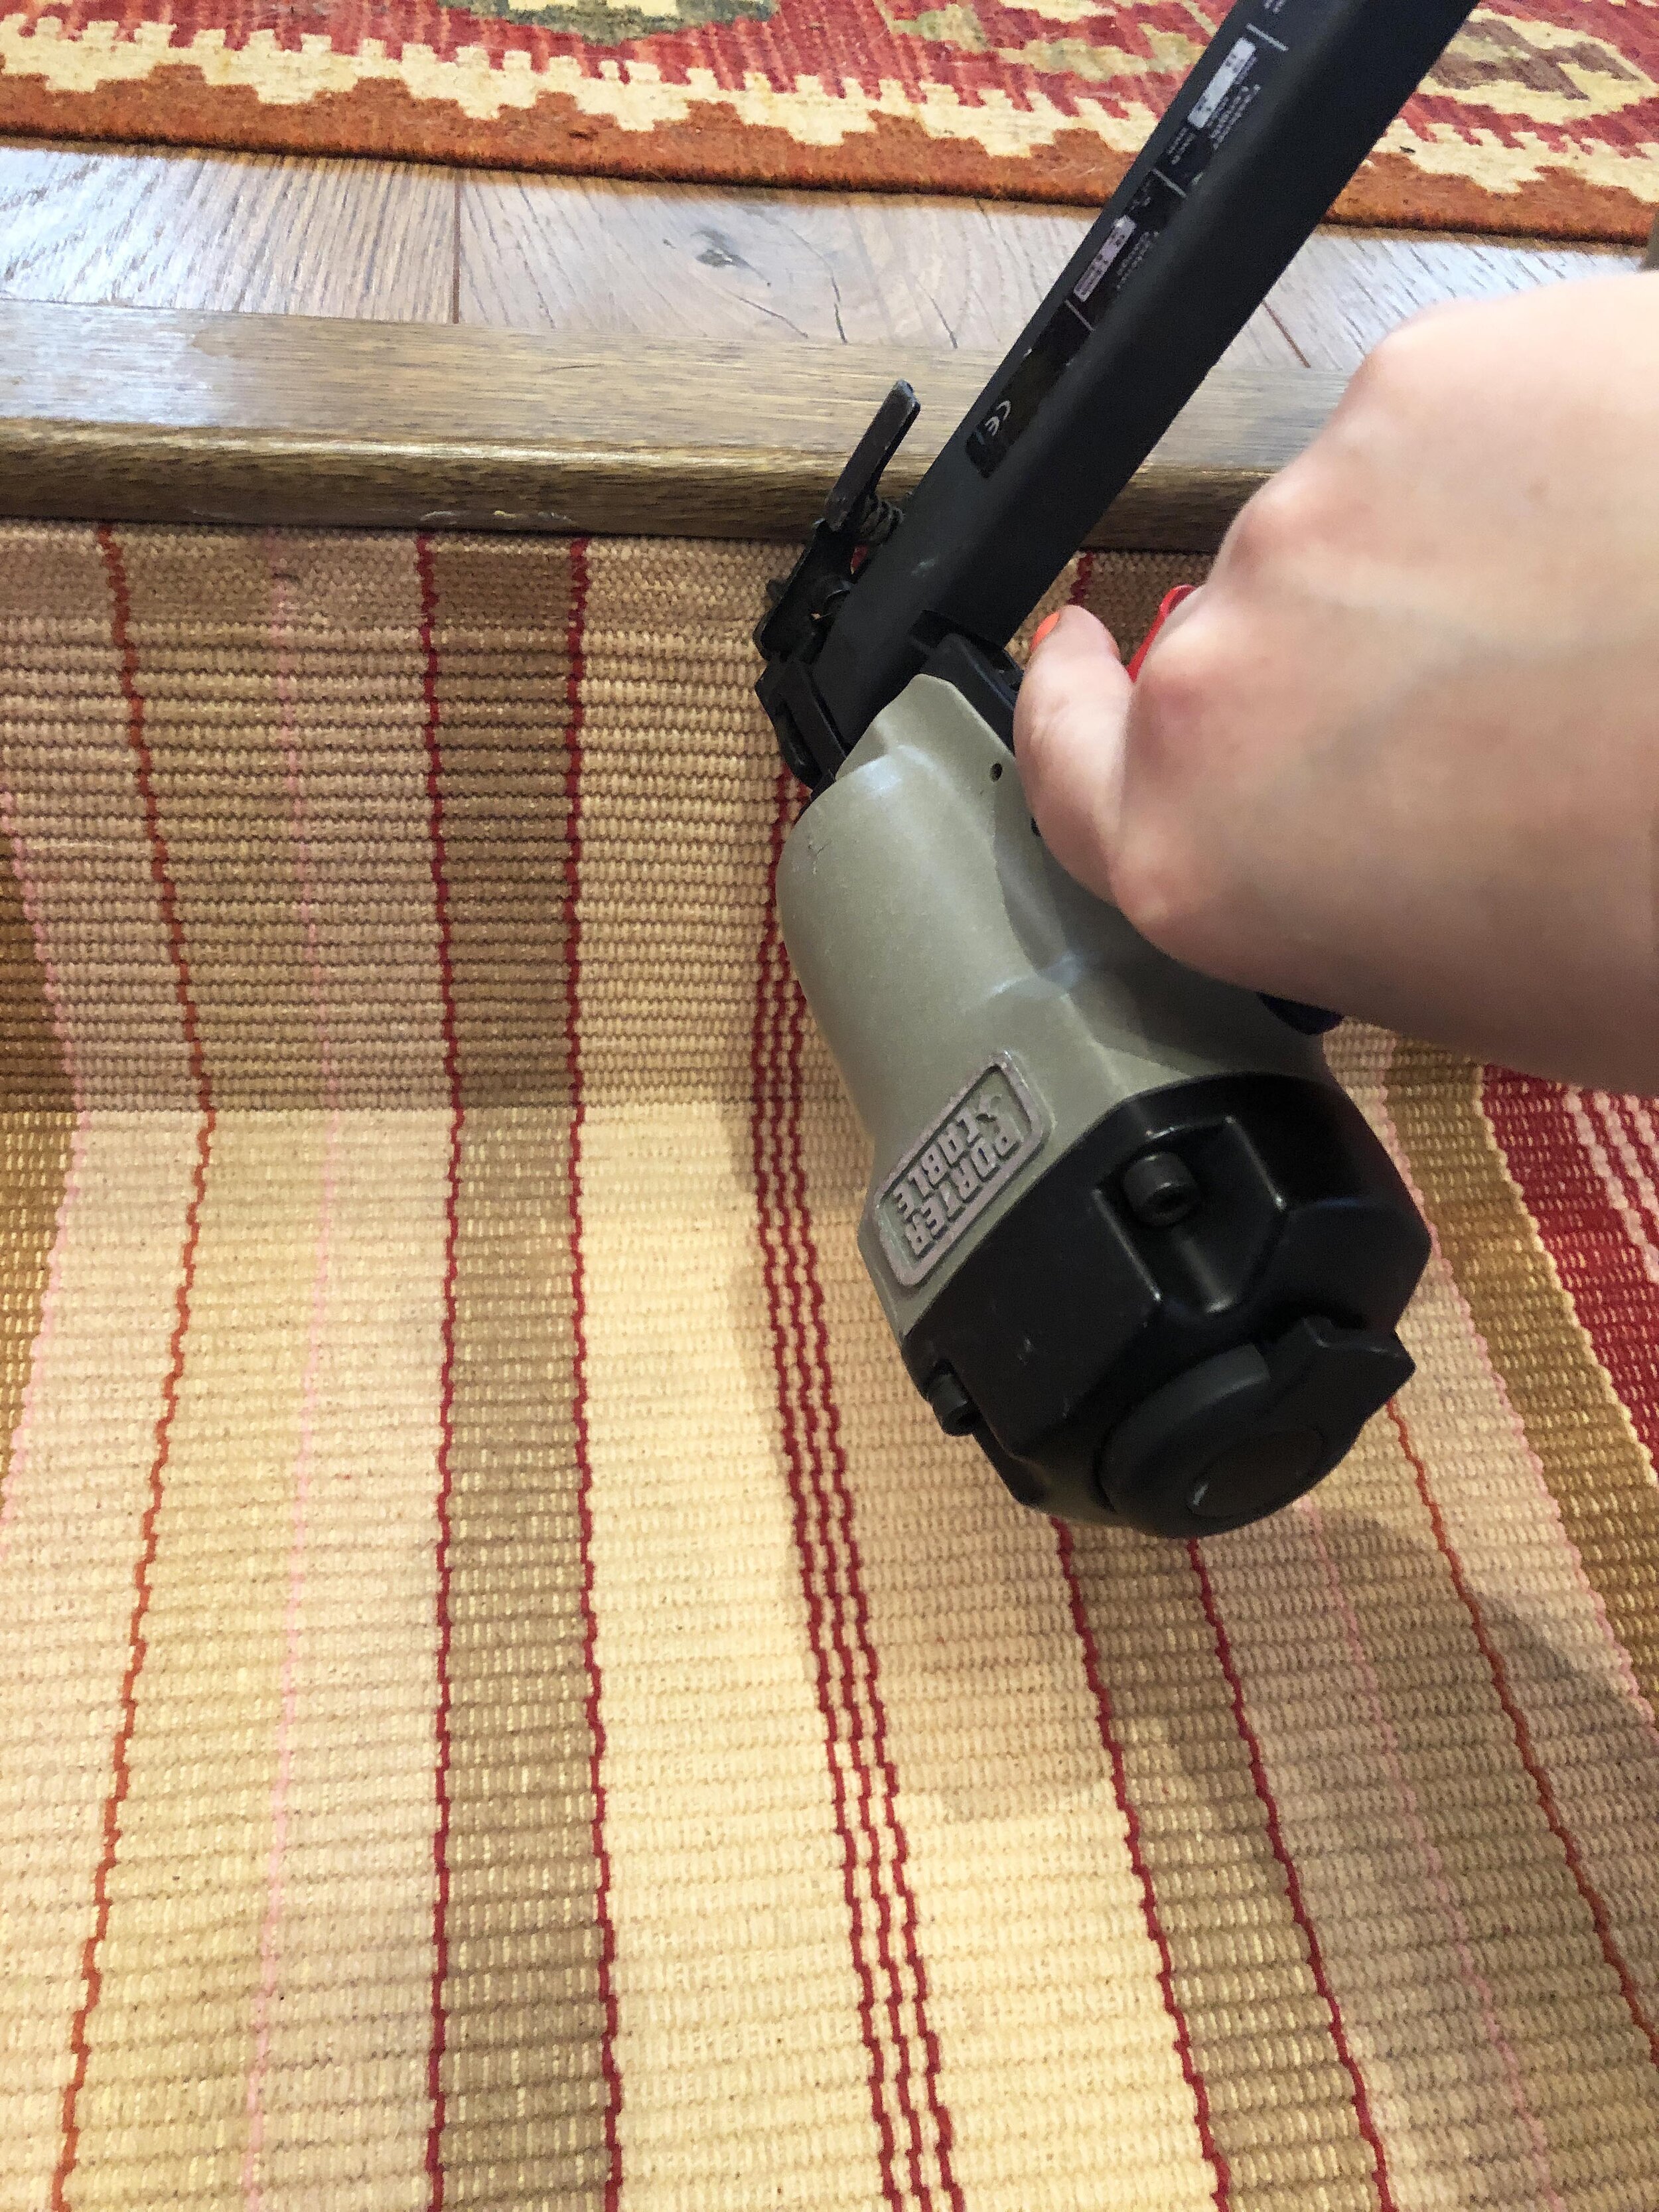
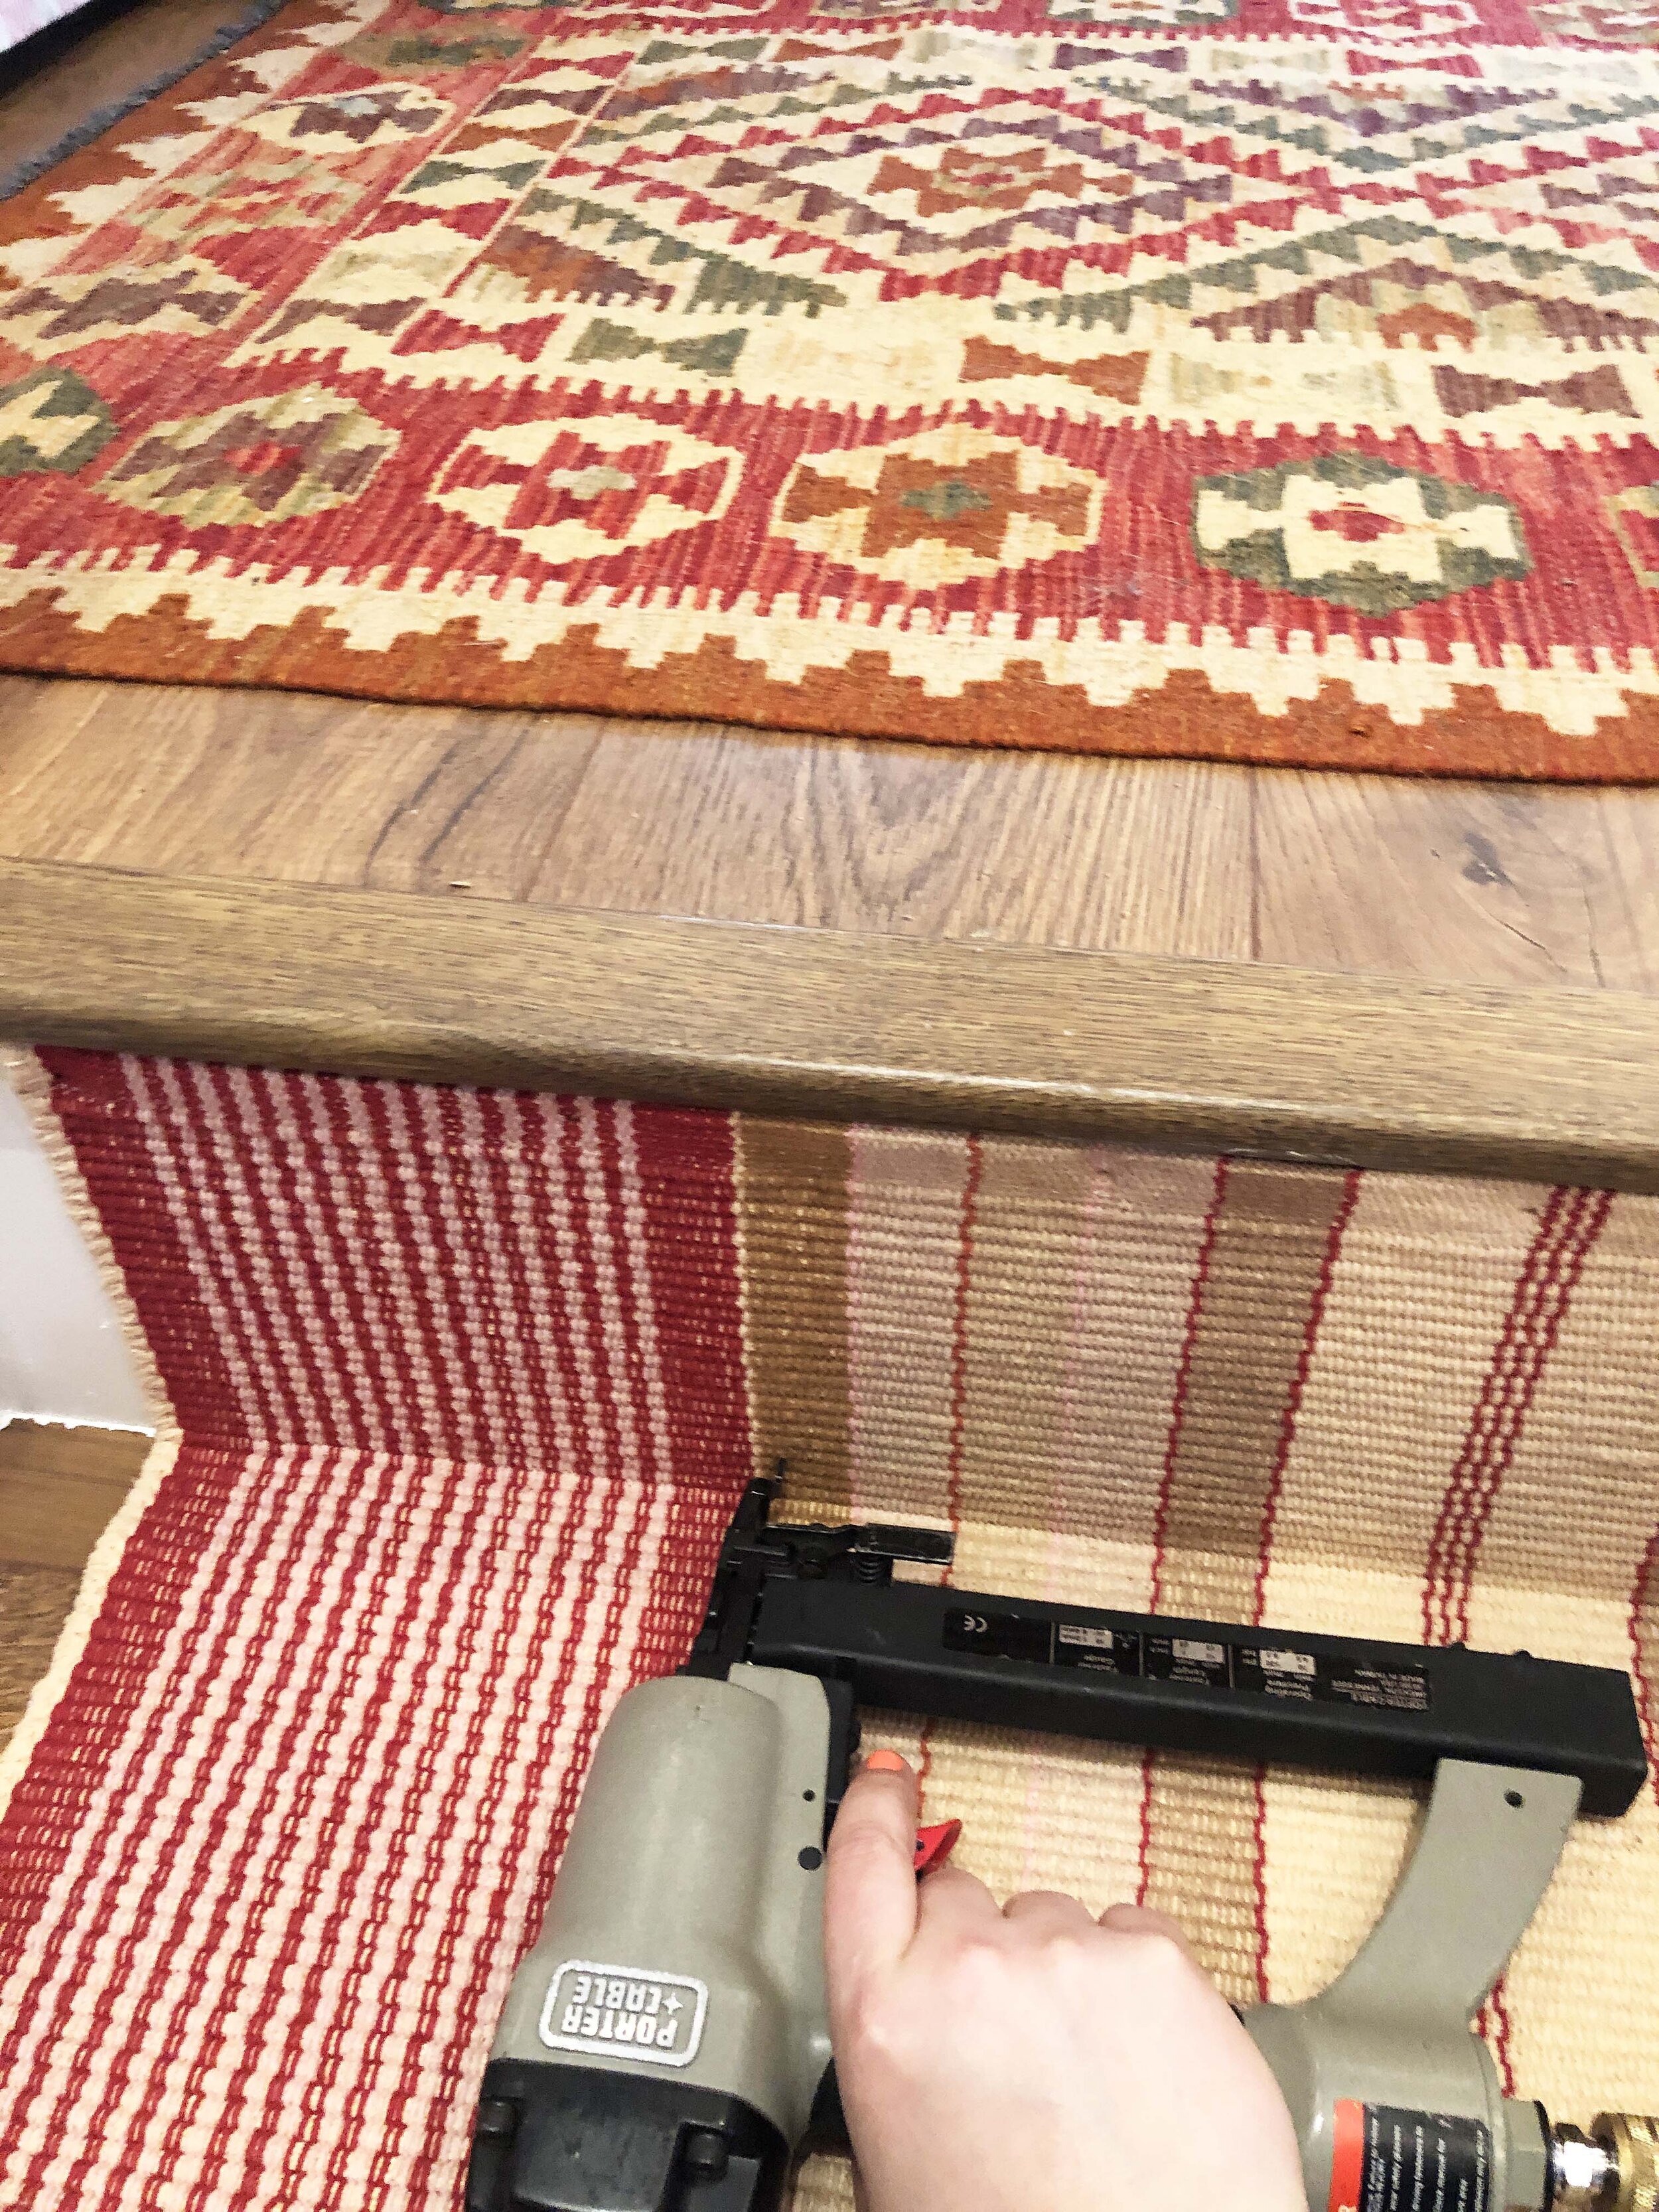
Now, take your staple gun and hit some staples across the top hem of the rug. I like to put in roughly 8-10 across the top, making sure to get a staple in very close to the edge of the hem on both the right and left side edge of the rug.
Step 8
Now, hit it with some staples along the bottom of the rise, as well.
Step 9
Now, smooth the rug along this first run of step, remove the backing from the tape along with bullnose, and press the rug firmly along the bullnose. Congrats! You’ve completed the first rise and run. Now you are ready to move onto the second rise and run.
Step 10
Repeat steps 6-9 ad nauseam as you work your way down the stairs. At some point, you will come to the end of the first runner.
Step 11
You’ll want to use a nice sharp pair of scissors to trim the rug just under the edge of the last bullnose that it reaches. Cut between the horizontal grooves of the rug. This will leave you with a raw, fraying edge of rug.

Step 12
Make sure your glue gun is at the ready. Carefully, run a thin bead of glue along the raw edge of the rug and press the loose threads of the rug together into the glue as you go (work in about 6 inch sections as you go).
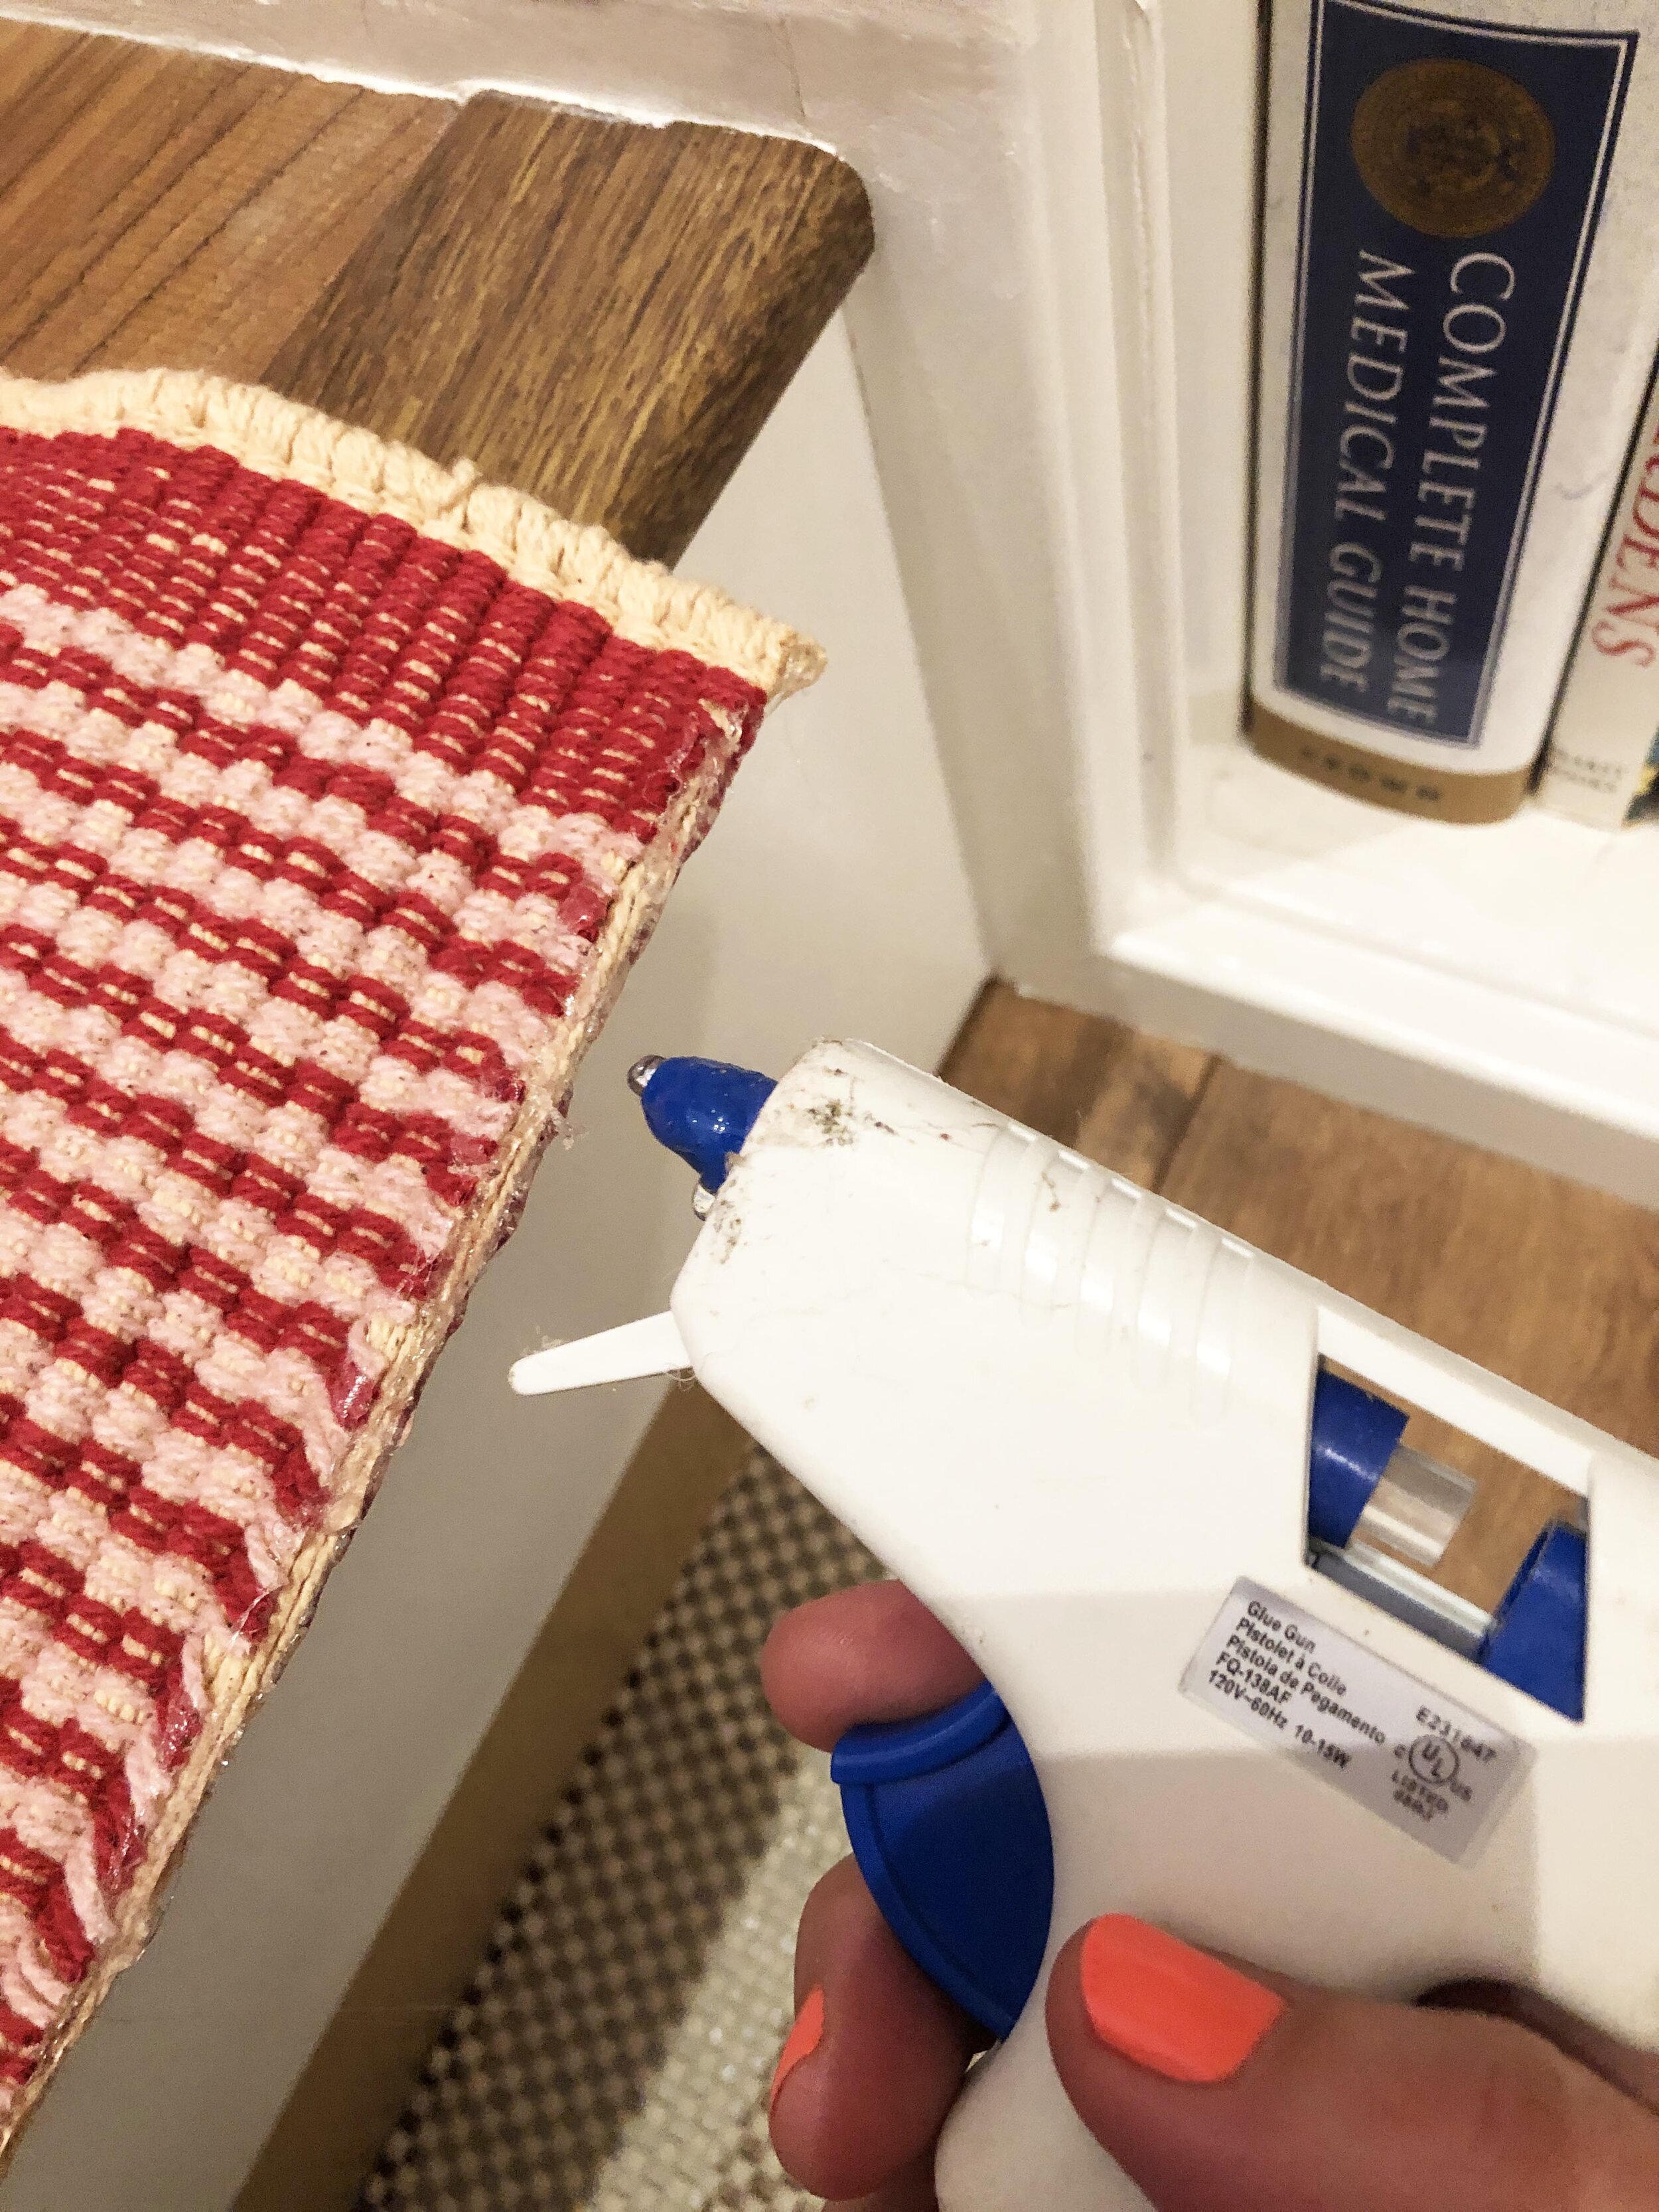
And if you need a quick break, go ahead and flip through the Complete Home Medical Guide.
Step 13
Now press that hemmed edge into the tape along the top of the rise of the next step (if need be, add an extra strip of tape across the entire lip of the bullnose just to fully stick it down).
Step 14
Time for the next rug! We’re going to start it by pressing the finished edge right up against the glue-hemmed edge of the previous rug, adhering it to the “top of rise” stretch of tape.
Step 15
Press the runner flat and adhere it to the “bottom of rise” tape strip and then hit both the top and bottom edges with staples. Continue on repeating this procedure until you come to your next rug end (if you even have one), or the end of the stairs.
Step 16
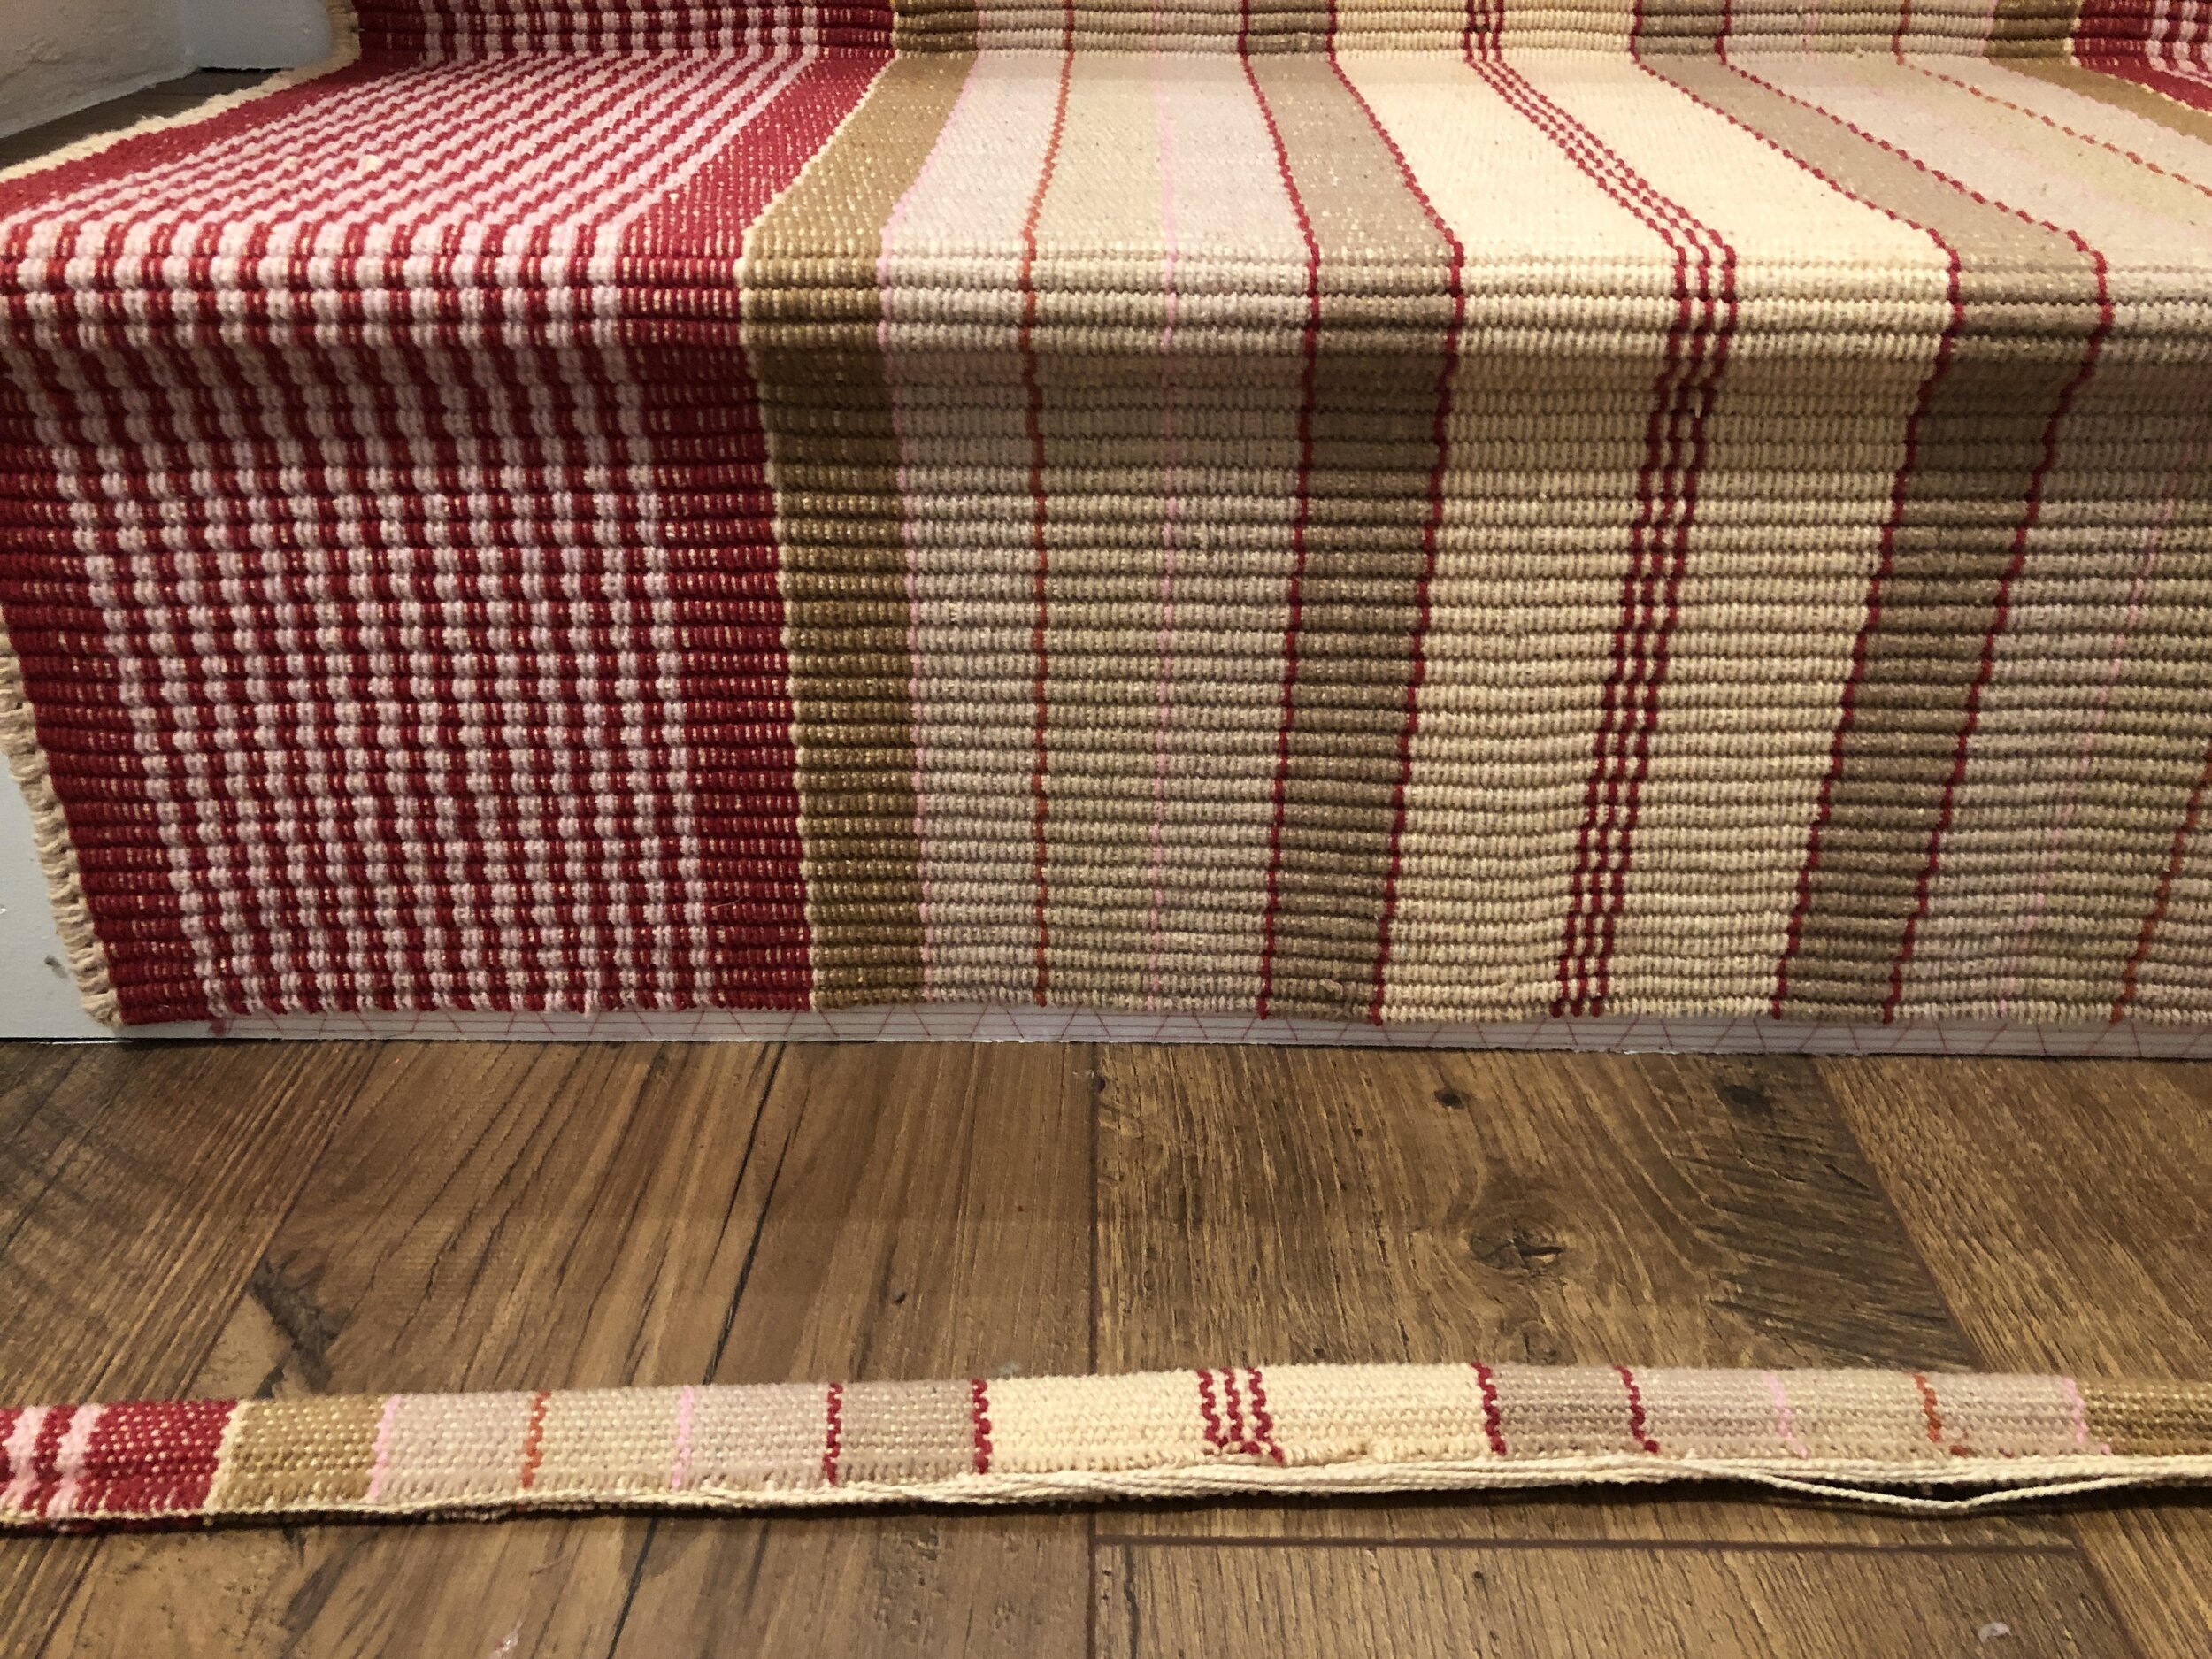
The end of the road: you’re going to treat the end of the rug much like you did the ends of each of your rugs. You’ll trim it right flush with the bottom of the lowest stair rise (where the stairs meet the floor), and then, once again, hem it with hot glue.
Step 17
Press the glue-hemmed edge into the last stretch of “bottom of rise” tape, then secure with staples.
Step 18
From the leftover rug pieces that you will inevitably have, cut a finished end off. We’re going to use this as “piping” along the bottom edge of the step. Trim the raw end of the “piping” as close as you can to the seam that binds it together without cutting that seam and letting the whole thing unravel.
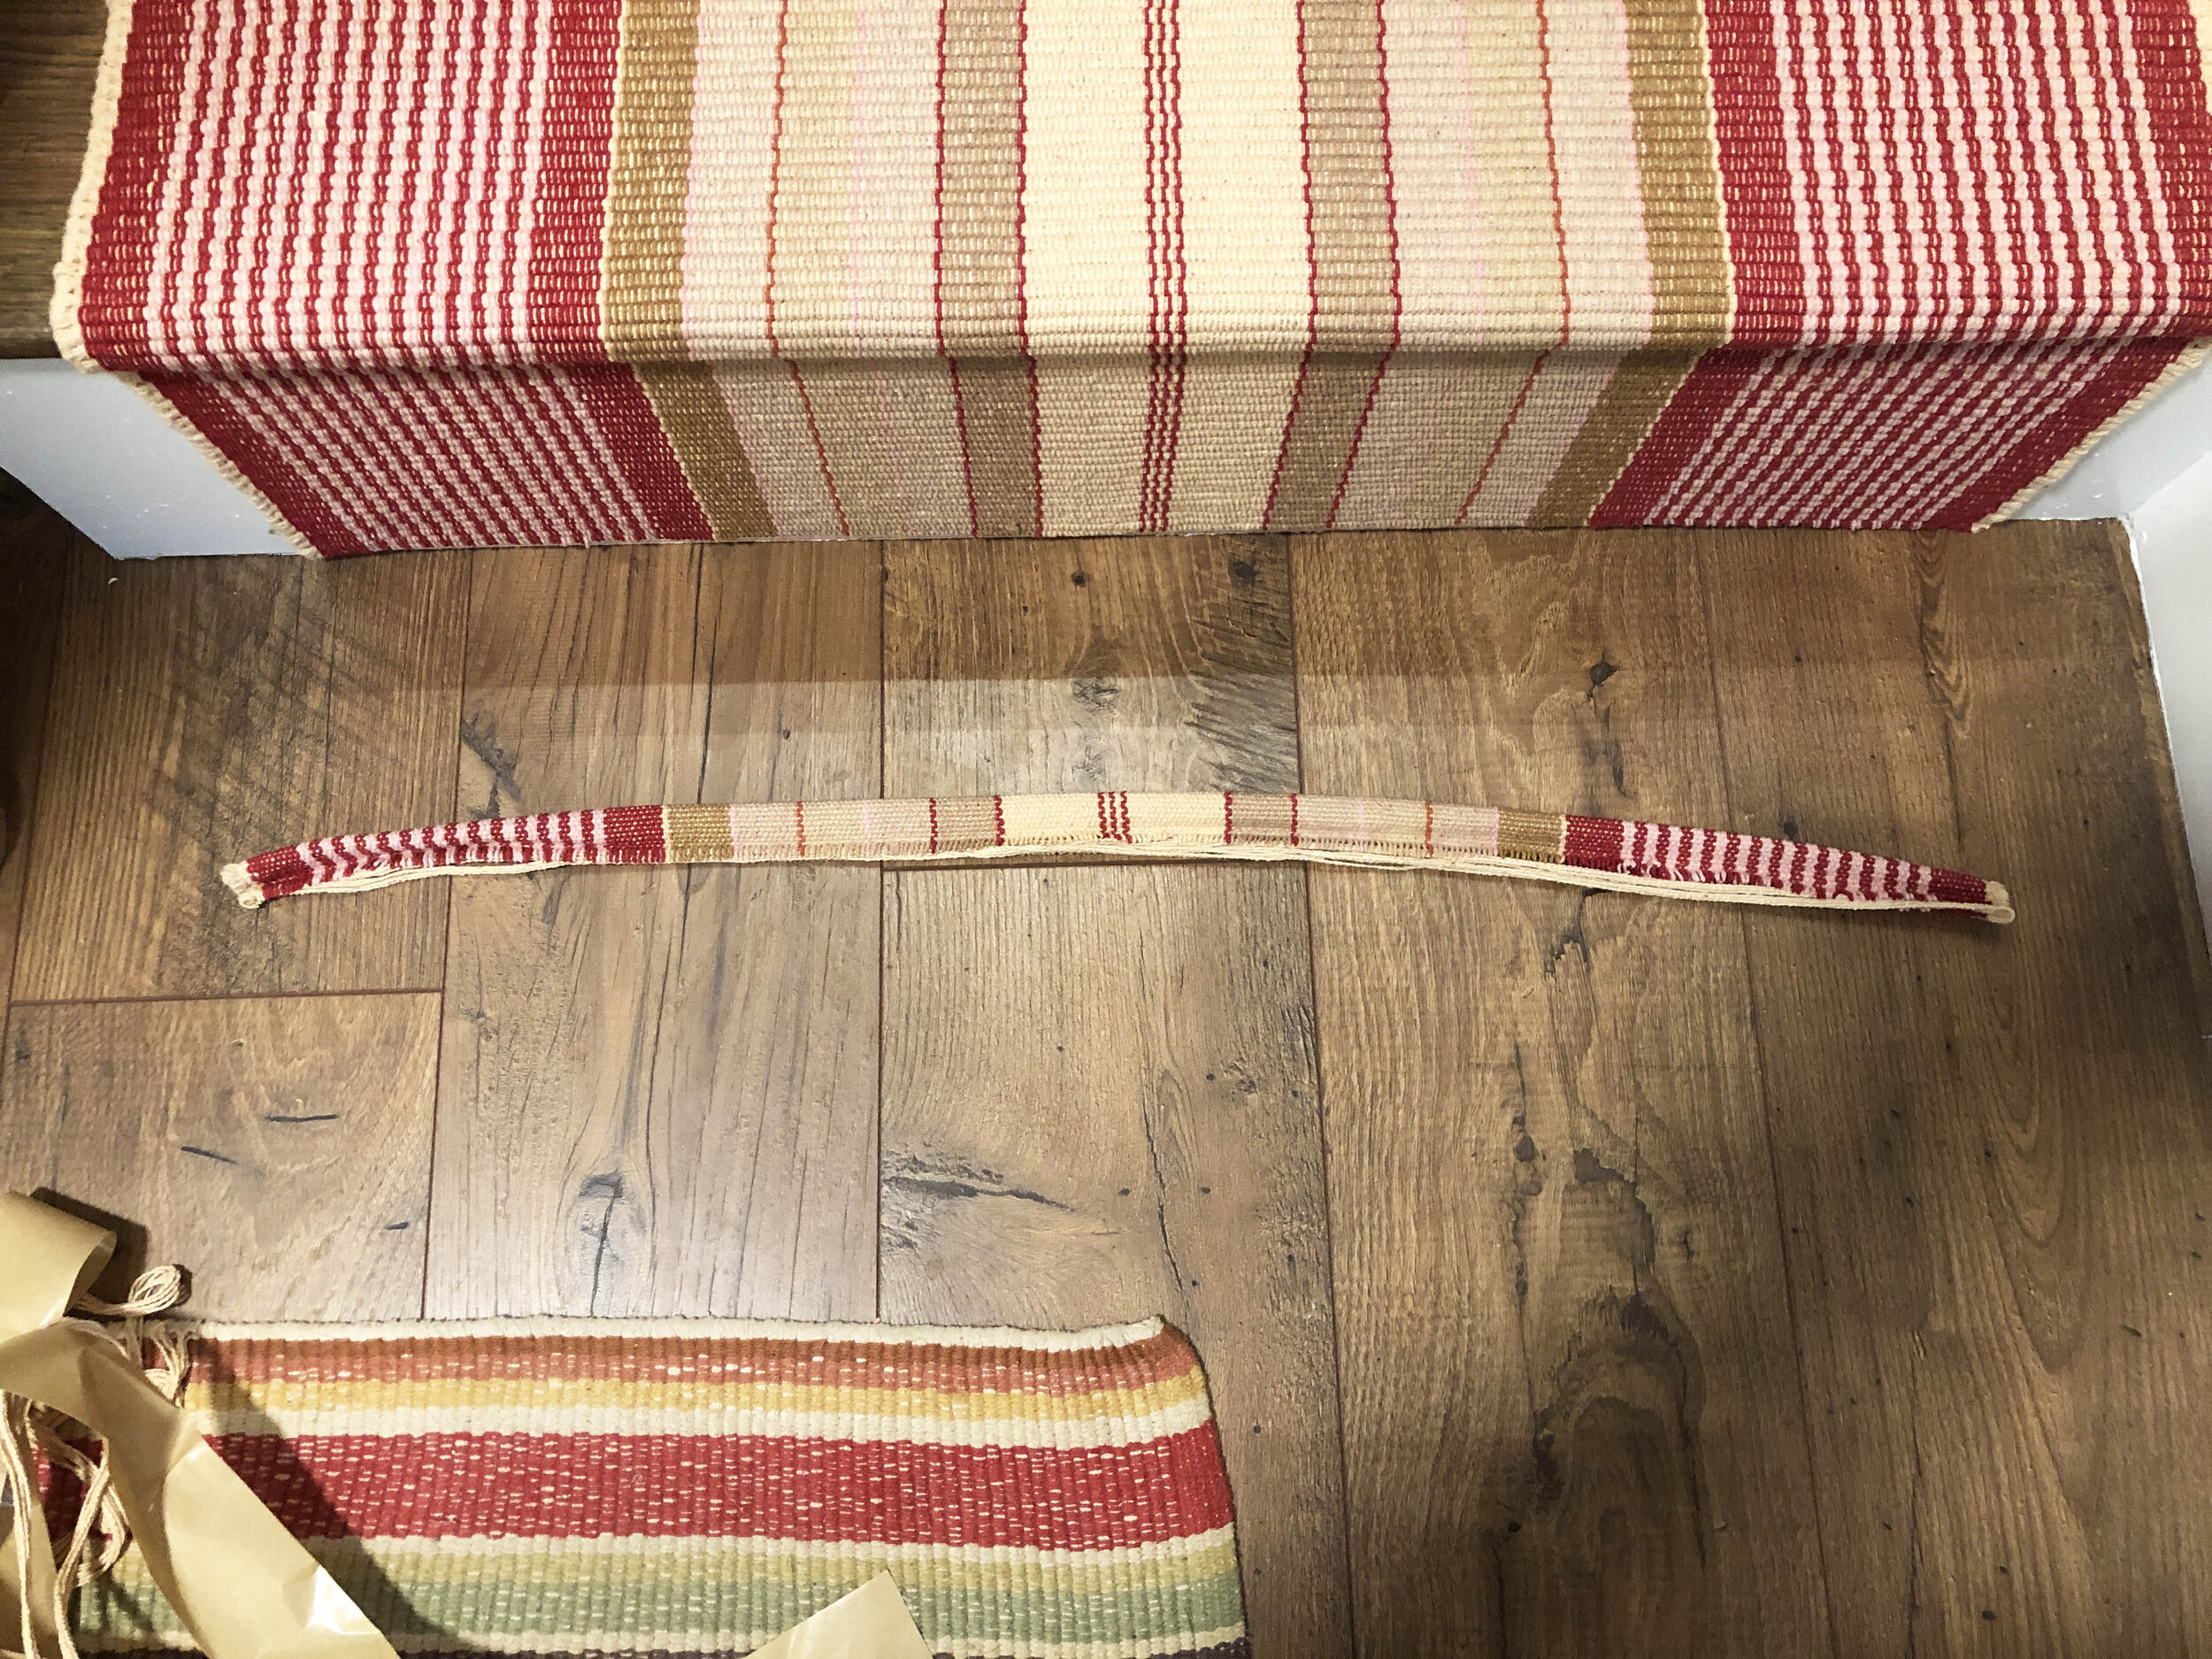
Step 19
Now, using your hot glue gun, glue the unfinished edge of the piping into the bottom edge of the runner, snugging it in there between the end of the runner and the floor. You’ll wind up with what appears to be a finished edge of rug.
And TA-DAAAAAH. Stair runner. One that holds up to three crazy dogs stampeding up and down it eleventy times a day. If you have four dogs though, I make no guarantees HAHAHAHAHA!
Step 20
Celebrate project completion with a glass of bubbly and a few of your closest, most skeptical friends.
