

The Back Deck Life: Before + After

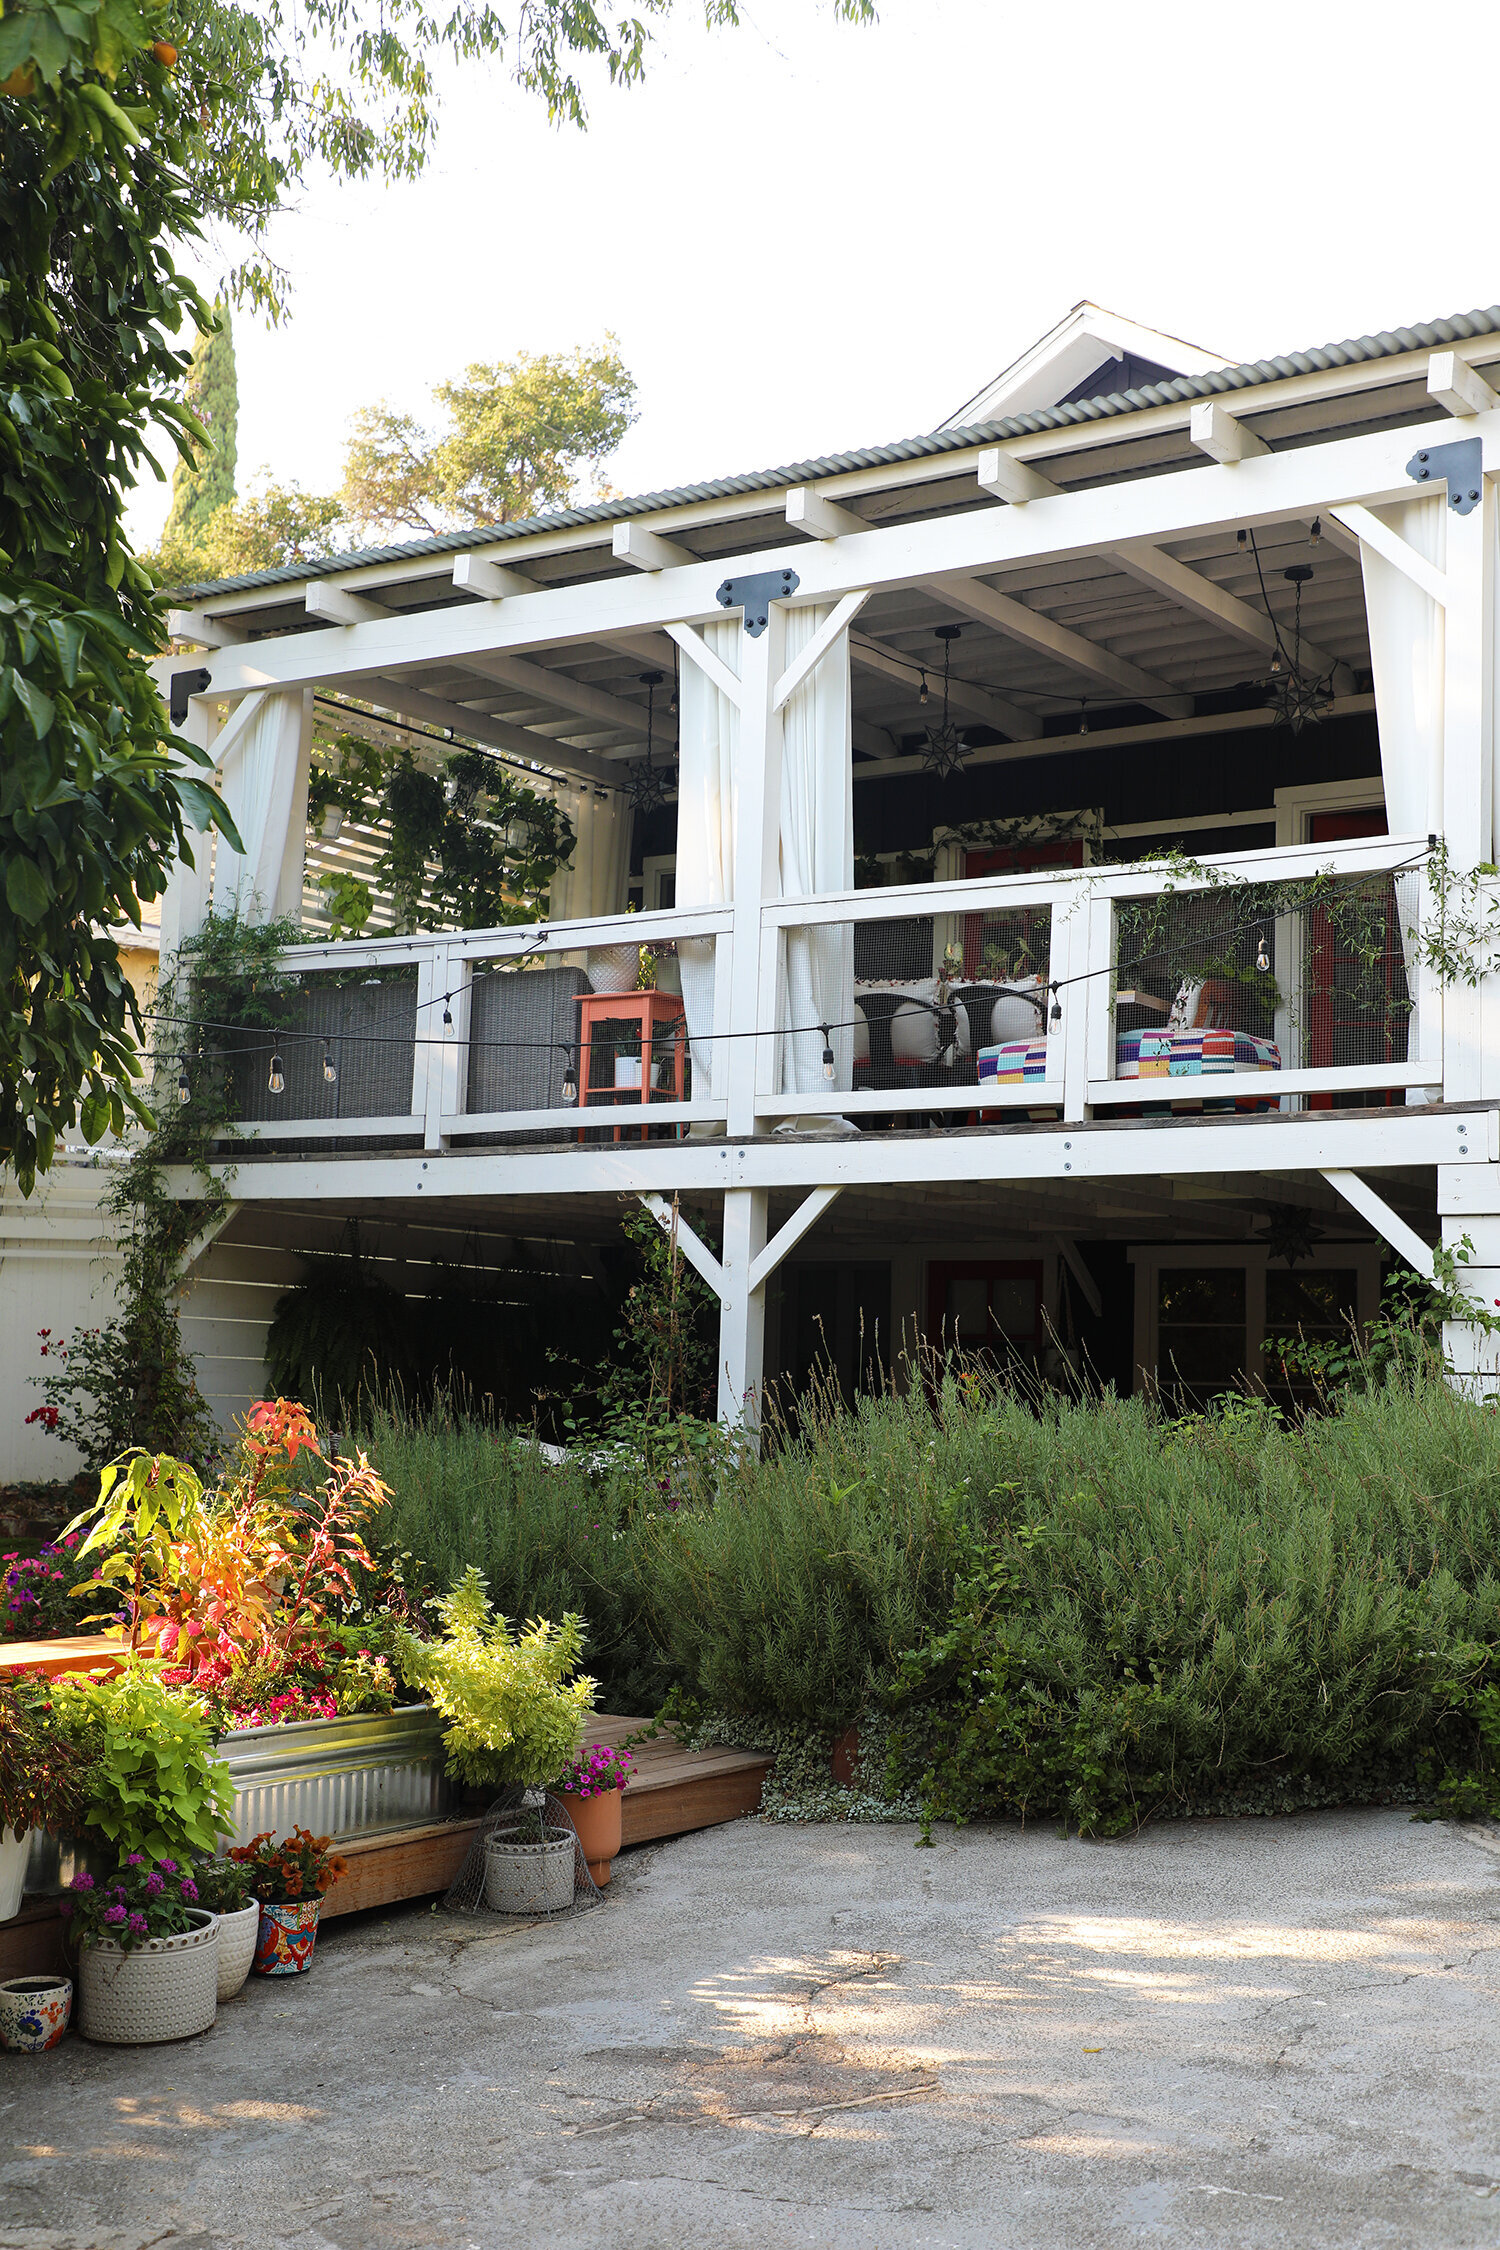
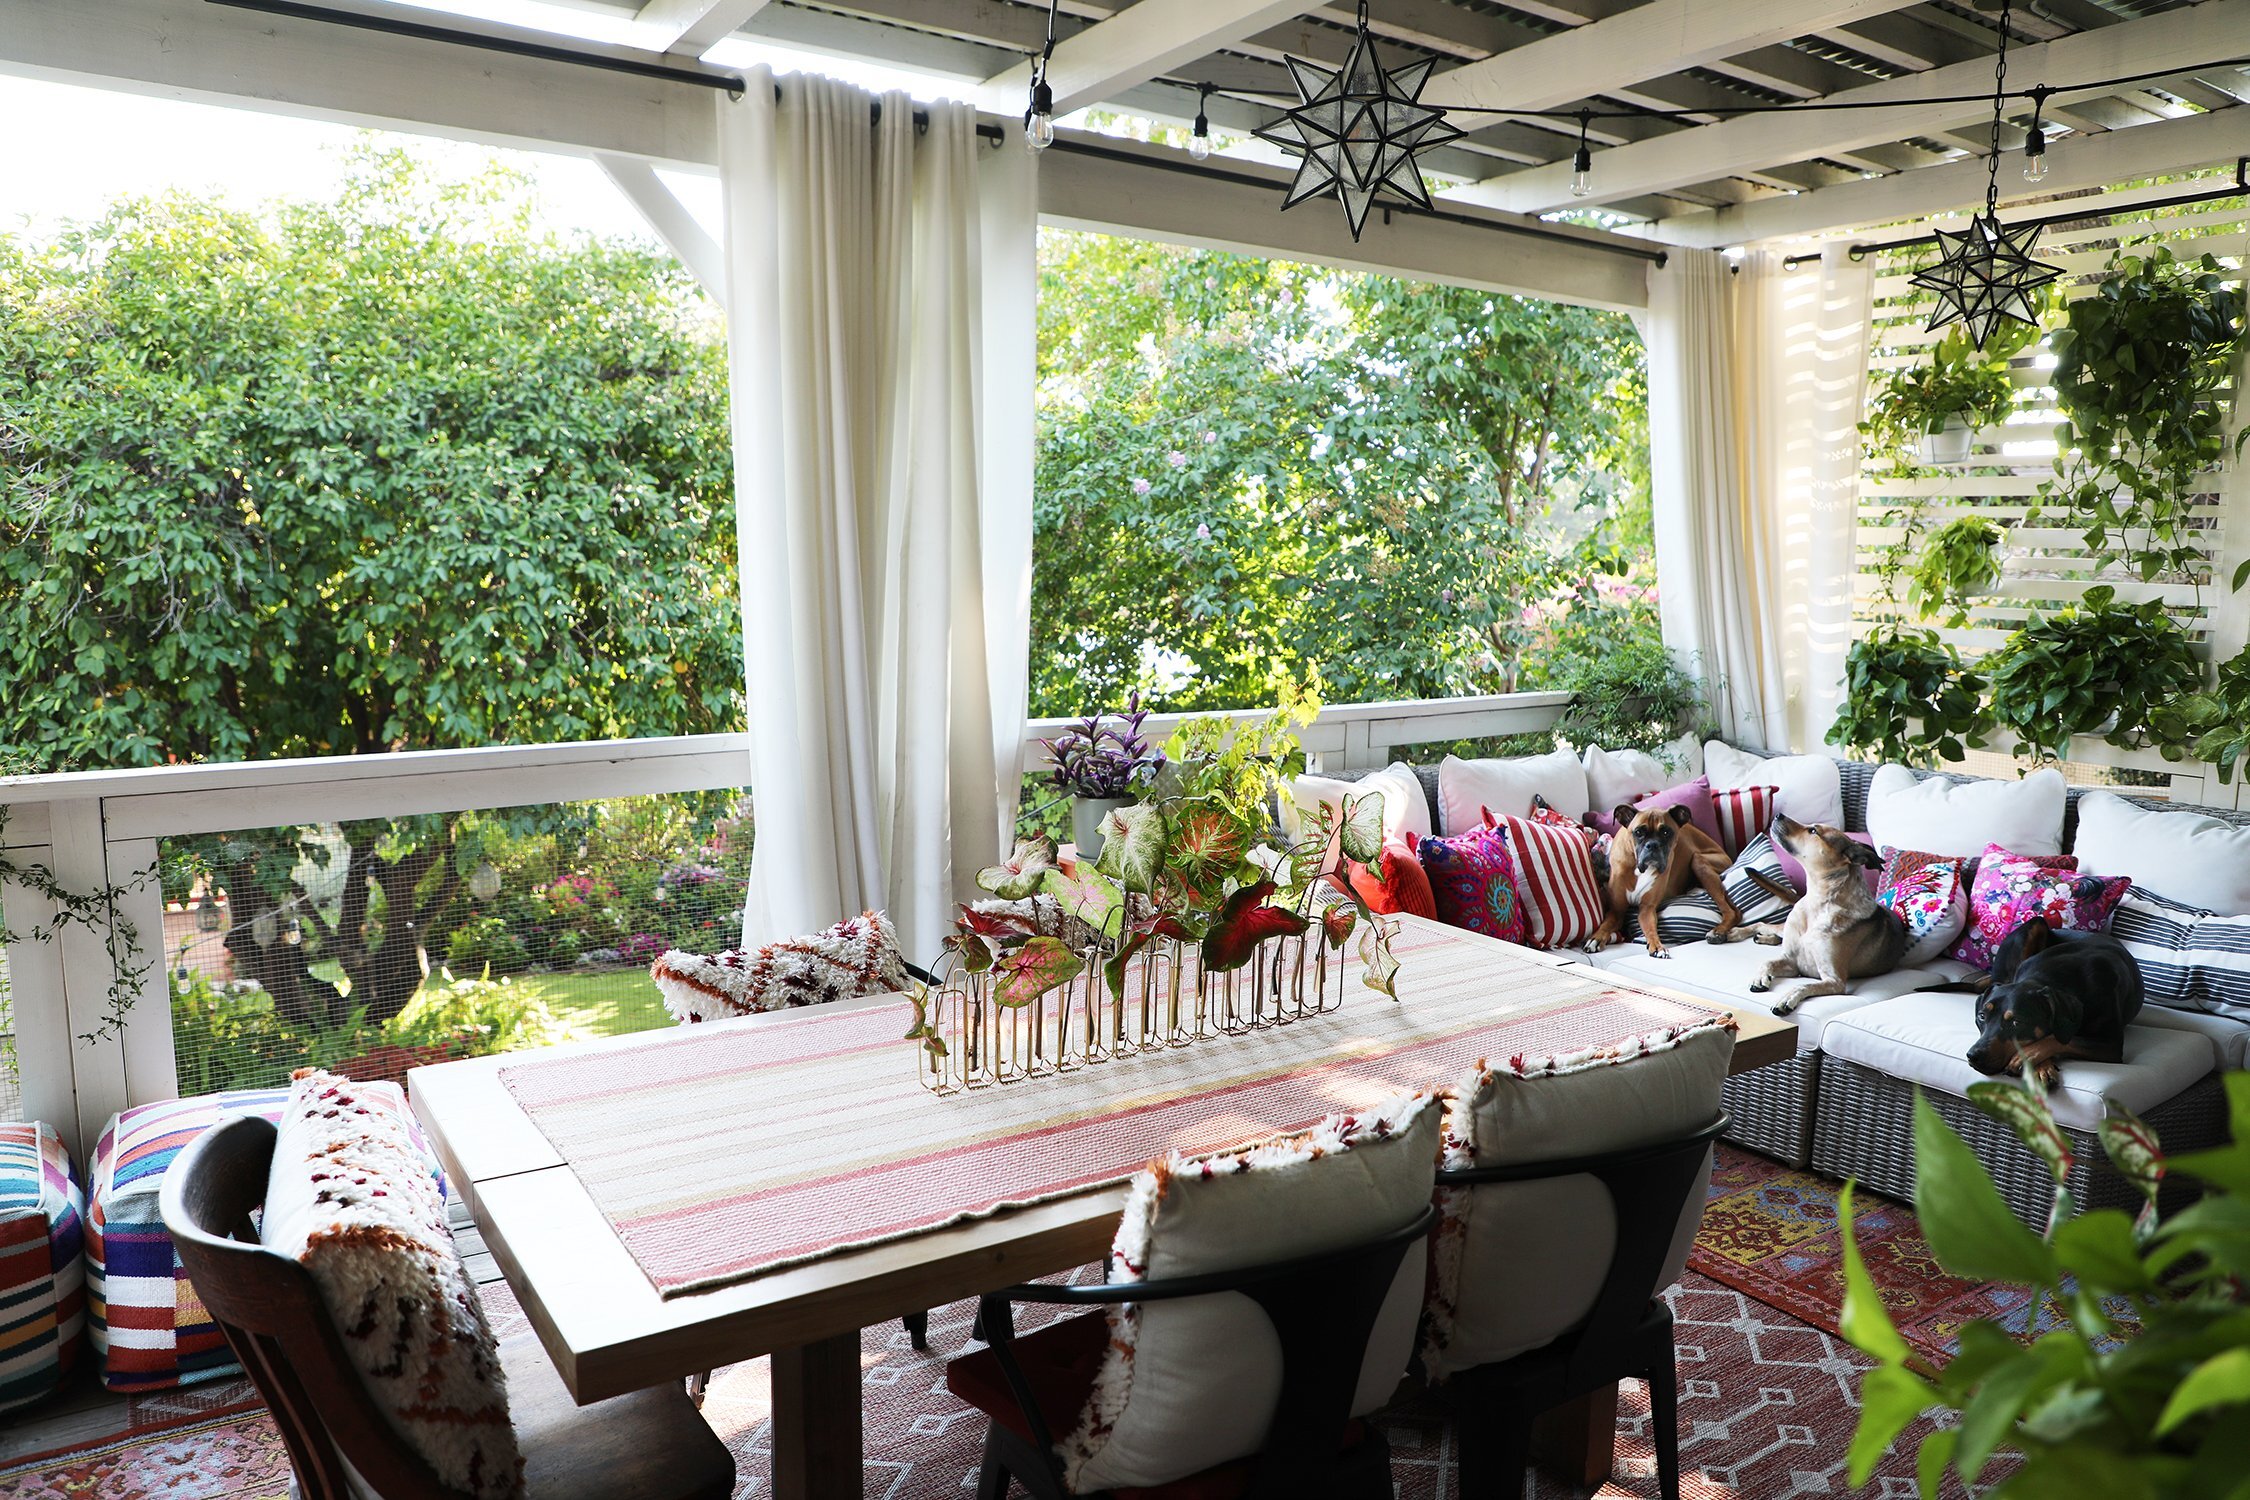
After.
Deck life is pretty damned essential to us here in SoCal—especially when you have a fairly small house without an actual dining room in it. Outdoor rooms are where we spread out to entertain. So we were pretty excited by the fact that this place had a back deck (and underneath it, a downstairs patio). AT FIRST. At first, we were excited…then we tried to actually walk out on it and discovered that it was pretty much falling down.
After.
Reminder: this house was abandoned for five years before we bought it, so I take a little bit of license mocking the derelict state that it was in. At the same time, it’s very clear that someone, at some point before the abandonment, built this deck, chose the terracotta tile in the downstairs, put lots of 60’s paneling up and made lots of choices that worked for them at the time. While we came into the situation fully intending to change everything, I have to at least pay a little respect to the fact that someone, at some point in this house’s history was clearly putting a lot of work and love into it and living their lives here. The choices they made might not work for us (especially after being neglected for so long), but that doesn’t mean the choices were bad. It was just high time for a facelift.
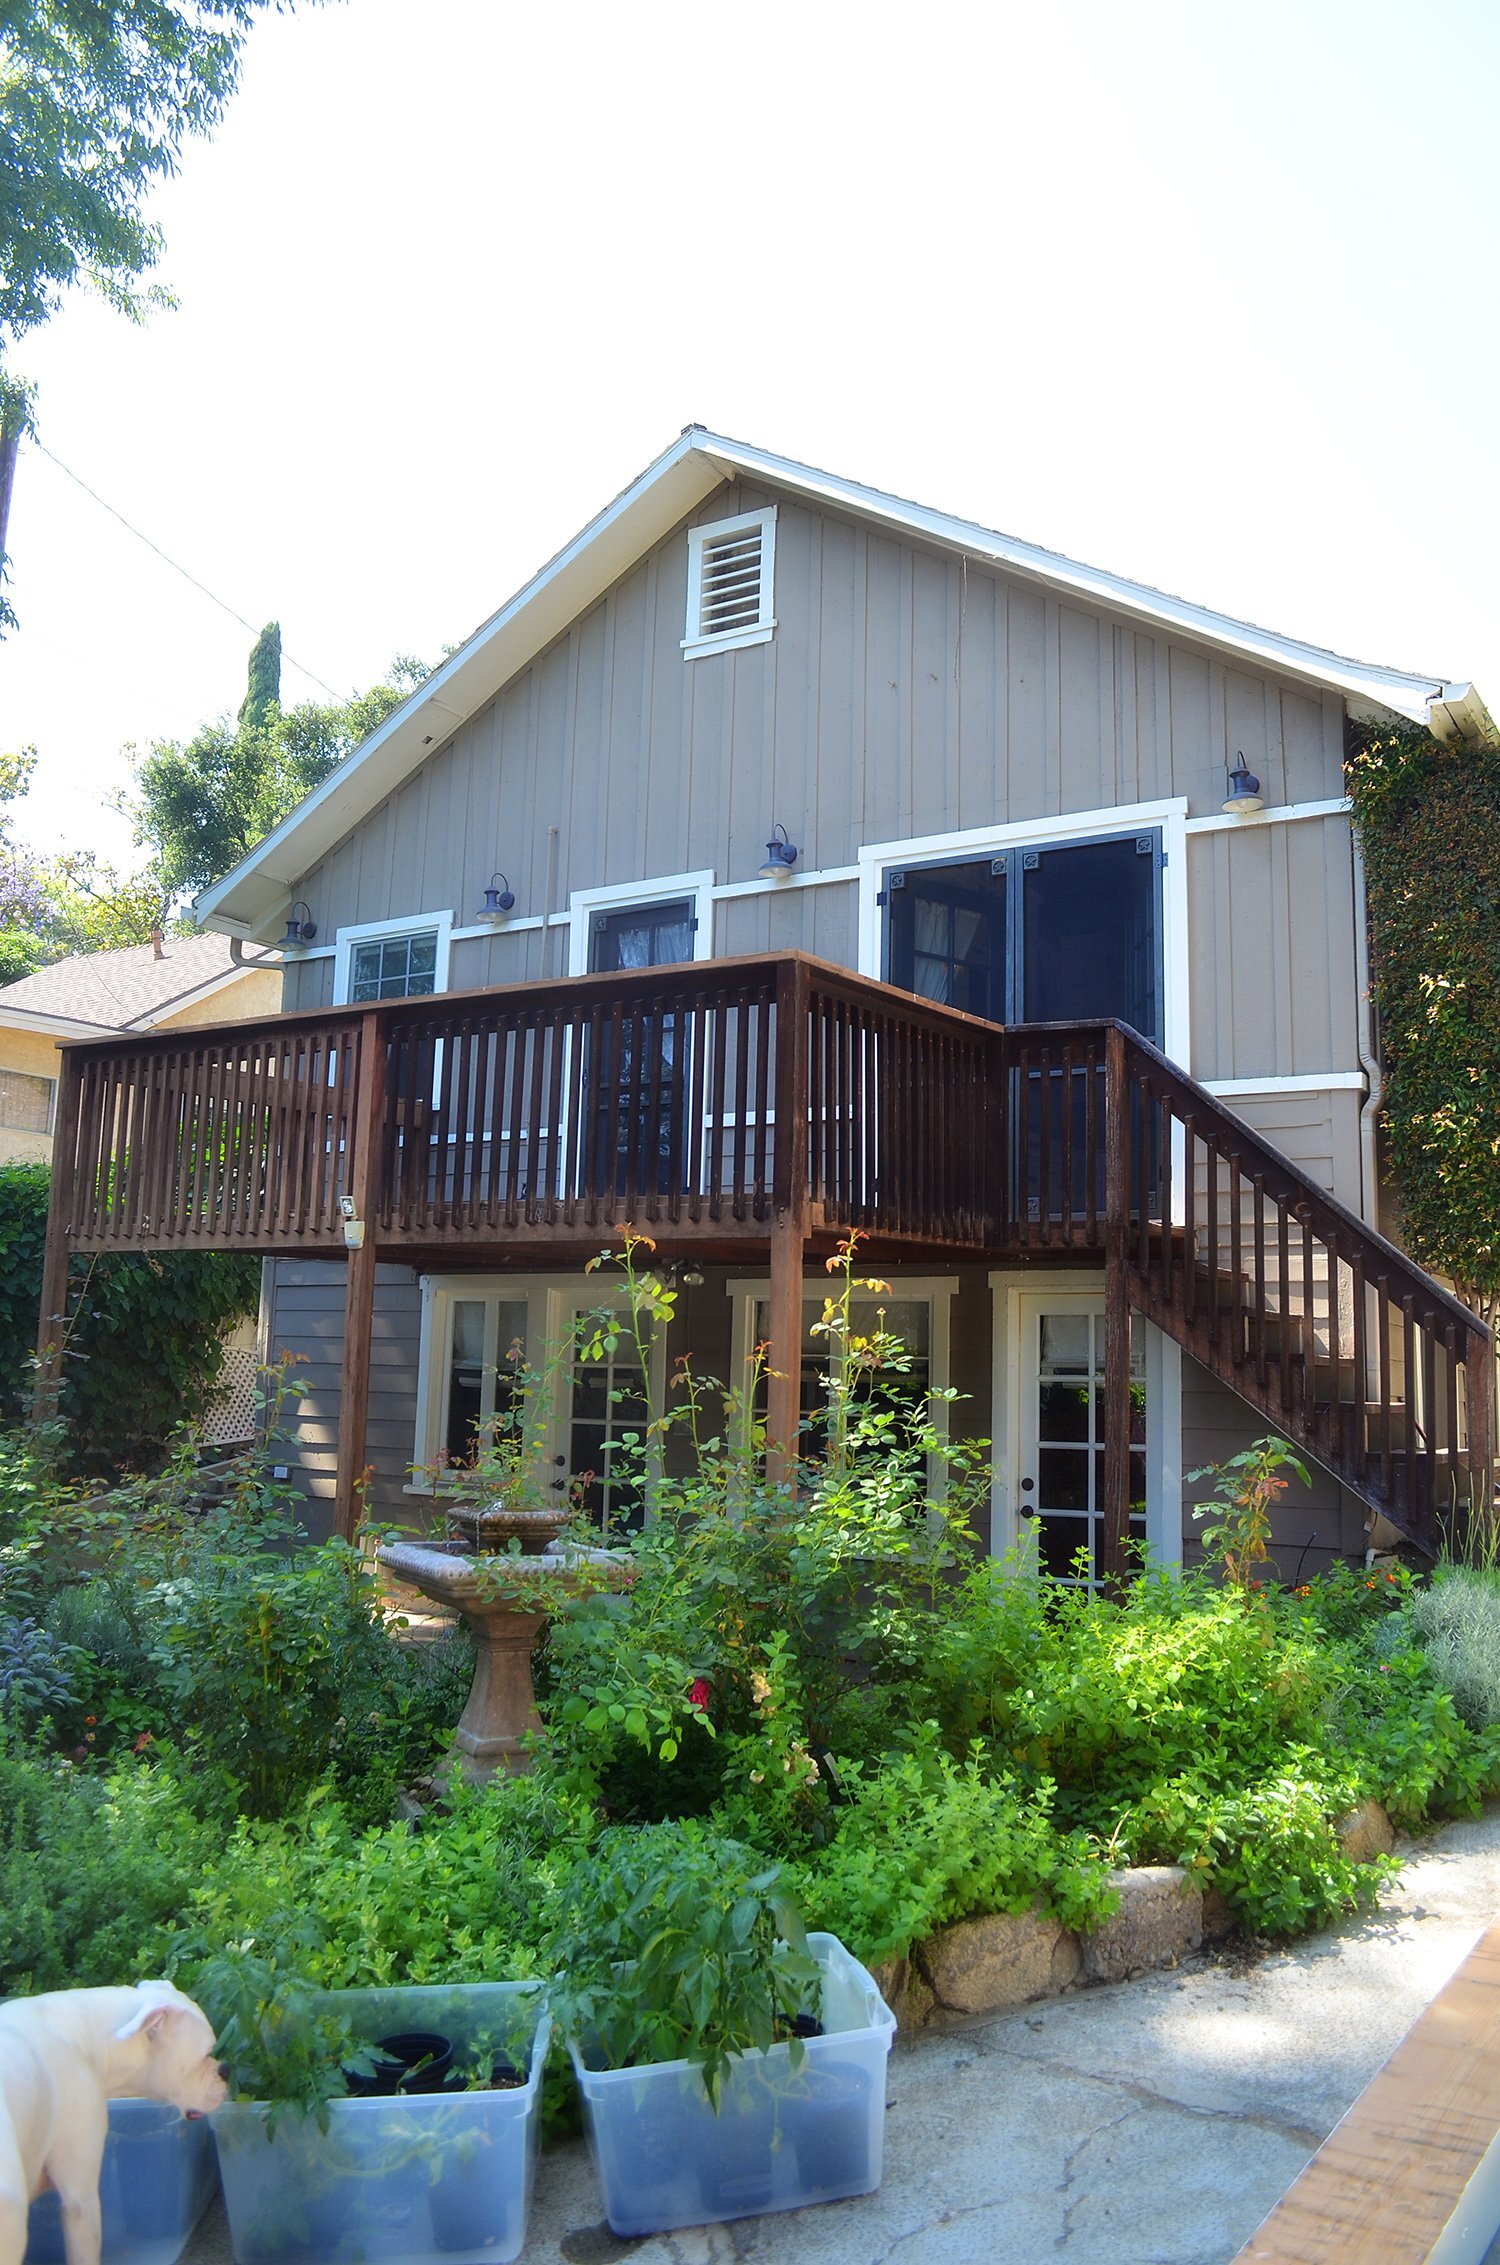
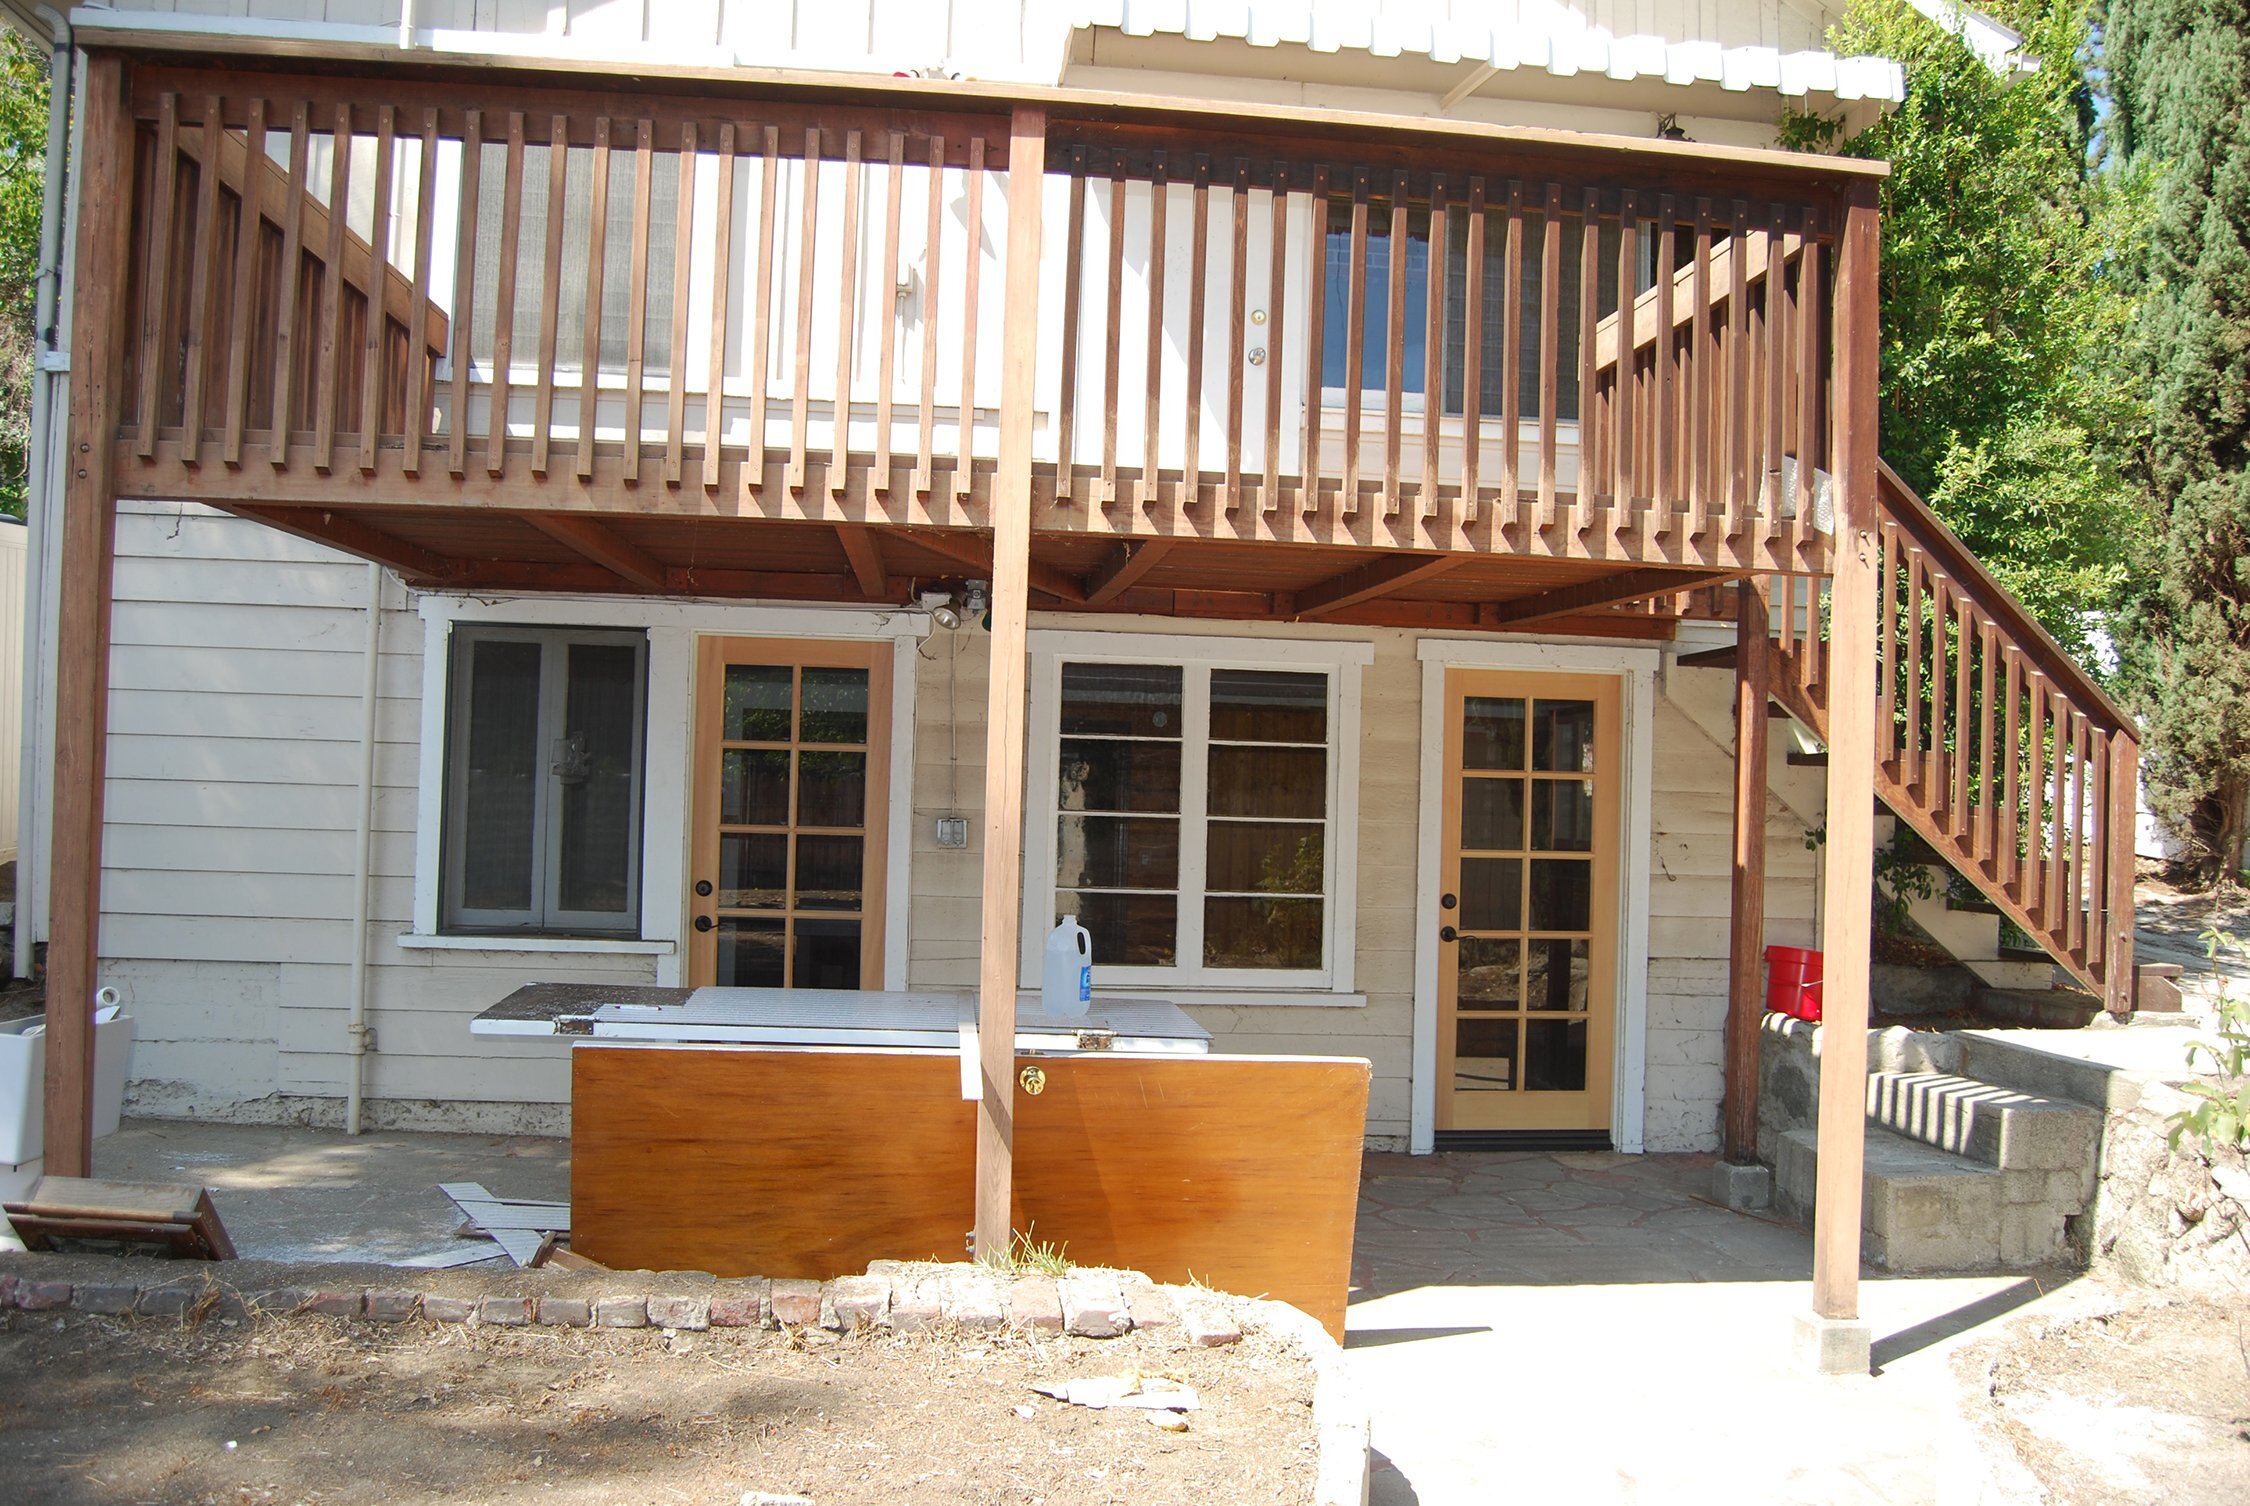
Before.
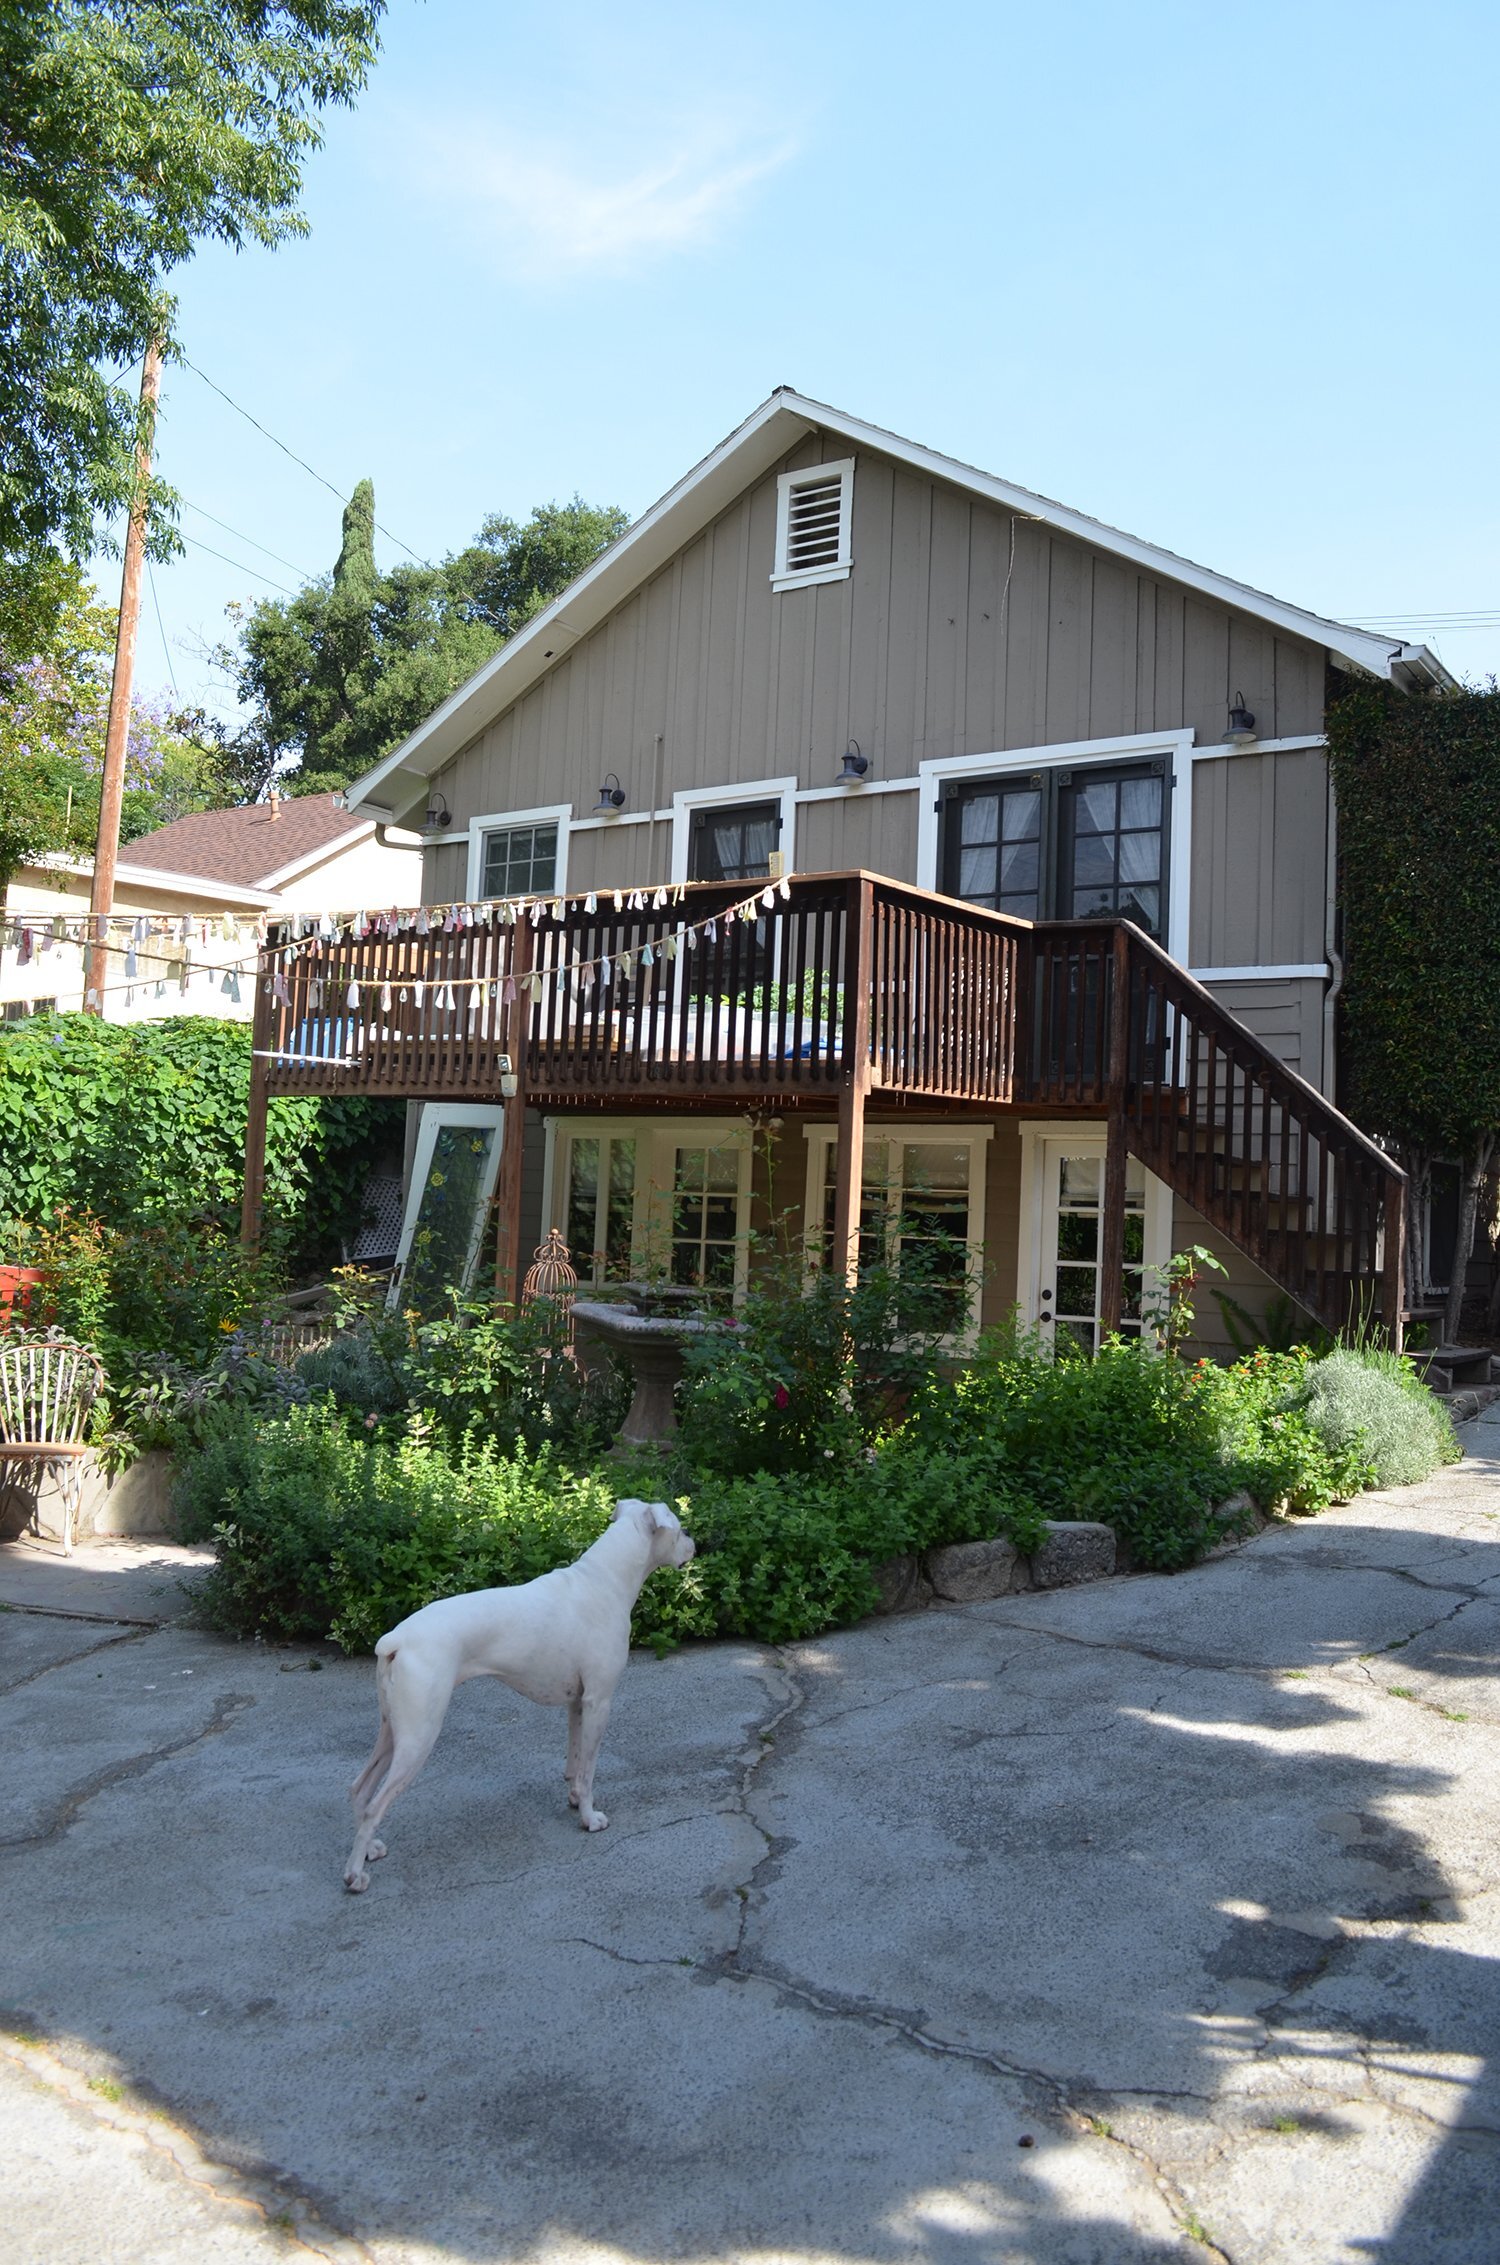
The previous image isn’t actually a true before—this was taken after we had had the house painted for the first time, and started working on the yard a bit (maybe about year two in the renovation process). You can see our old sweet boxer girl, Abbie, checking out the vegetable seedlings I was growing in tubs on the driveway (GOD, I miss that dog). But it’s a great shot of what the original deck looked like—it actually looked pretty ok, right? Which was why we were excited about it when we first toured the house.

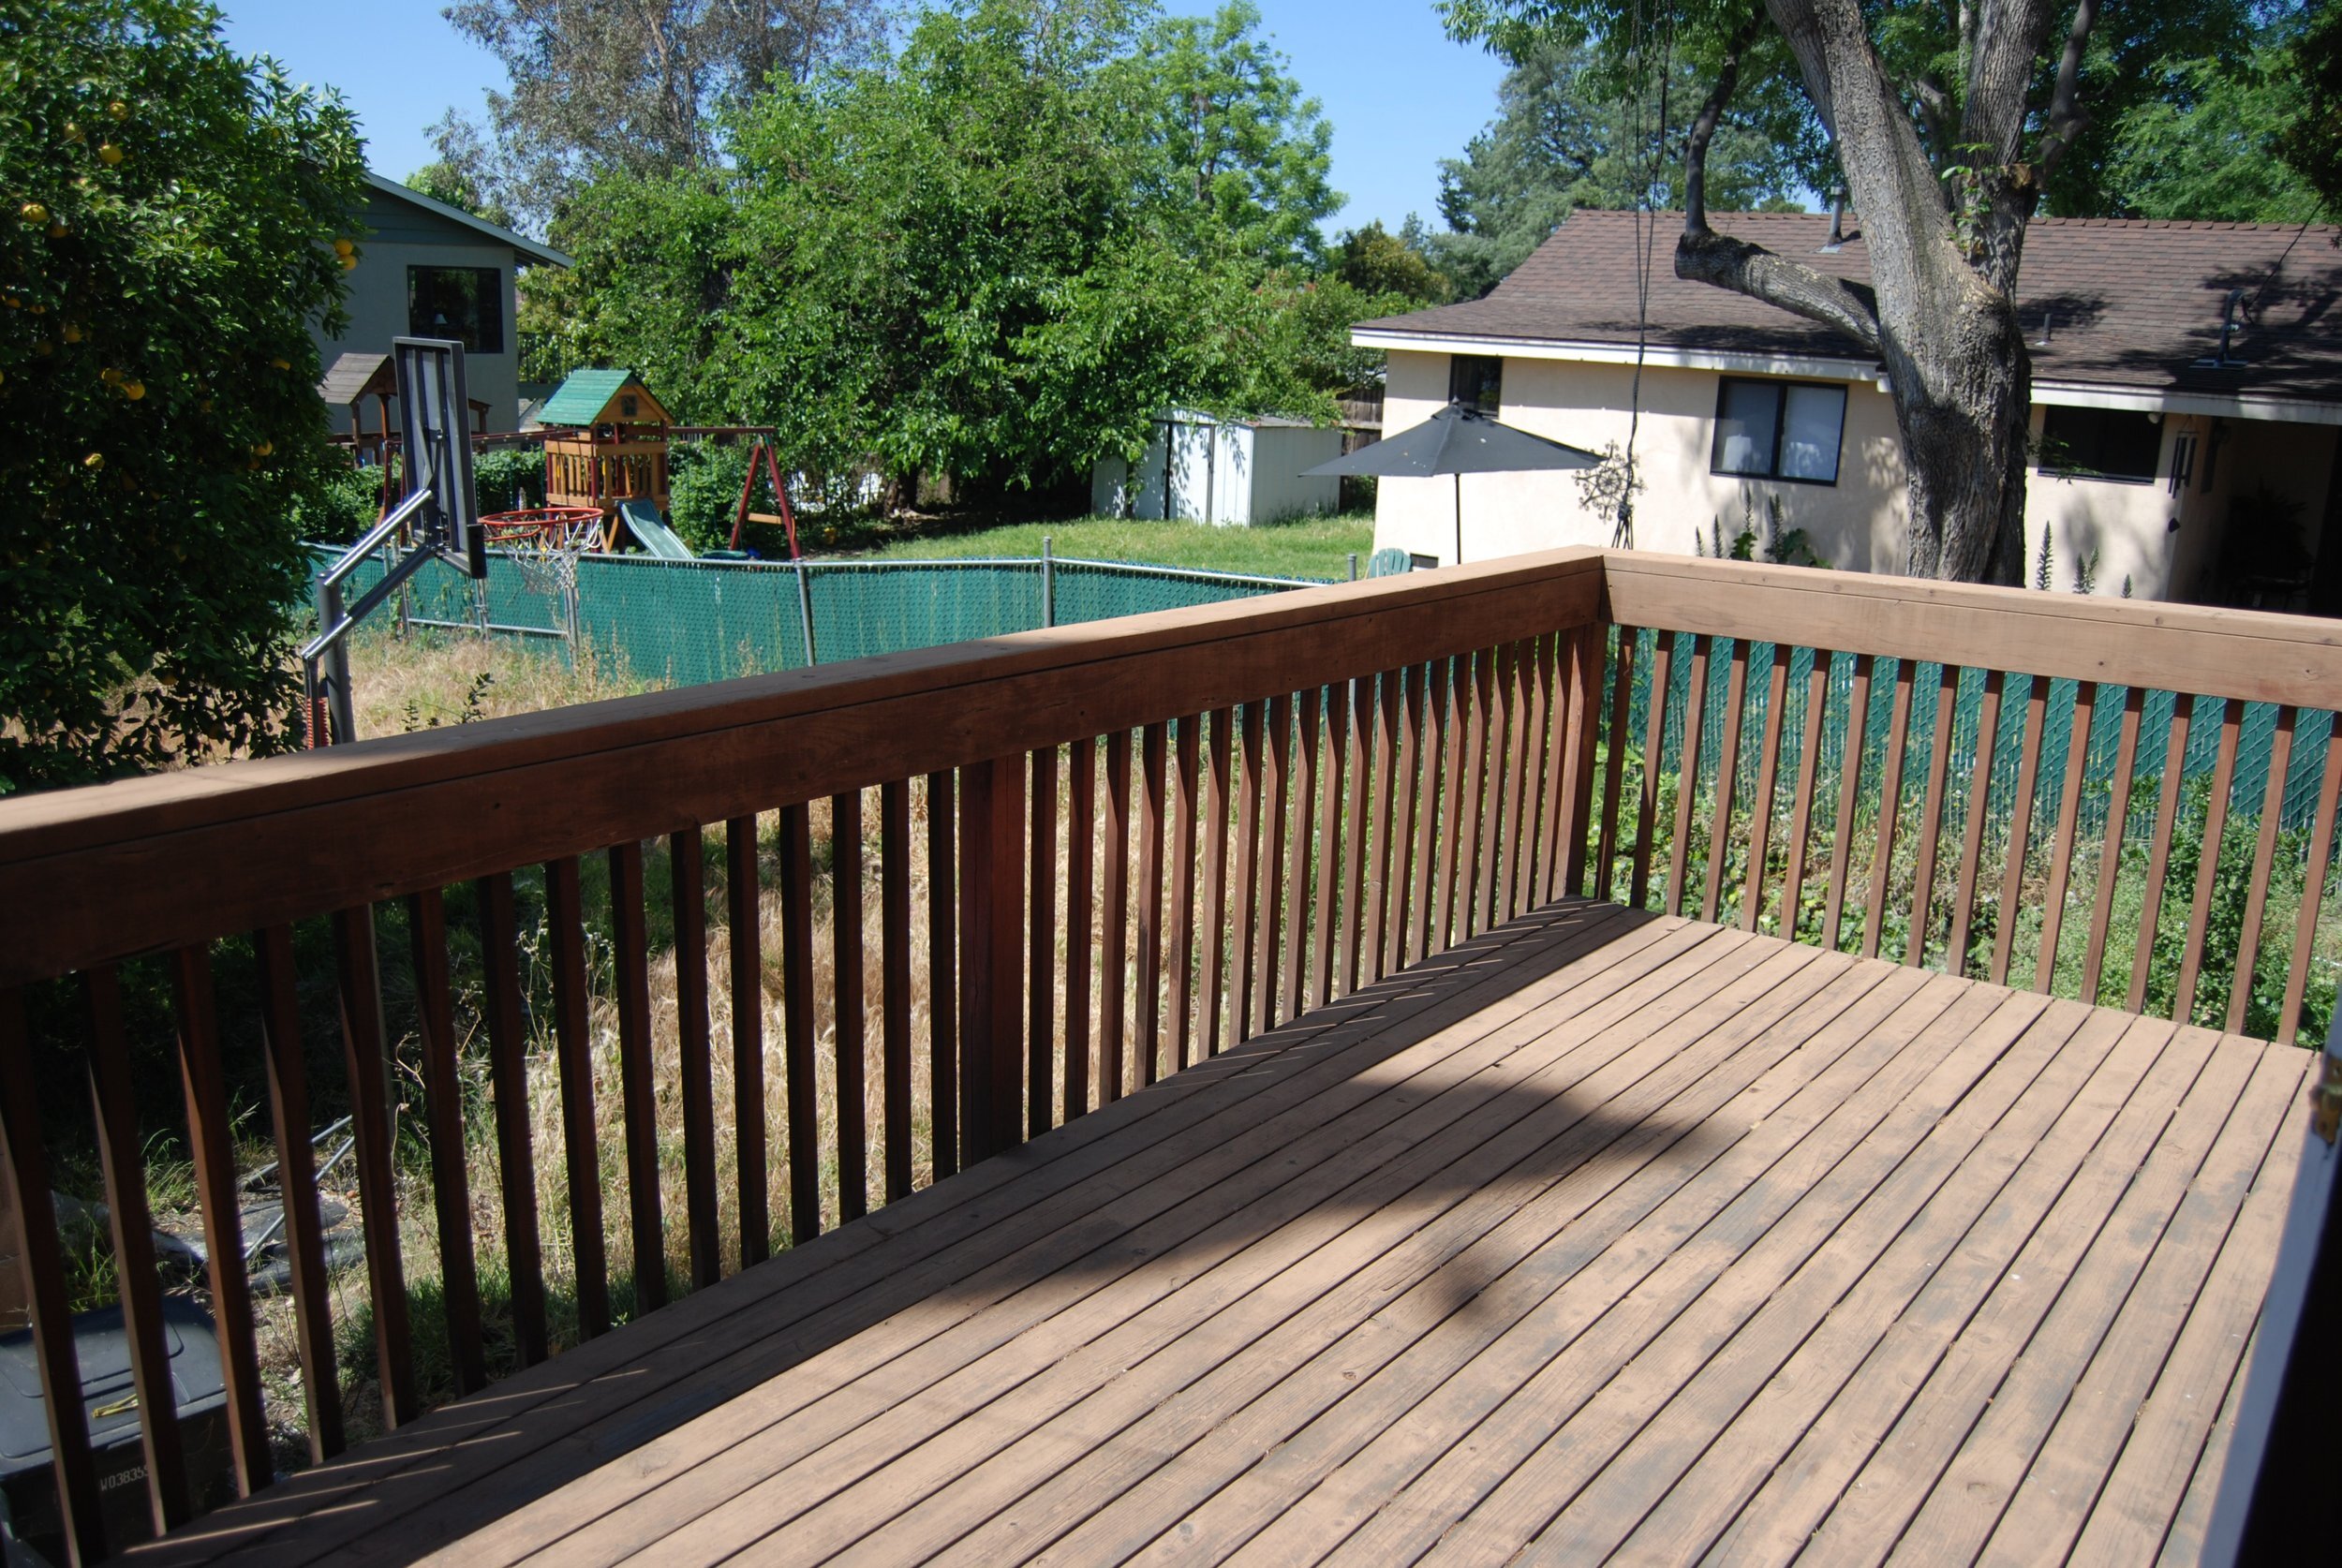
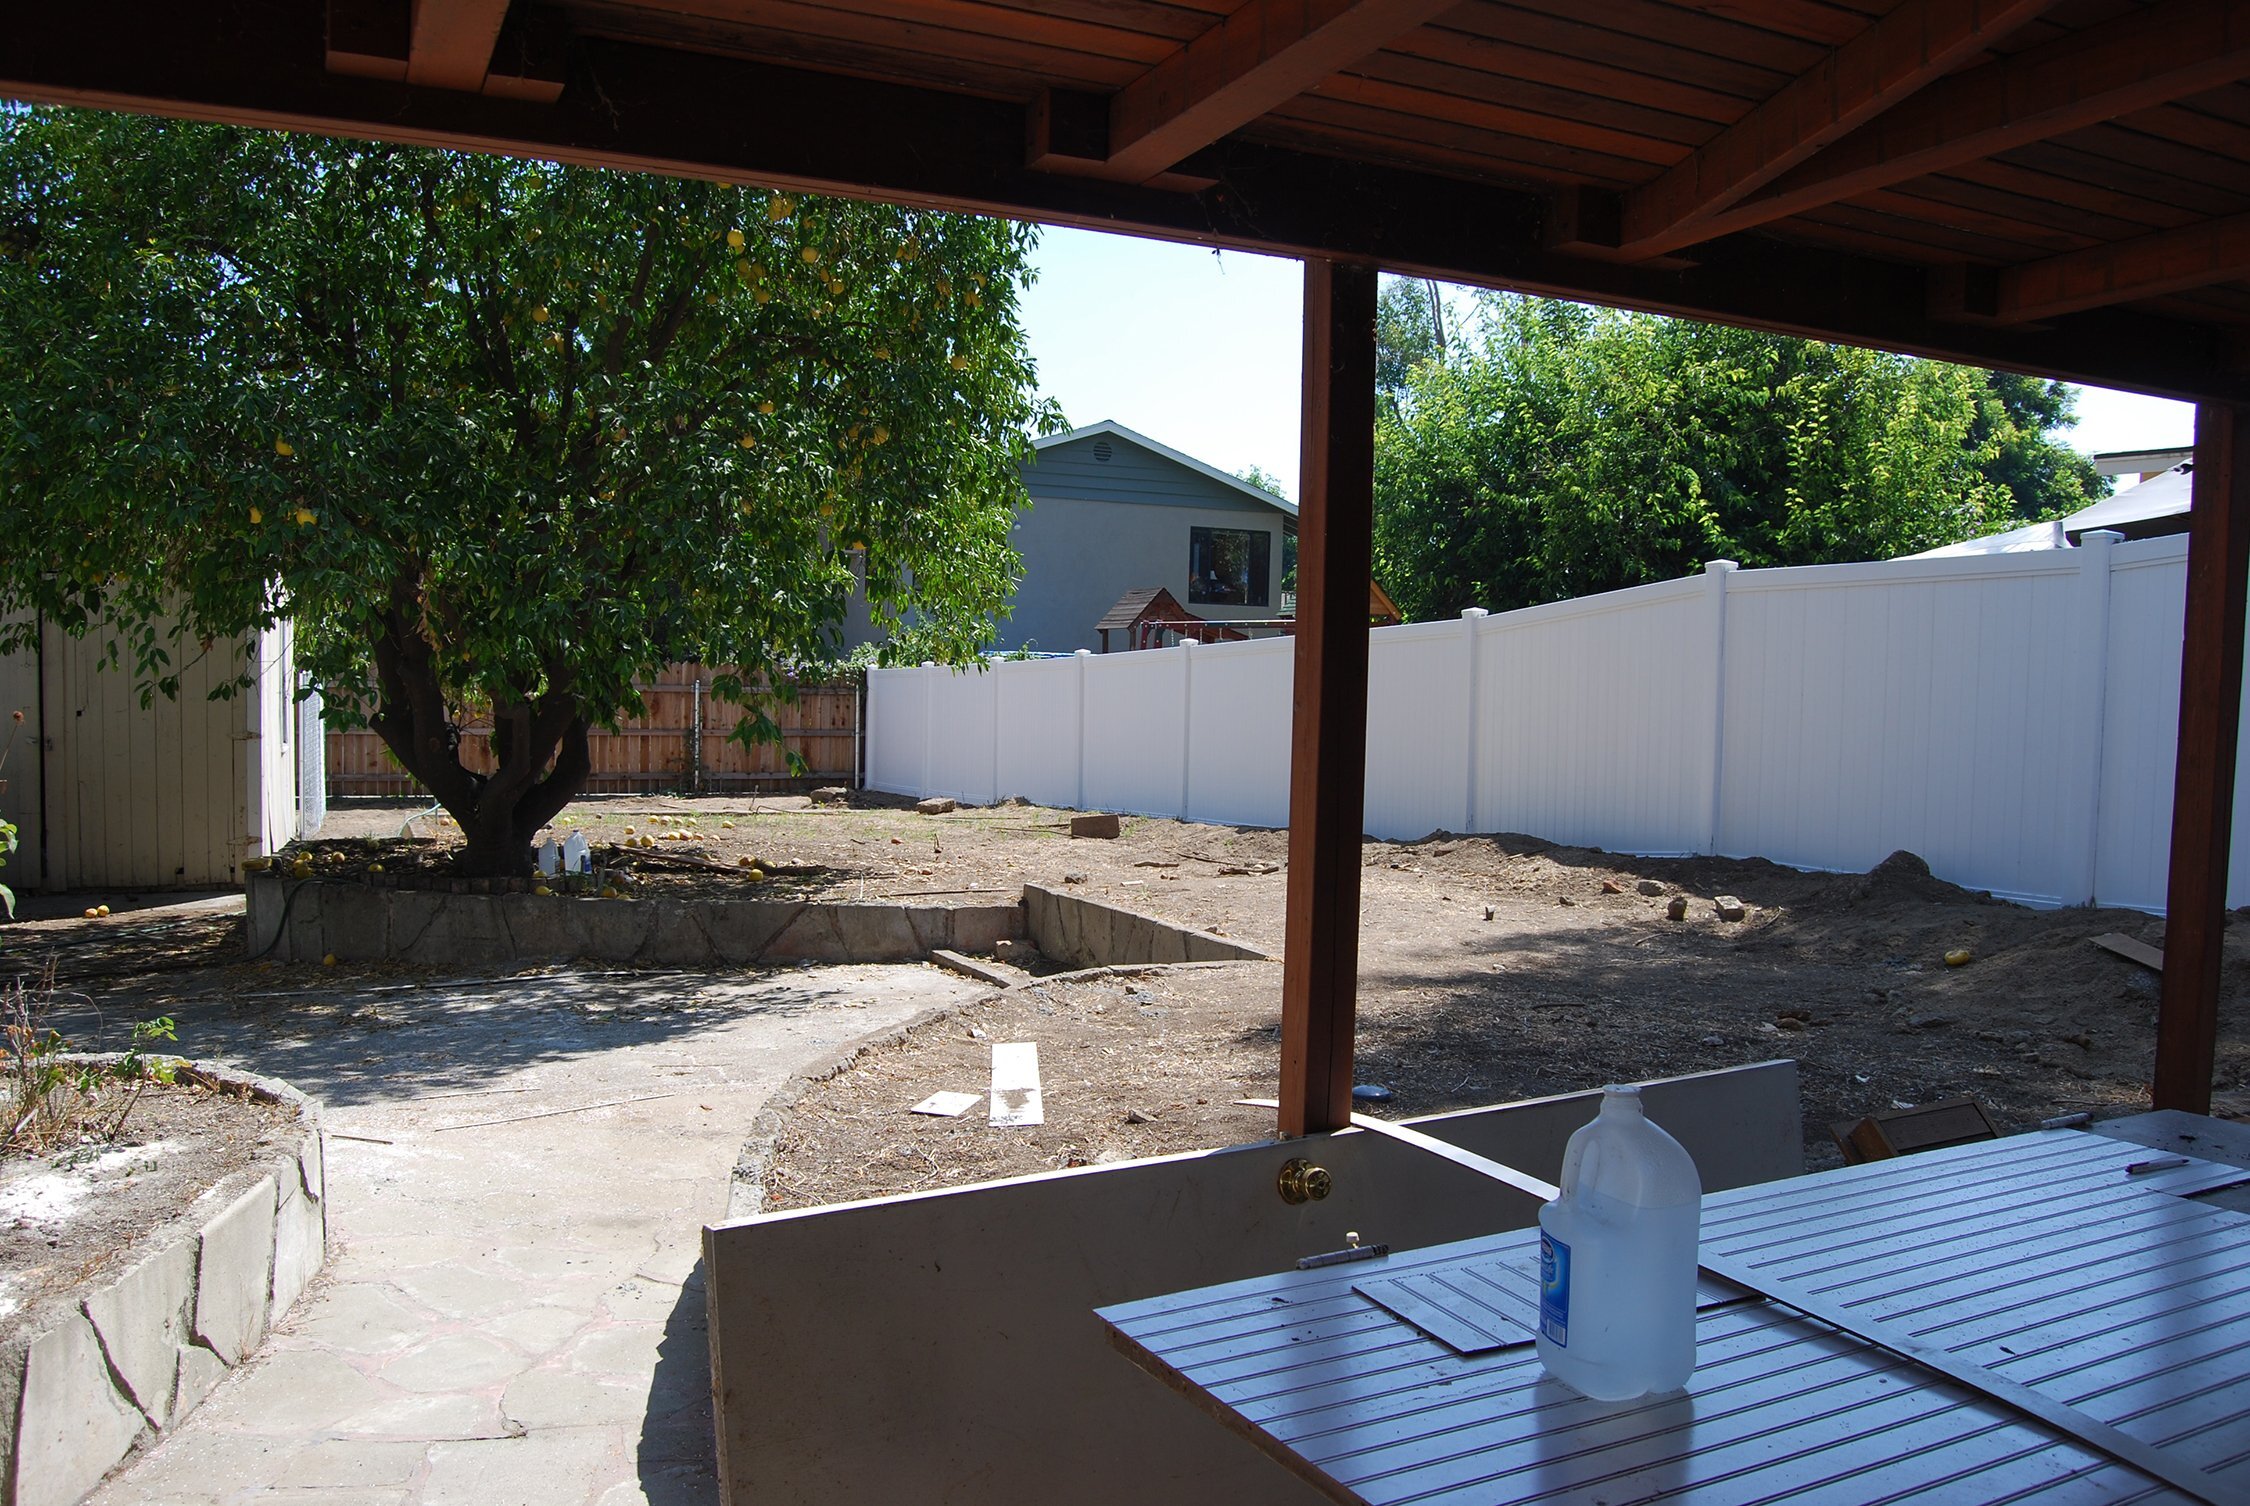
Before. The view from the deck out into the yard. (We will get to the yard fully in a subsequent post).
There is a reason why almost all my “before” photos of the deck are shot from the doorway of the house and not from ON the deck—when you stepped out onto it, it swayed so dang badly and sloped so dramatically towards the yard that we took to calling it The Deck of Death and wouldn’t allow a soul to set foot on it. For YEARS it was a total no (wo)man’s land, other than sometimes I’d creep out there to start tubs of seedlings because it had great sun exposure. LOL.
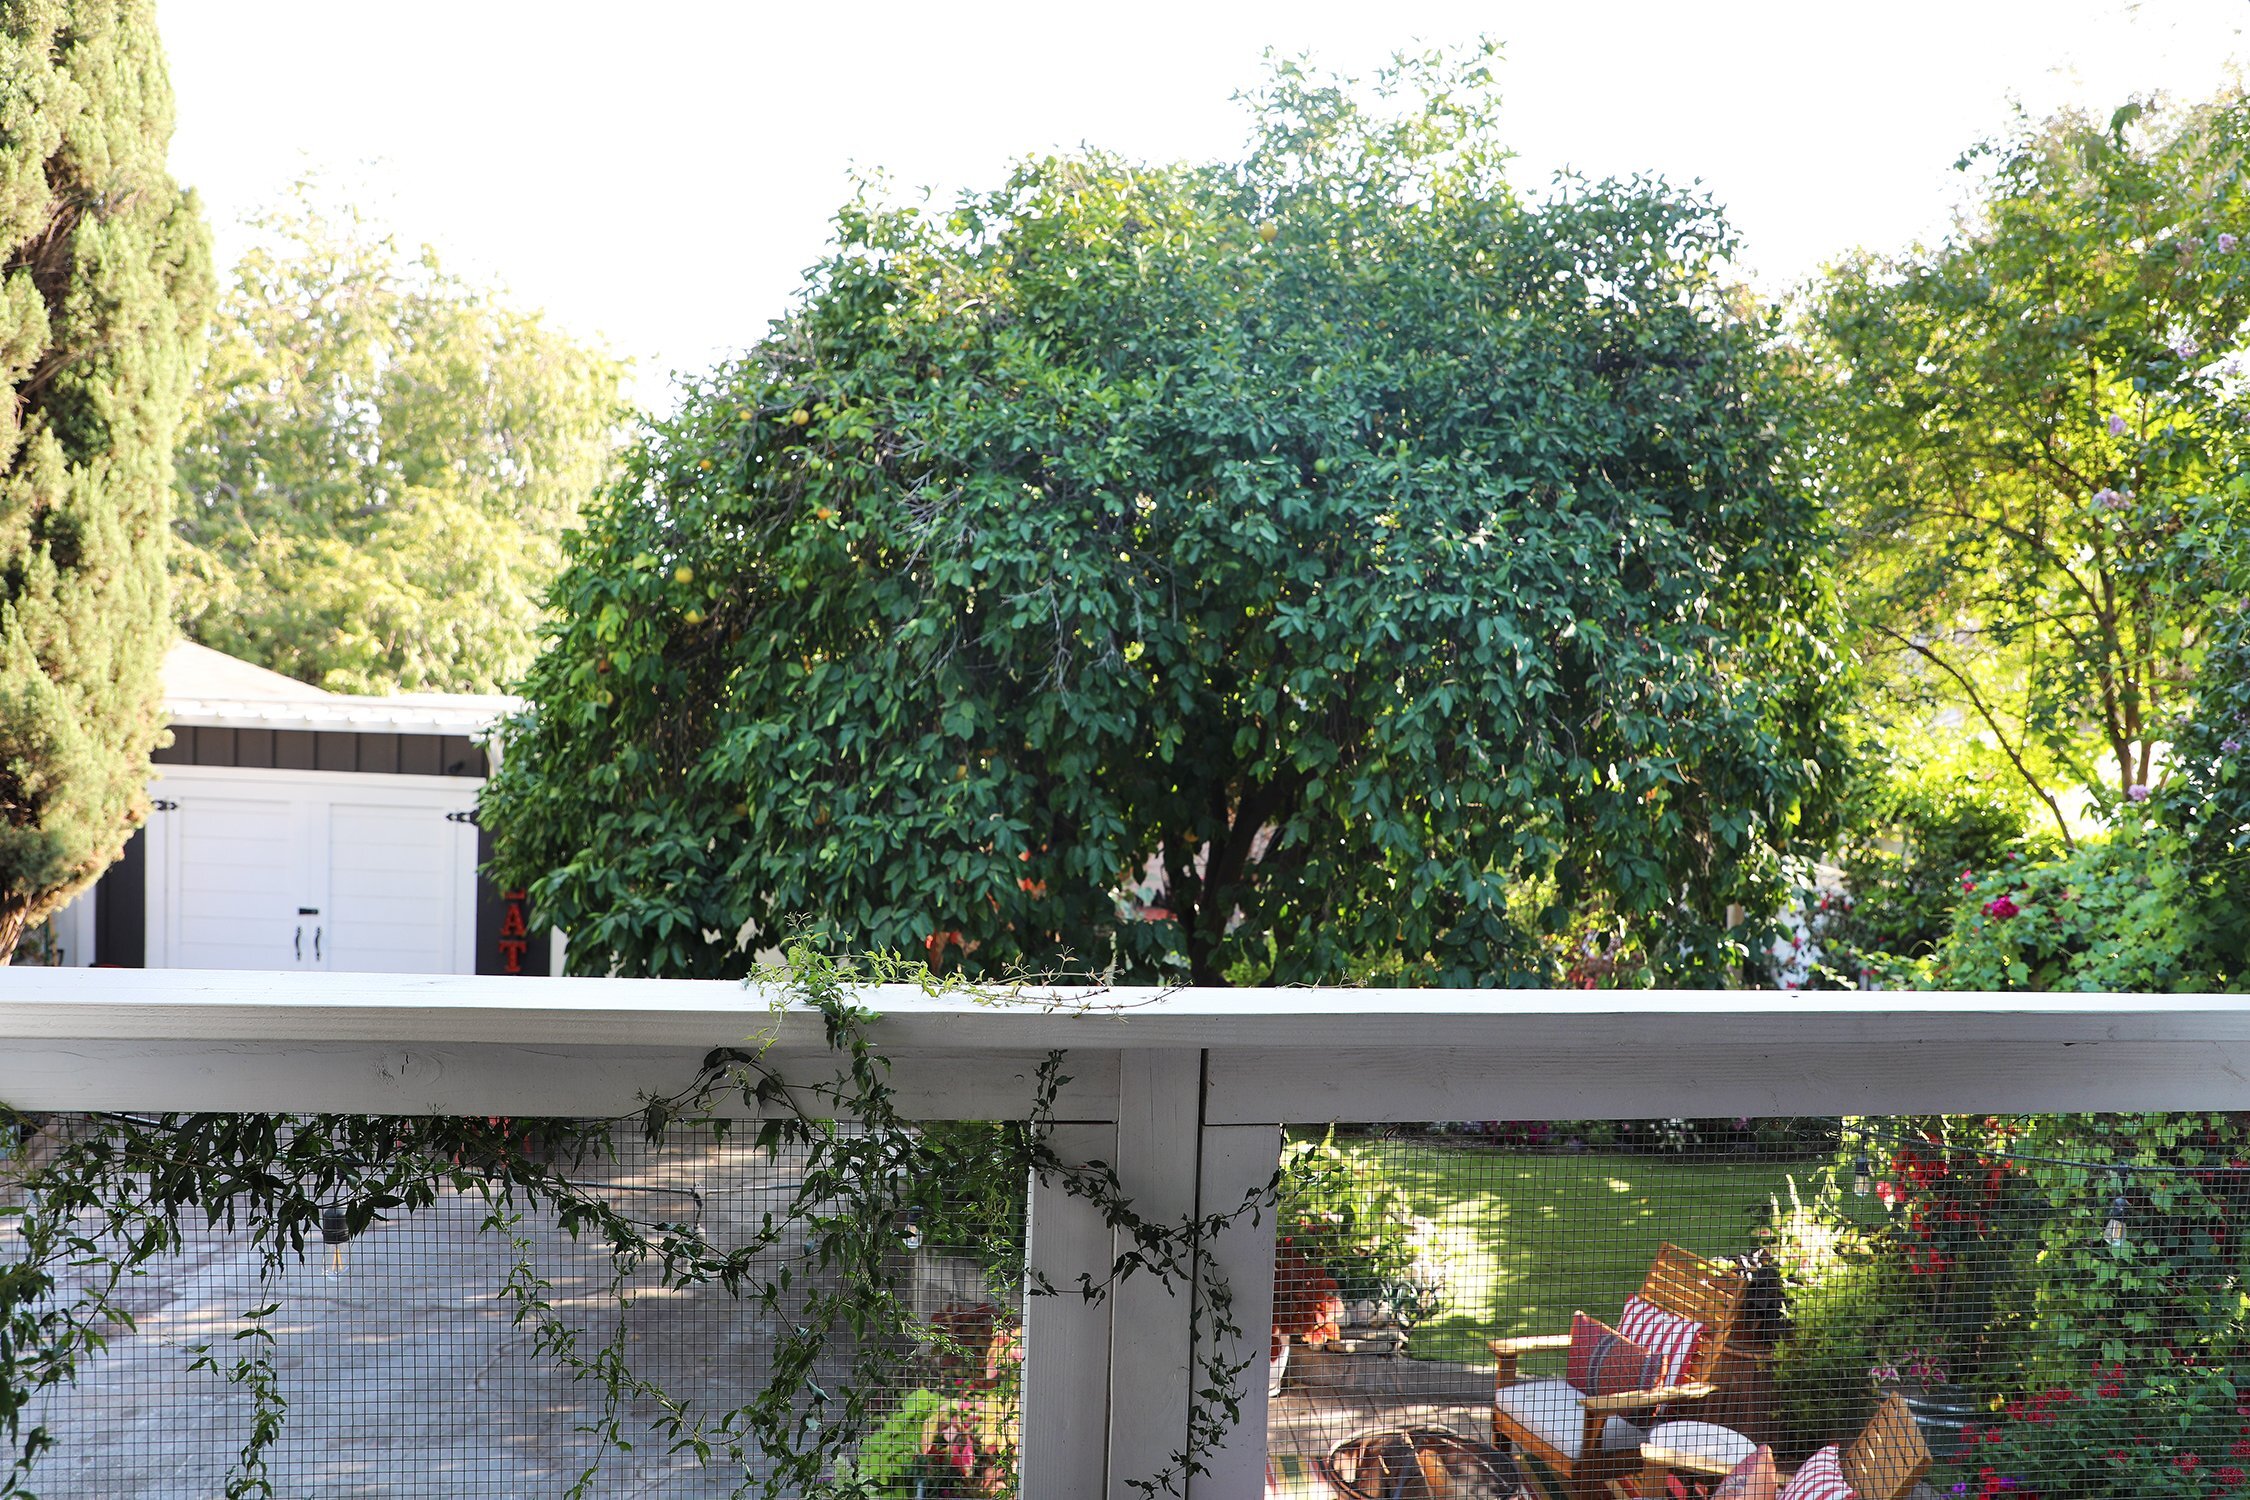
After. Same grapefruit tree in the dead center. But this photo really demonstrates how the trees and vegetation we planted along the west edge of the yard have gone a long way towards creating visual privacy from that two story house behind us, and the neighbors directly to the west.
After. We wanted to have very visually-unobtrusive railings so that we could see as much of the garden as possible, so we went with hardware cloth panels (which kind of lend themselves to the farmy vibe we were going for), which all but disappear when you’re looking at them. They also provide a great structure for our jasmine vines to grow along.
Before.

After. PRIVACY. Can I get an amen.
When we did finally get around to starting demo on the old deck, we came to realize that it was actually hanging on by a literal thread. Only one screw attached the entire structure to the house (though it appeared as though it was fully attached across the span of the structure). We probably should not have been walking on it at all. Spoiler alert: WE SURVIVED THE DECK OF DEATH.

Before. The door into the original family room/kitchen situation. Welcoming, right?
After. Double french doors into the kitchen, and a single french door into the primary suite.
After.
Yet again, my “before” photography skills were cringingly abysmal 13 years ago. I definitely didn’t take enough photos! In fact…I barely took any, at all. But in my defense, having a blog where I’d need to show the before and after process was not even remotely on my radar. I don’t think I even knew what a blog was at that time.
SO. I will just have to use my words (THE HORROR!).
In a nutshell, the old deck was falling down. It was also fairly small, in the entire scheme of things. It was, however, made fully out of redwood, so when we tore it down, we actually used all that wood to build our raised garden beds (more on that in a future post). It had a set of very crooked stairs that poked awkwardly out perpendicular to the driveway.

Before. (A soft “before” as we had started landscaping work in the yard at this point).
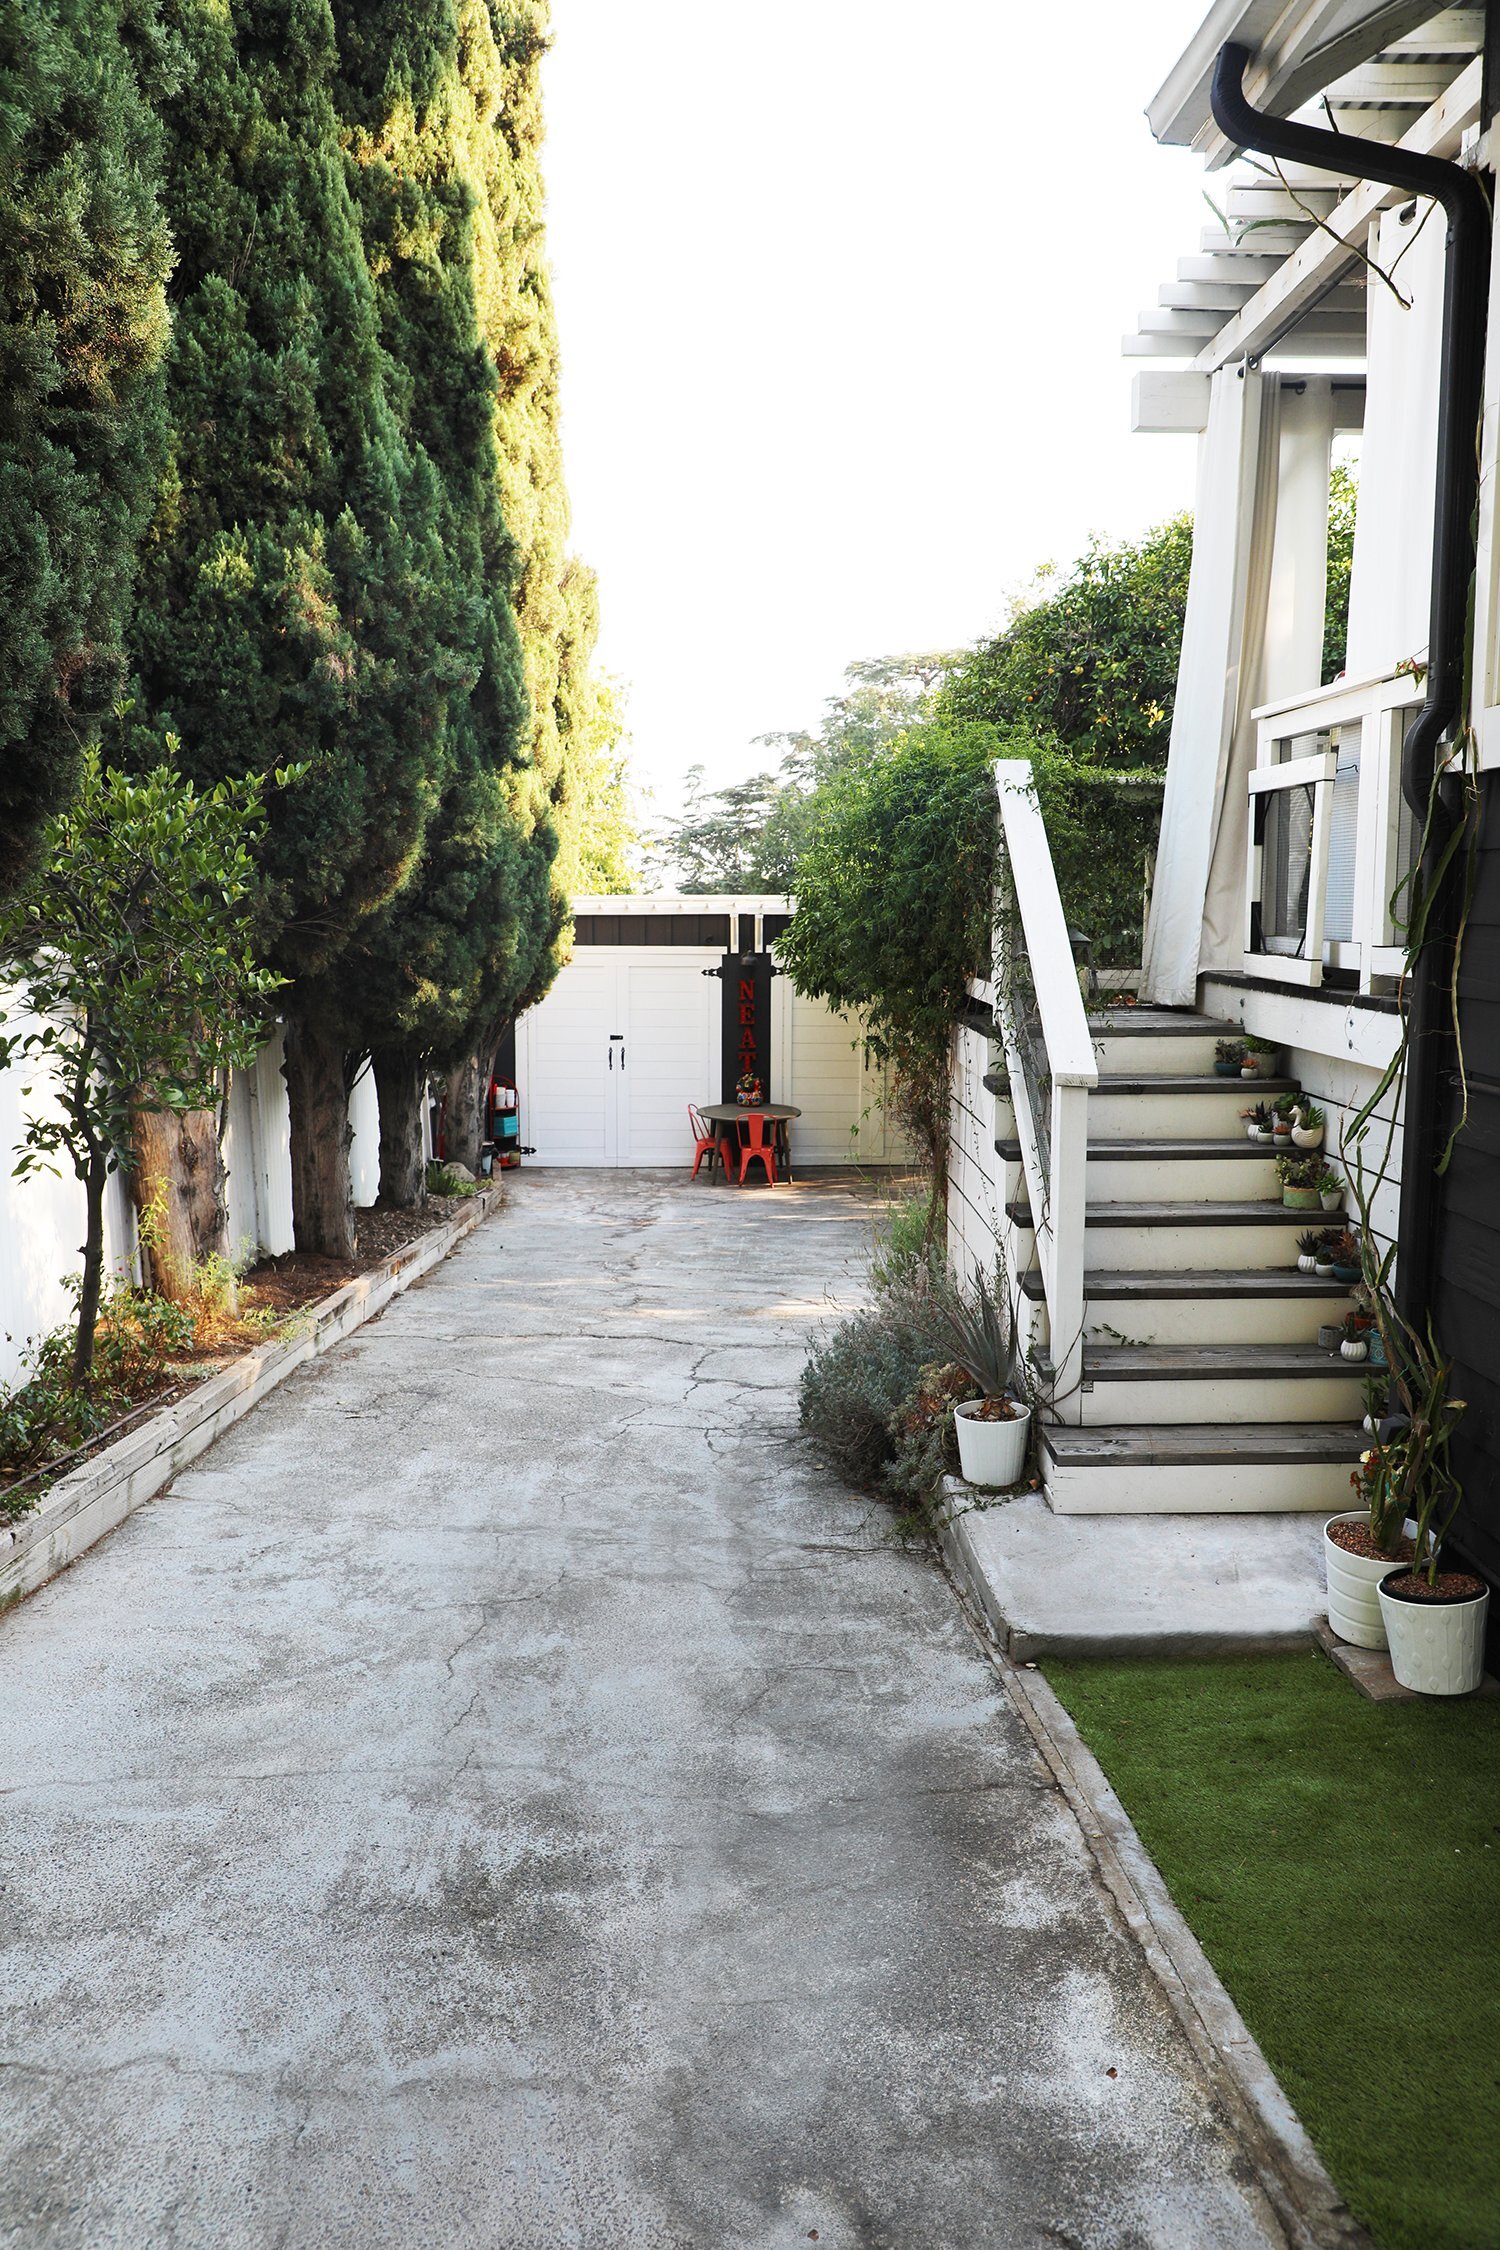
After. Please note the very enviable “aged asphalt” finish on our driveway. It’s very special. You know you want your driveway to look just like this.
We rebuilt the deck to span the width of the house, and changed the orientation of the stairs so that they ran parallel to the deck and driveway, effectively allowing for more useable deck space than the old perpendicular stairs.
Here’s a great before shot of that general stair/driveway area, although there is so much overgrowth that you can’t even see the stairs or the deck. They’re down there somewhere, I swear! Just beyond the abandoned shower stall and before the abandoned pallets of cinder blocks.

Before. Yes. That IS, indeed, a shower stall just tossed casually onto the driveway. It’s weird that the real estate listing didn’t mention an outdoor shower.
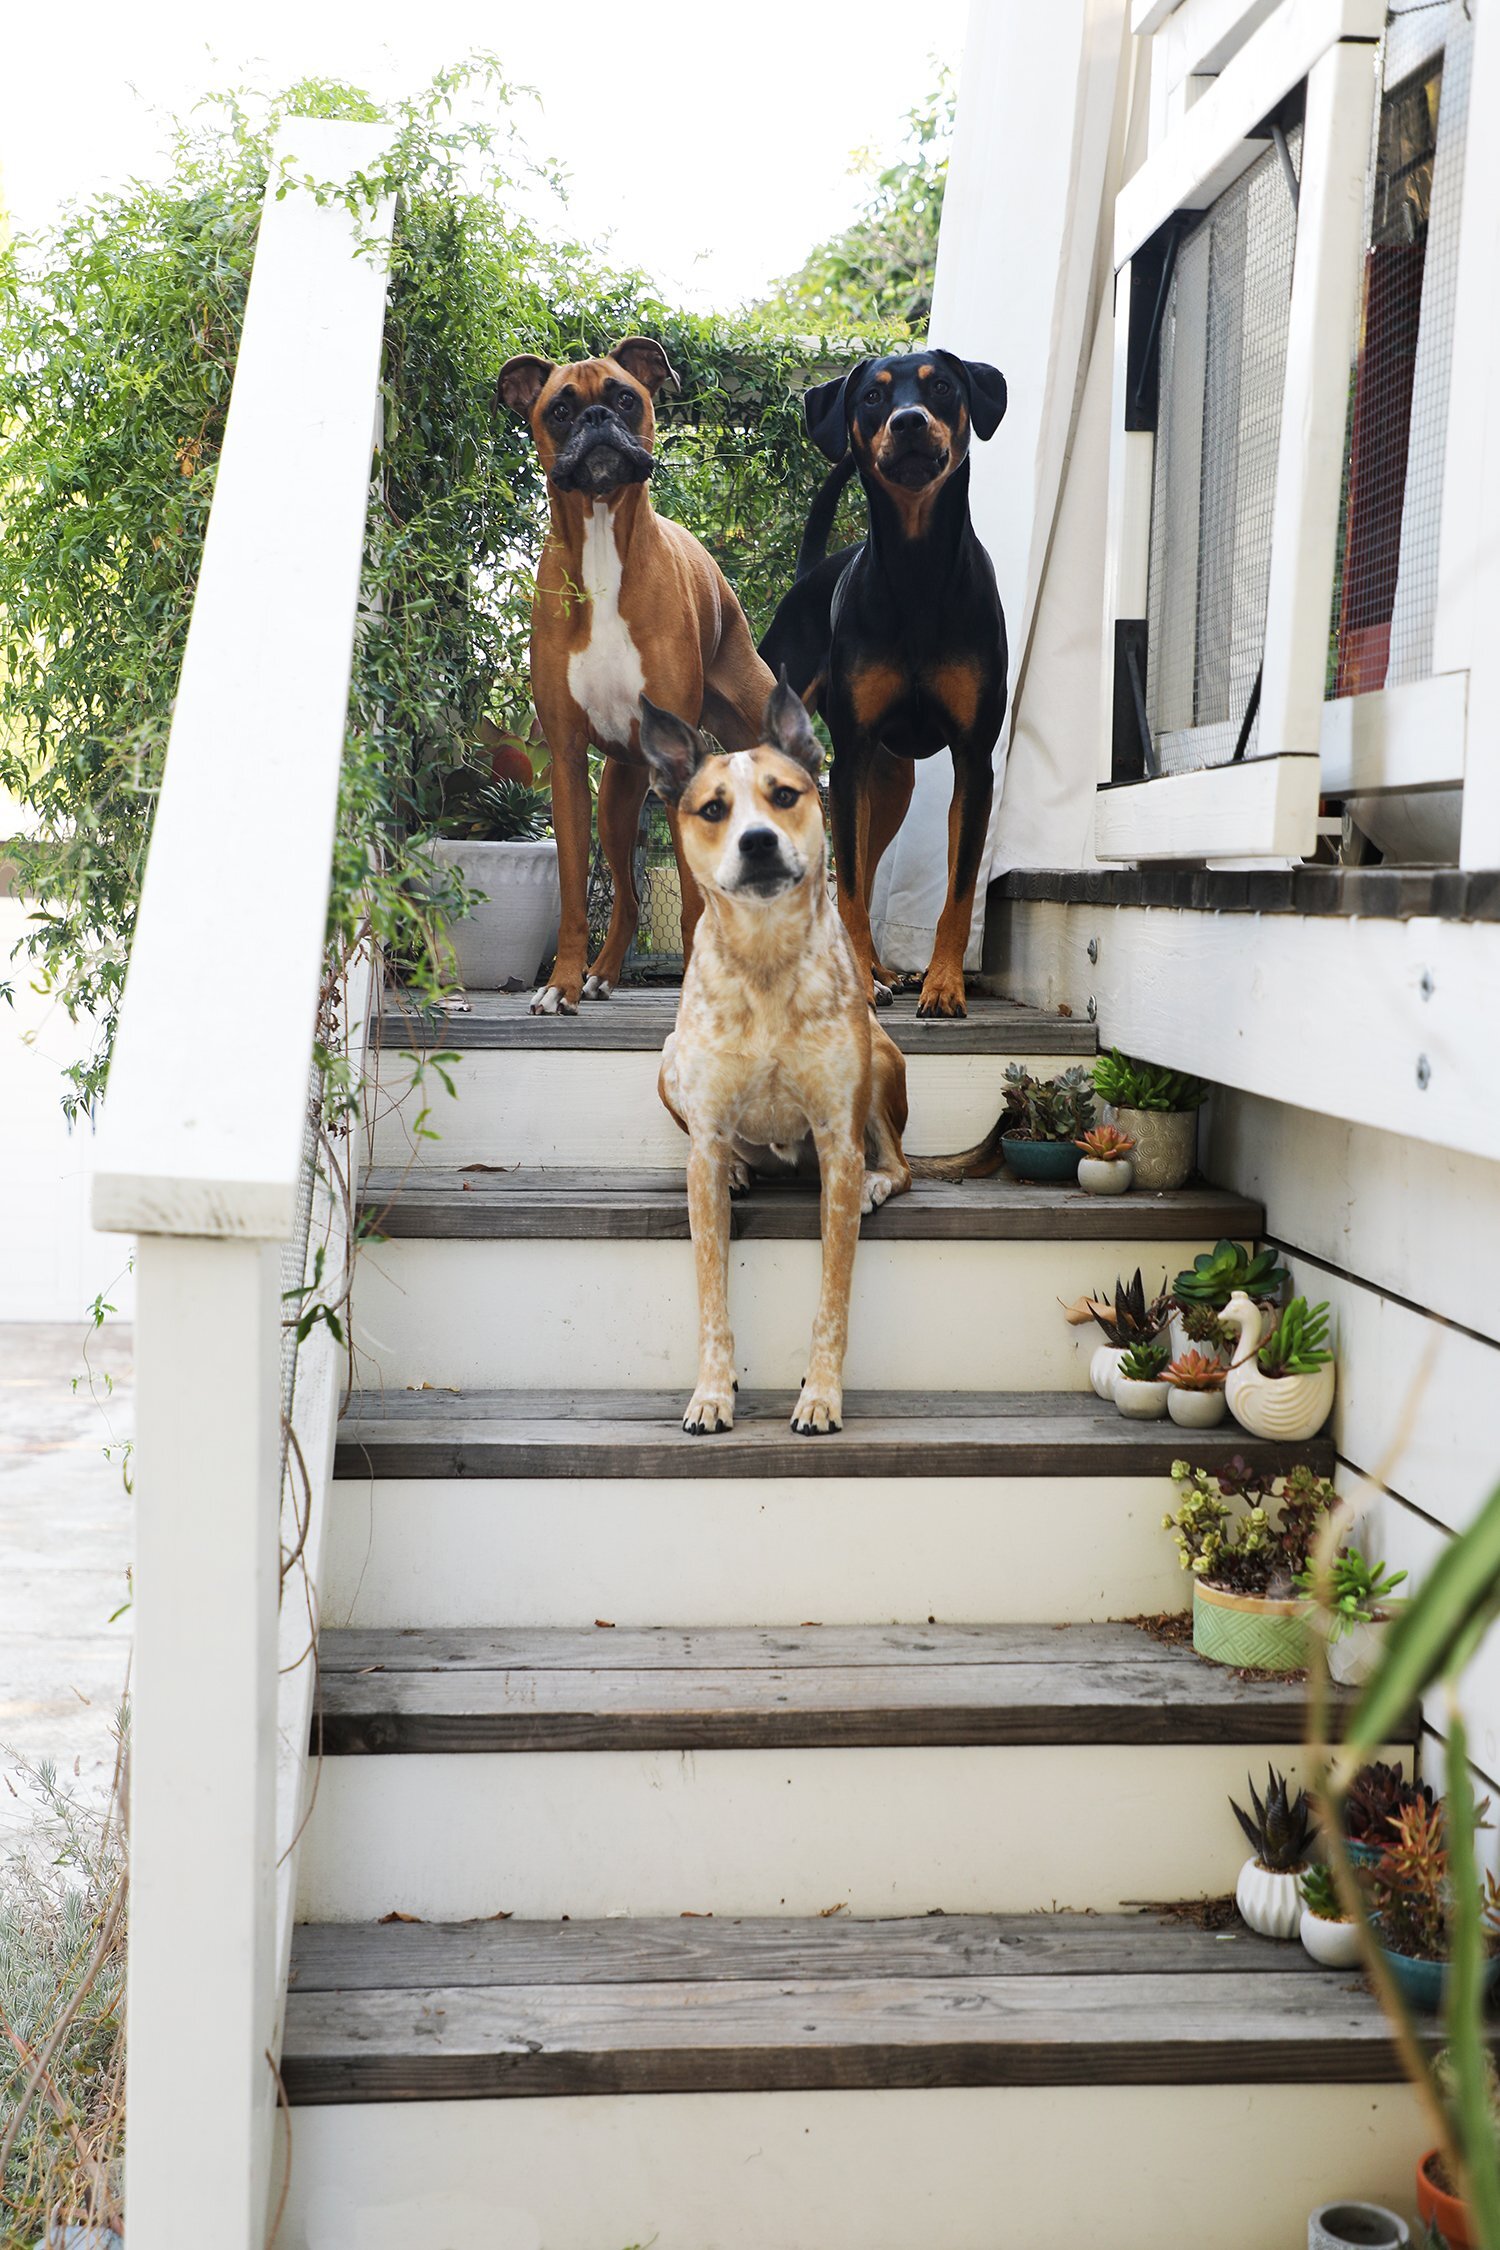
After. The new stairs are wider, sturdier, and perfectly placed so that if the dogs sit at the top they can just see over the front driveway fence and bark at anyone walking in front of our house. Which was about to happen here.
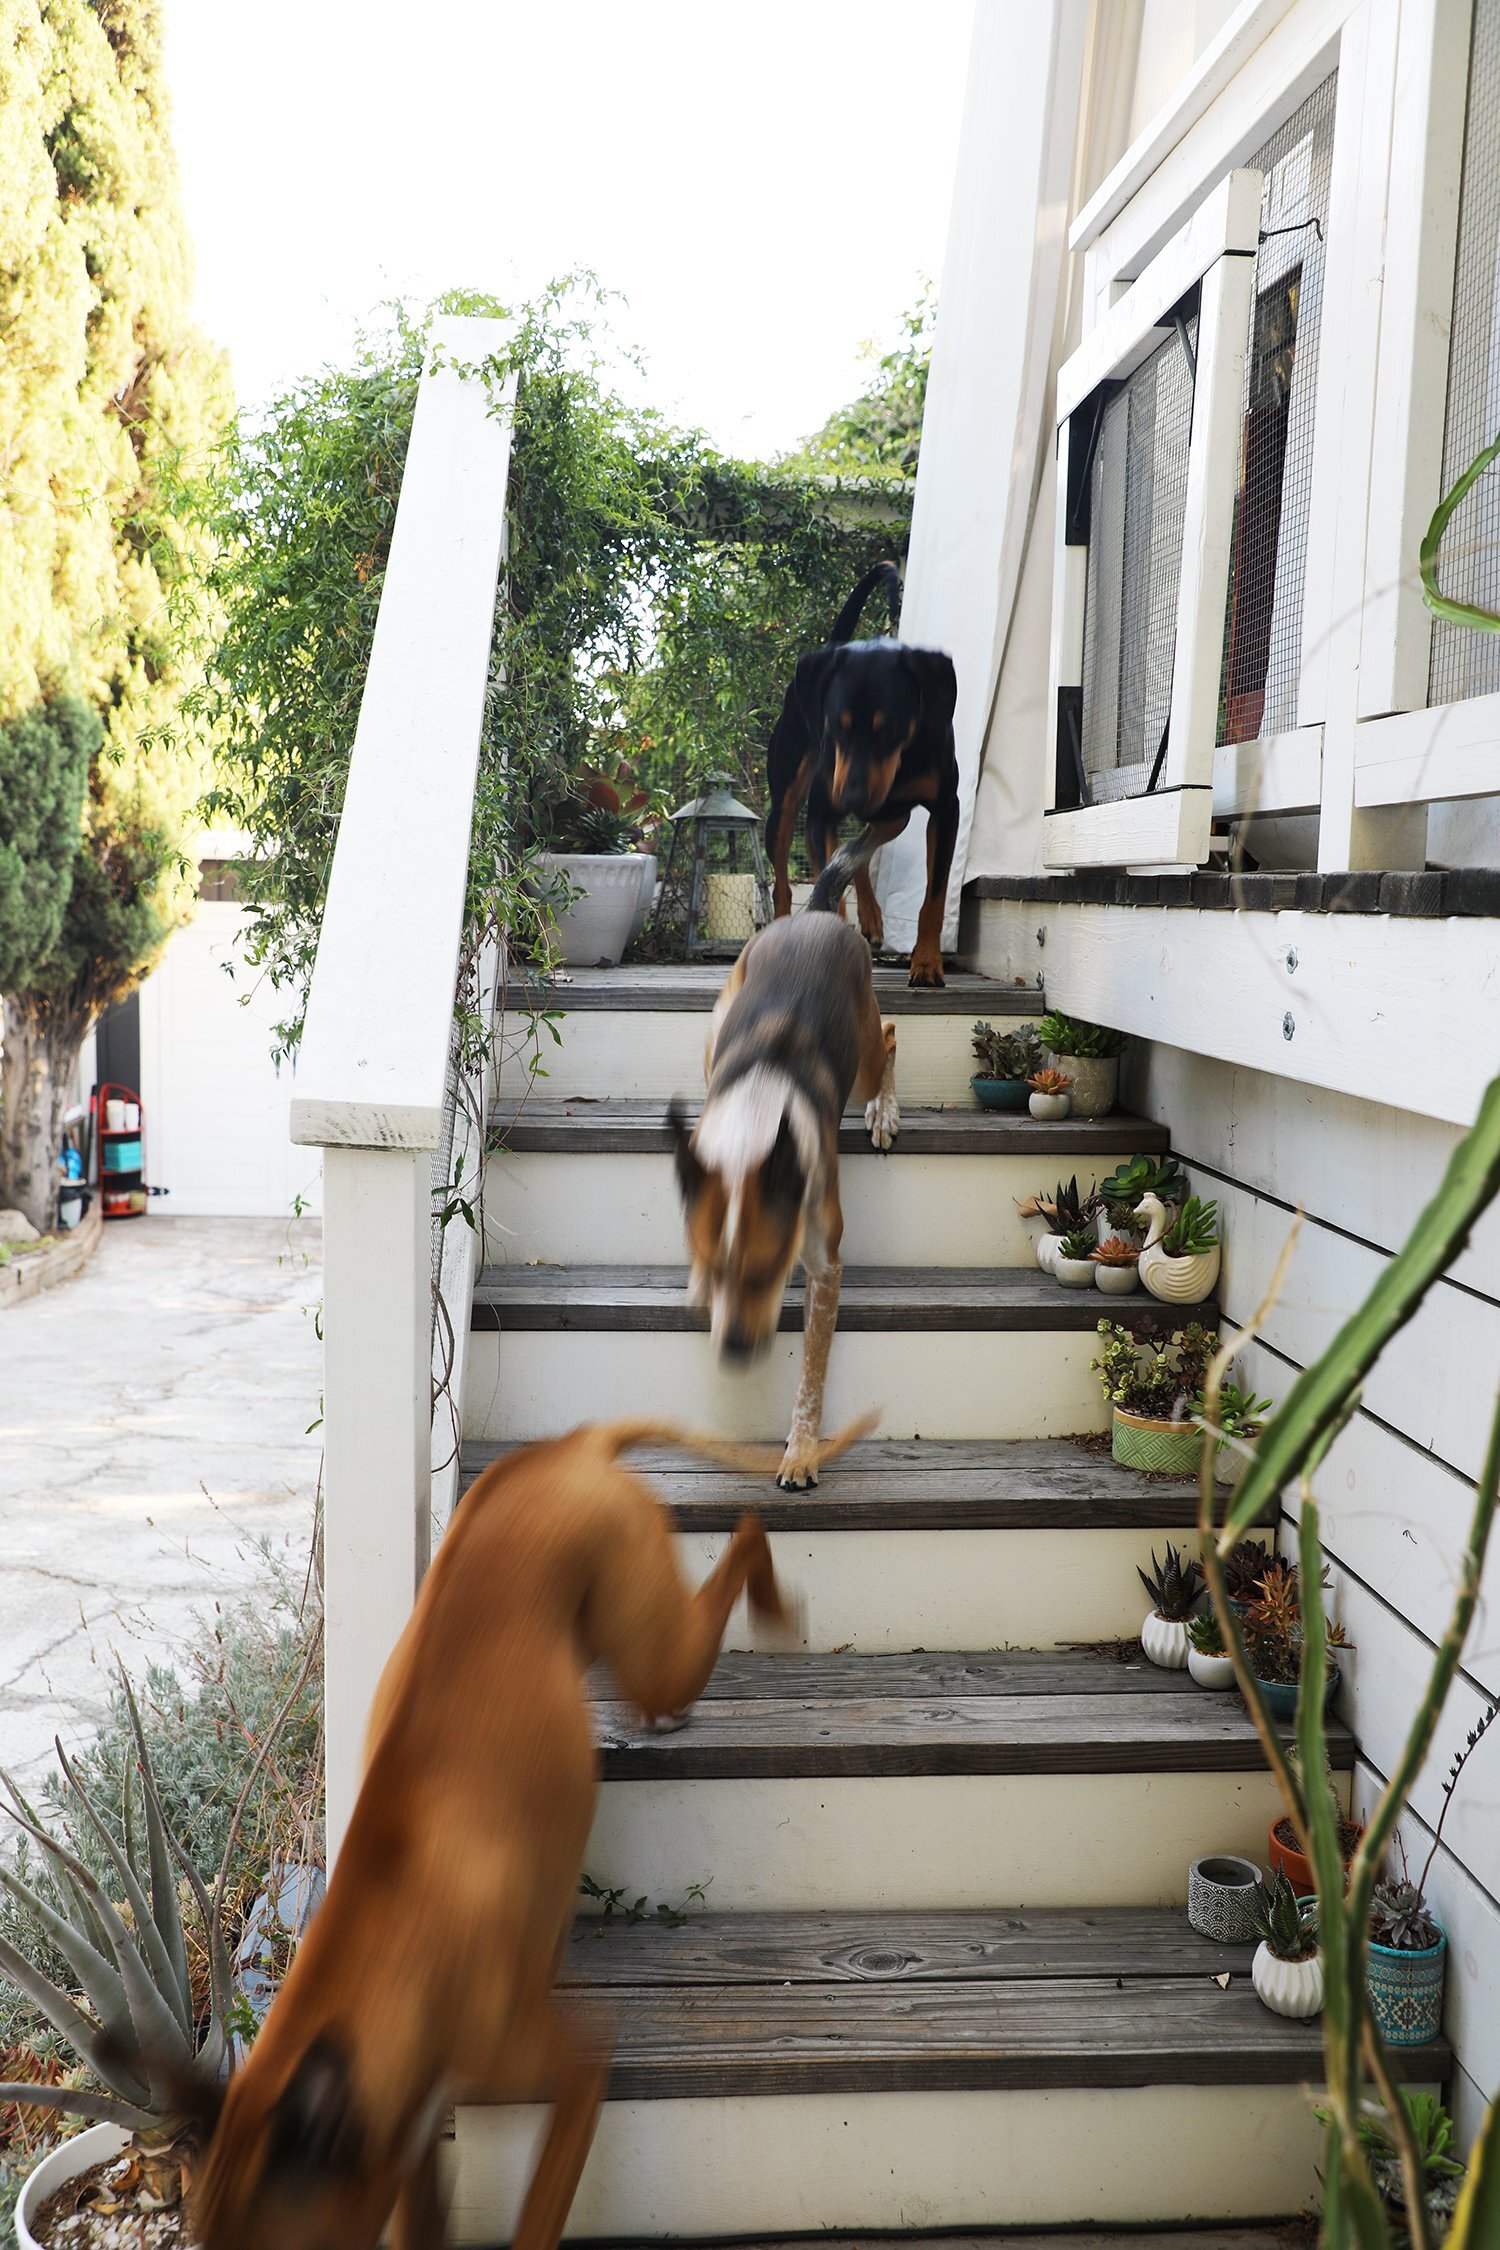
After. Immediately following said over-the-gate-viewing of people walking on the sidewalk in front of our house, and now they are barking and running and barking up the driveway to keep barking some more at the gate.
Before.

After. Same house. Different deck. Different doggies. Same cracked driveway.
We made the new deck span the full width of the house, as well as making it deeper so that it fully enclosed the downstairs patio area, too. Originally, we built it with just a pergola structure over the top, but eventually closed the roof up with corrugated metal to make it a fully functioning all-season “room”. Well, make that two rooms (one up, one down).
After.
On the west side of our house, we were just staring awkwardly down into our neighbors’ house and yard, plus our neighbors also have dogs, so you can probably figure out how that worked. Our dogs and their dogs were having lots of very loud conversations. So we decided to put up a privacy screen/slatted wall with trailing houseplants growing all over it (plus some jasmine vine that creeps up from the yard). This not only affords everyone some privacy and cuts off all the dogs’ clear sight lines, it also helps me feel a little more secure that one of our dogs isn’t going to try to leap down into our neighbors’ yard to further the dog conversations (ROOSTER, I’M LOOKING AT YOU).

After. Rooster staring hard through said privacy screen at the neighbors.

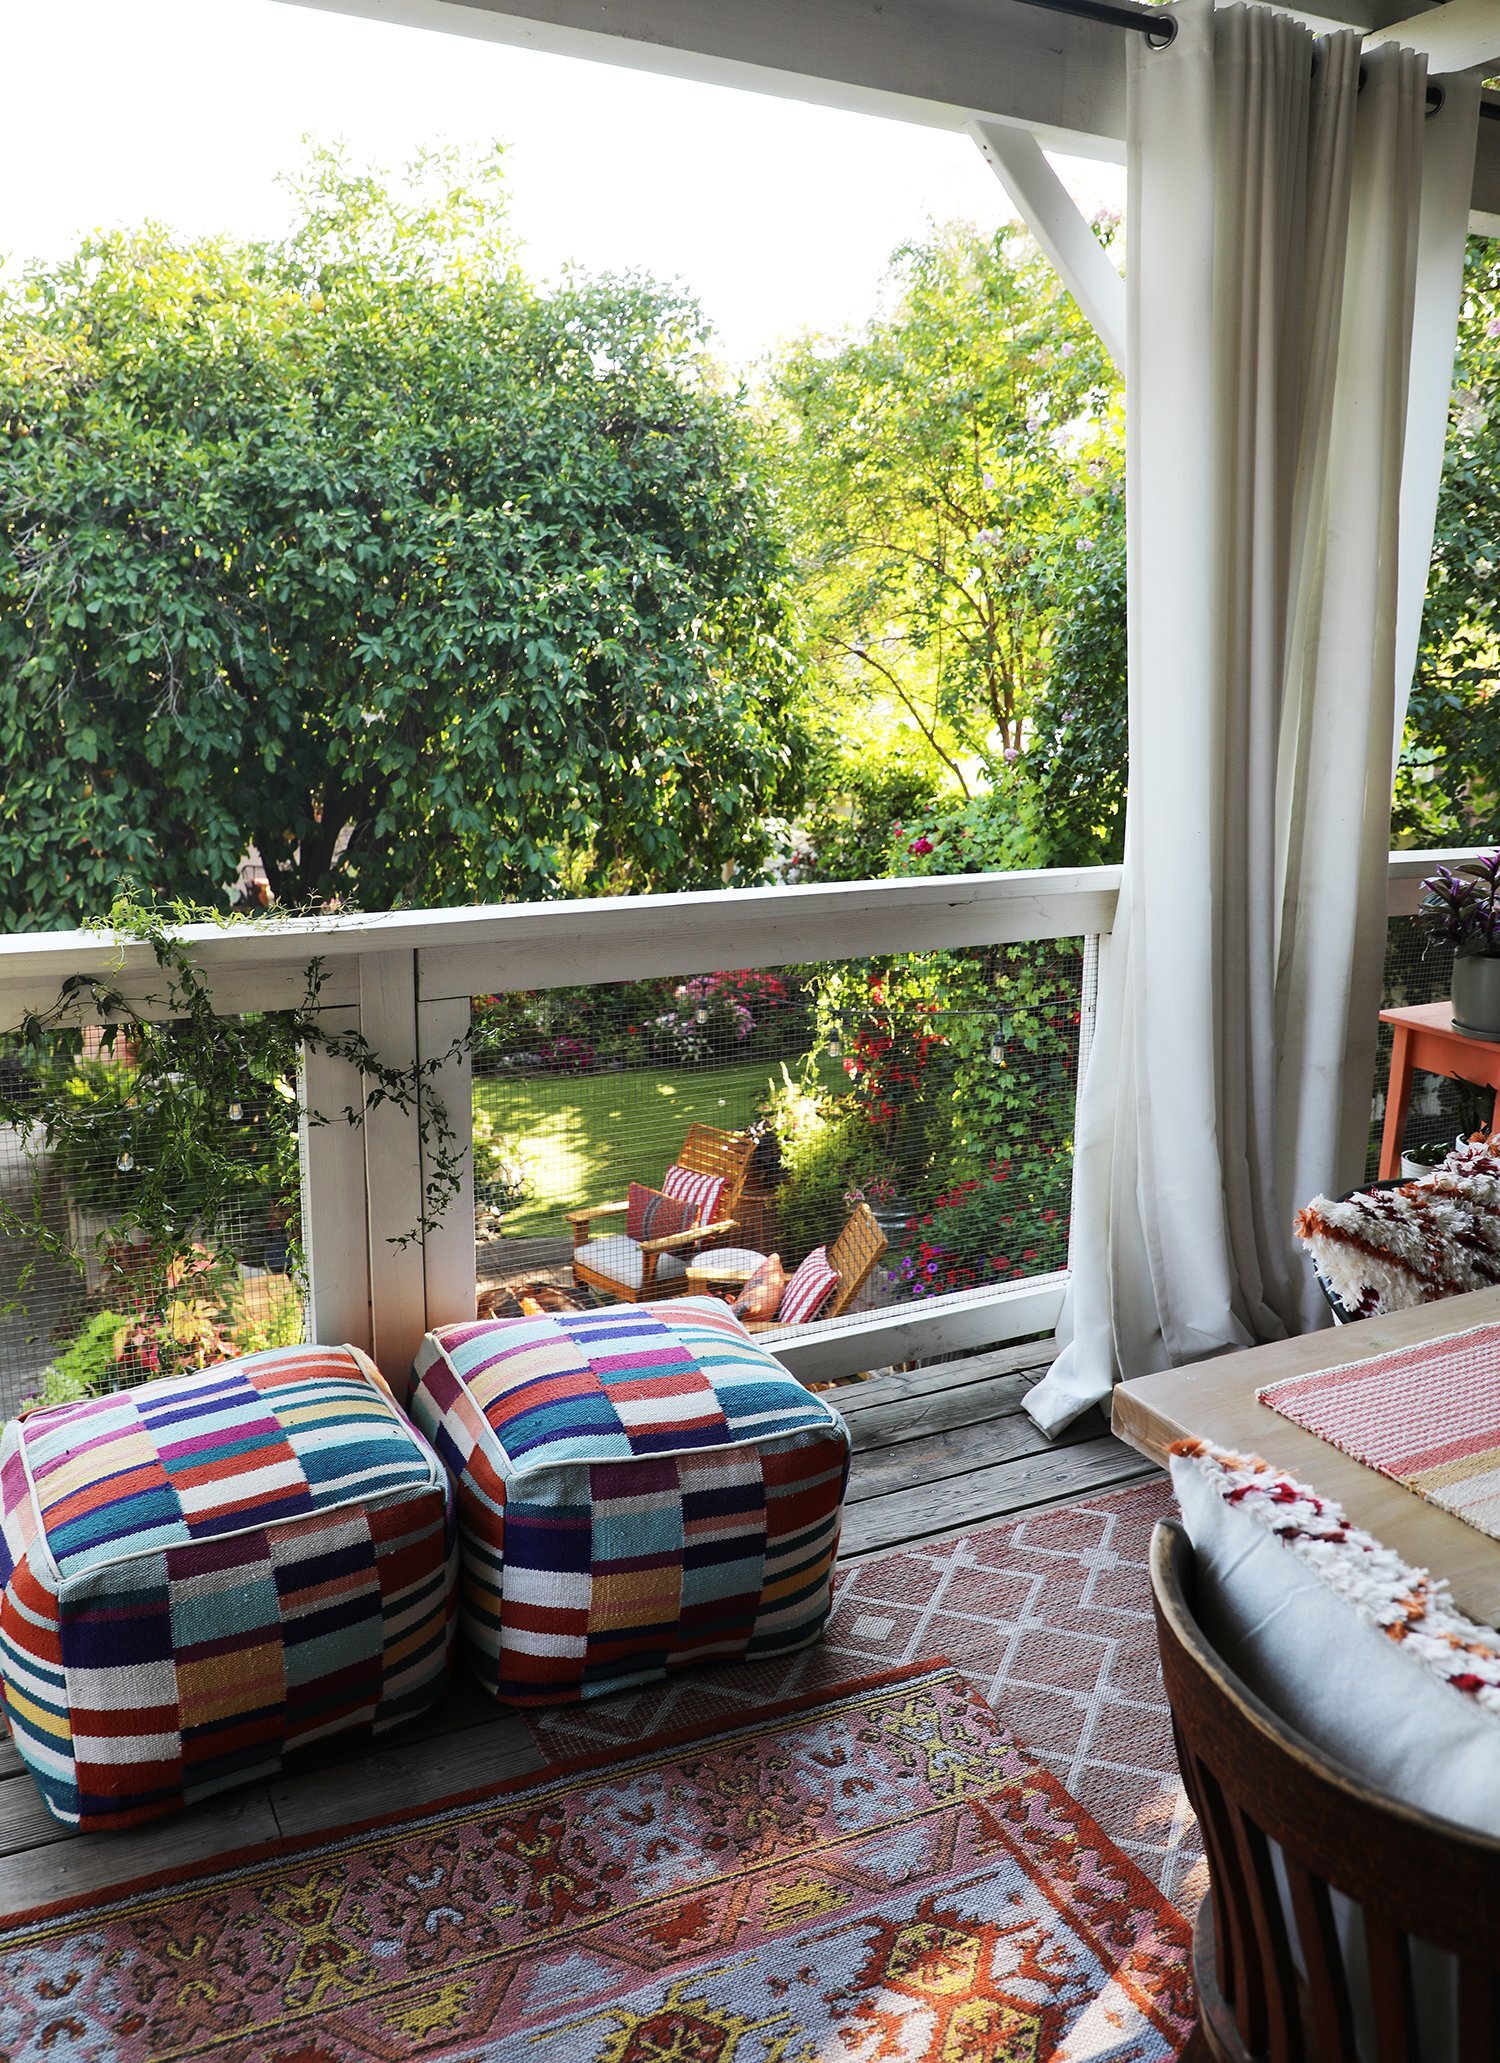
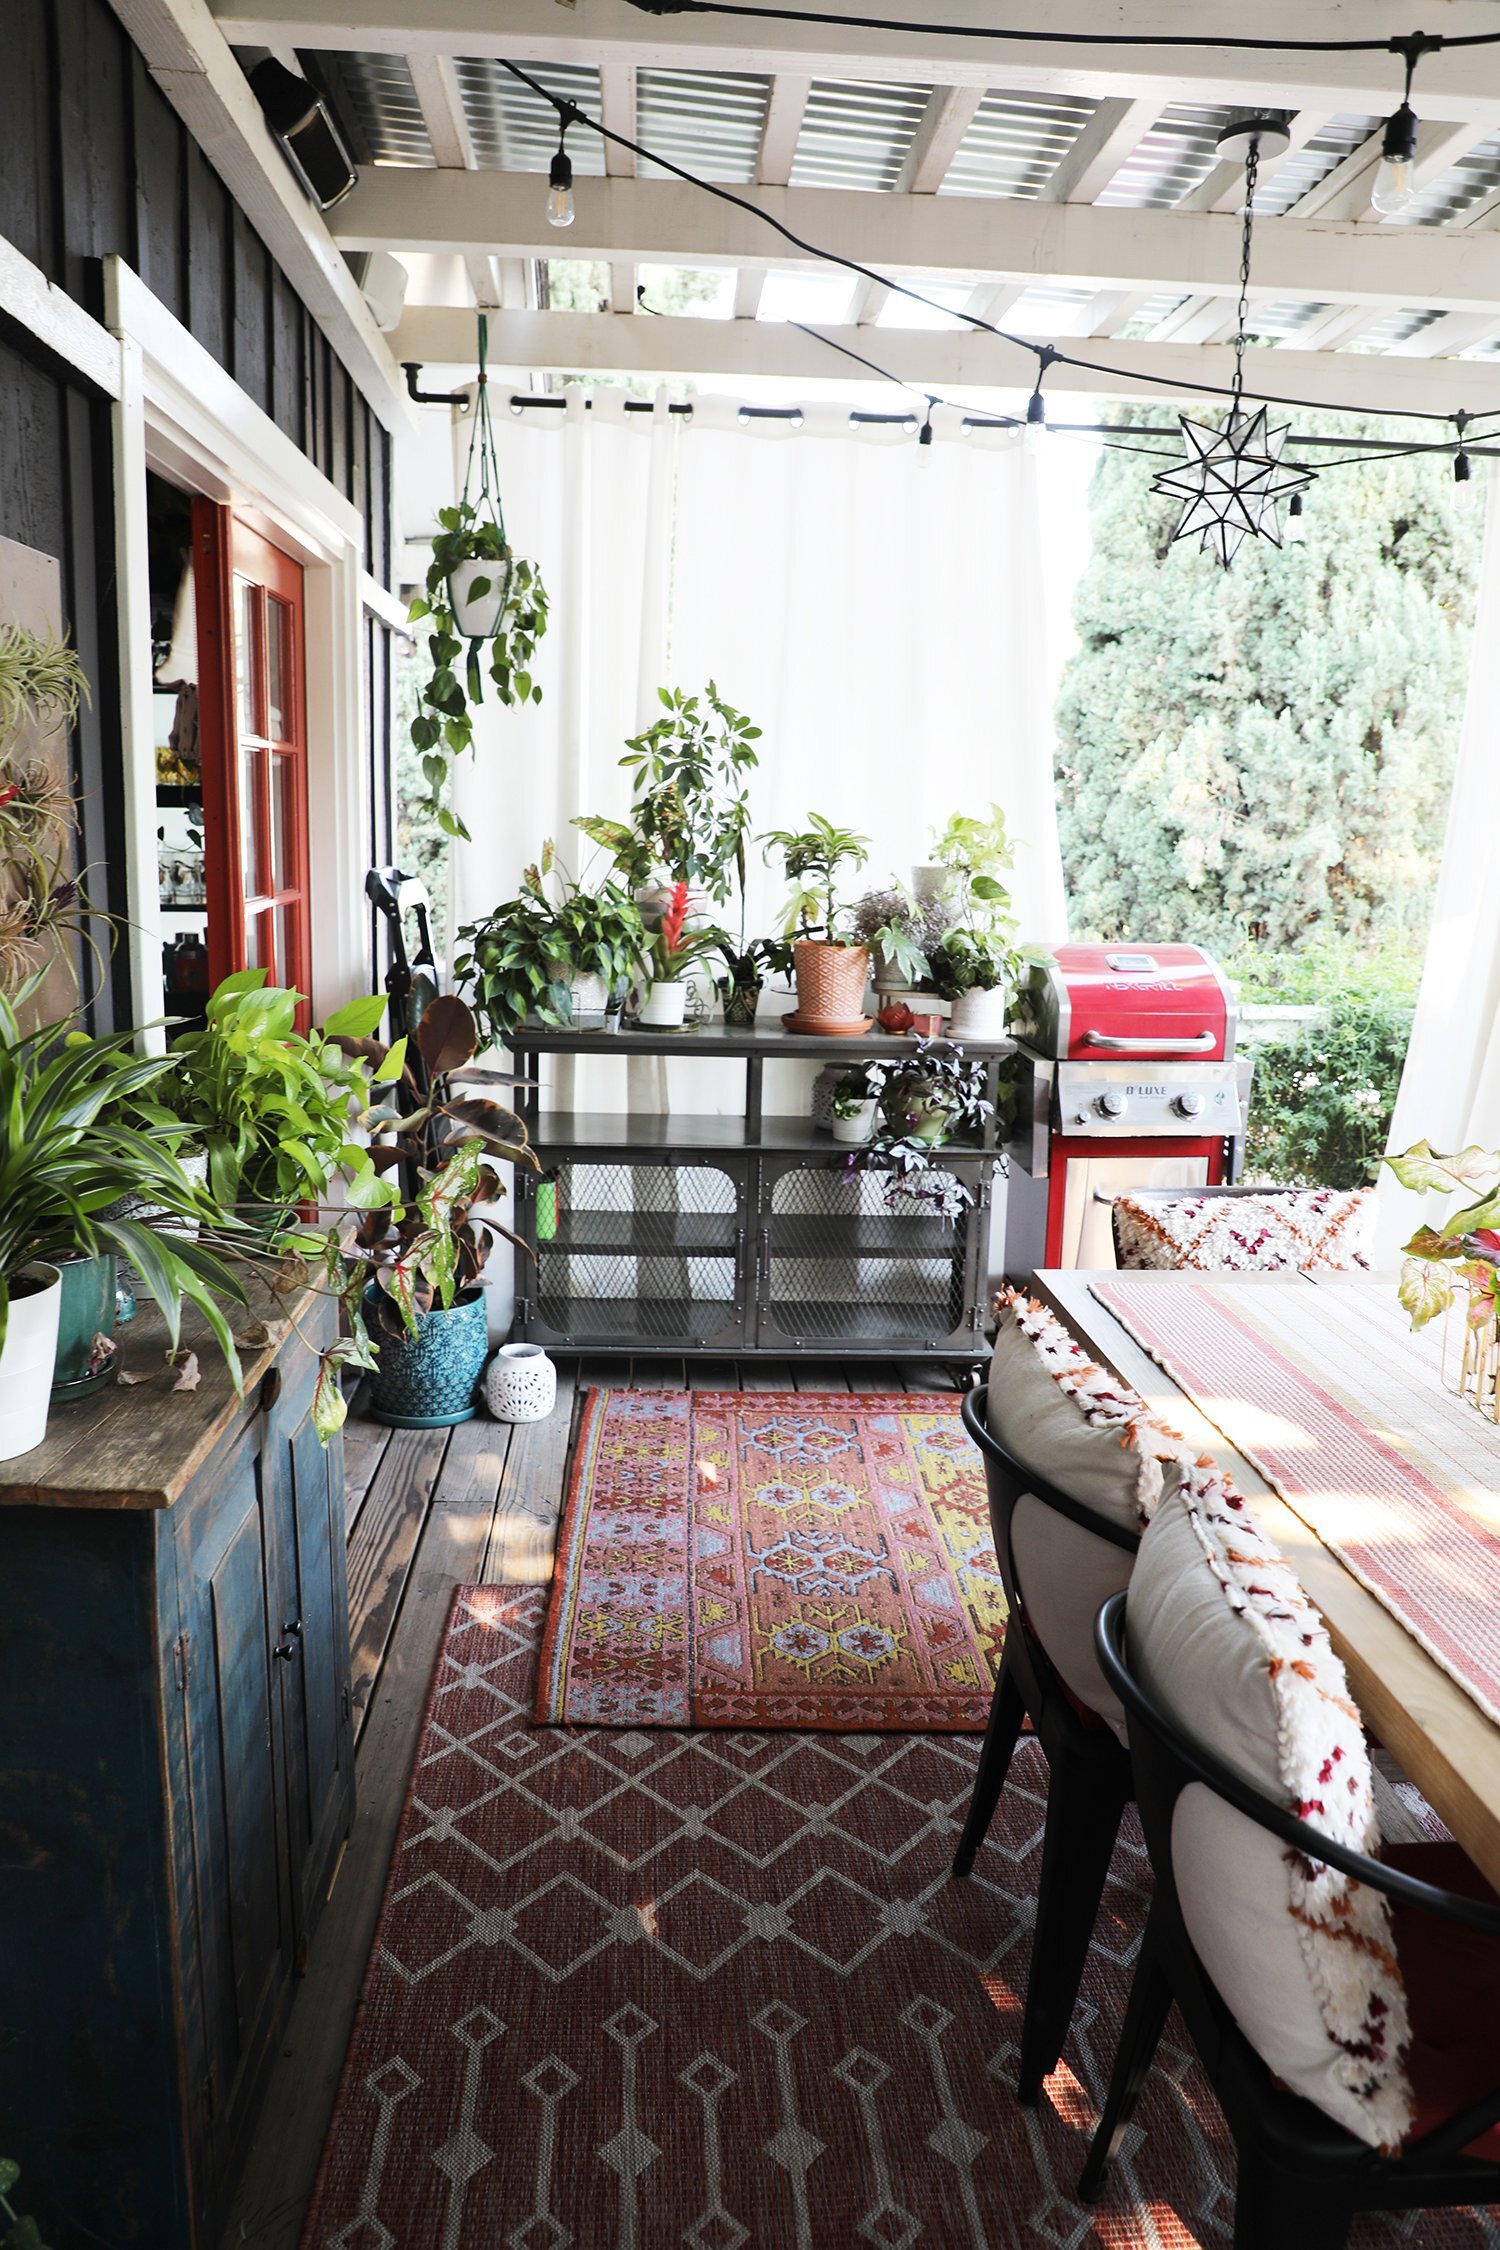
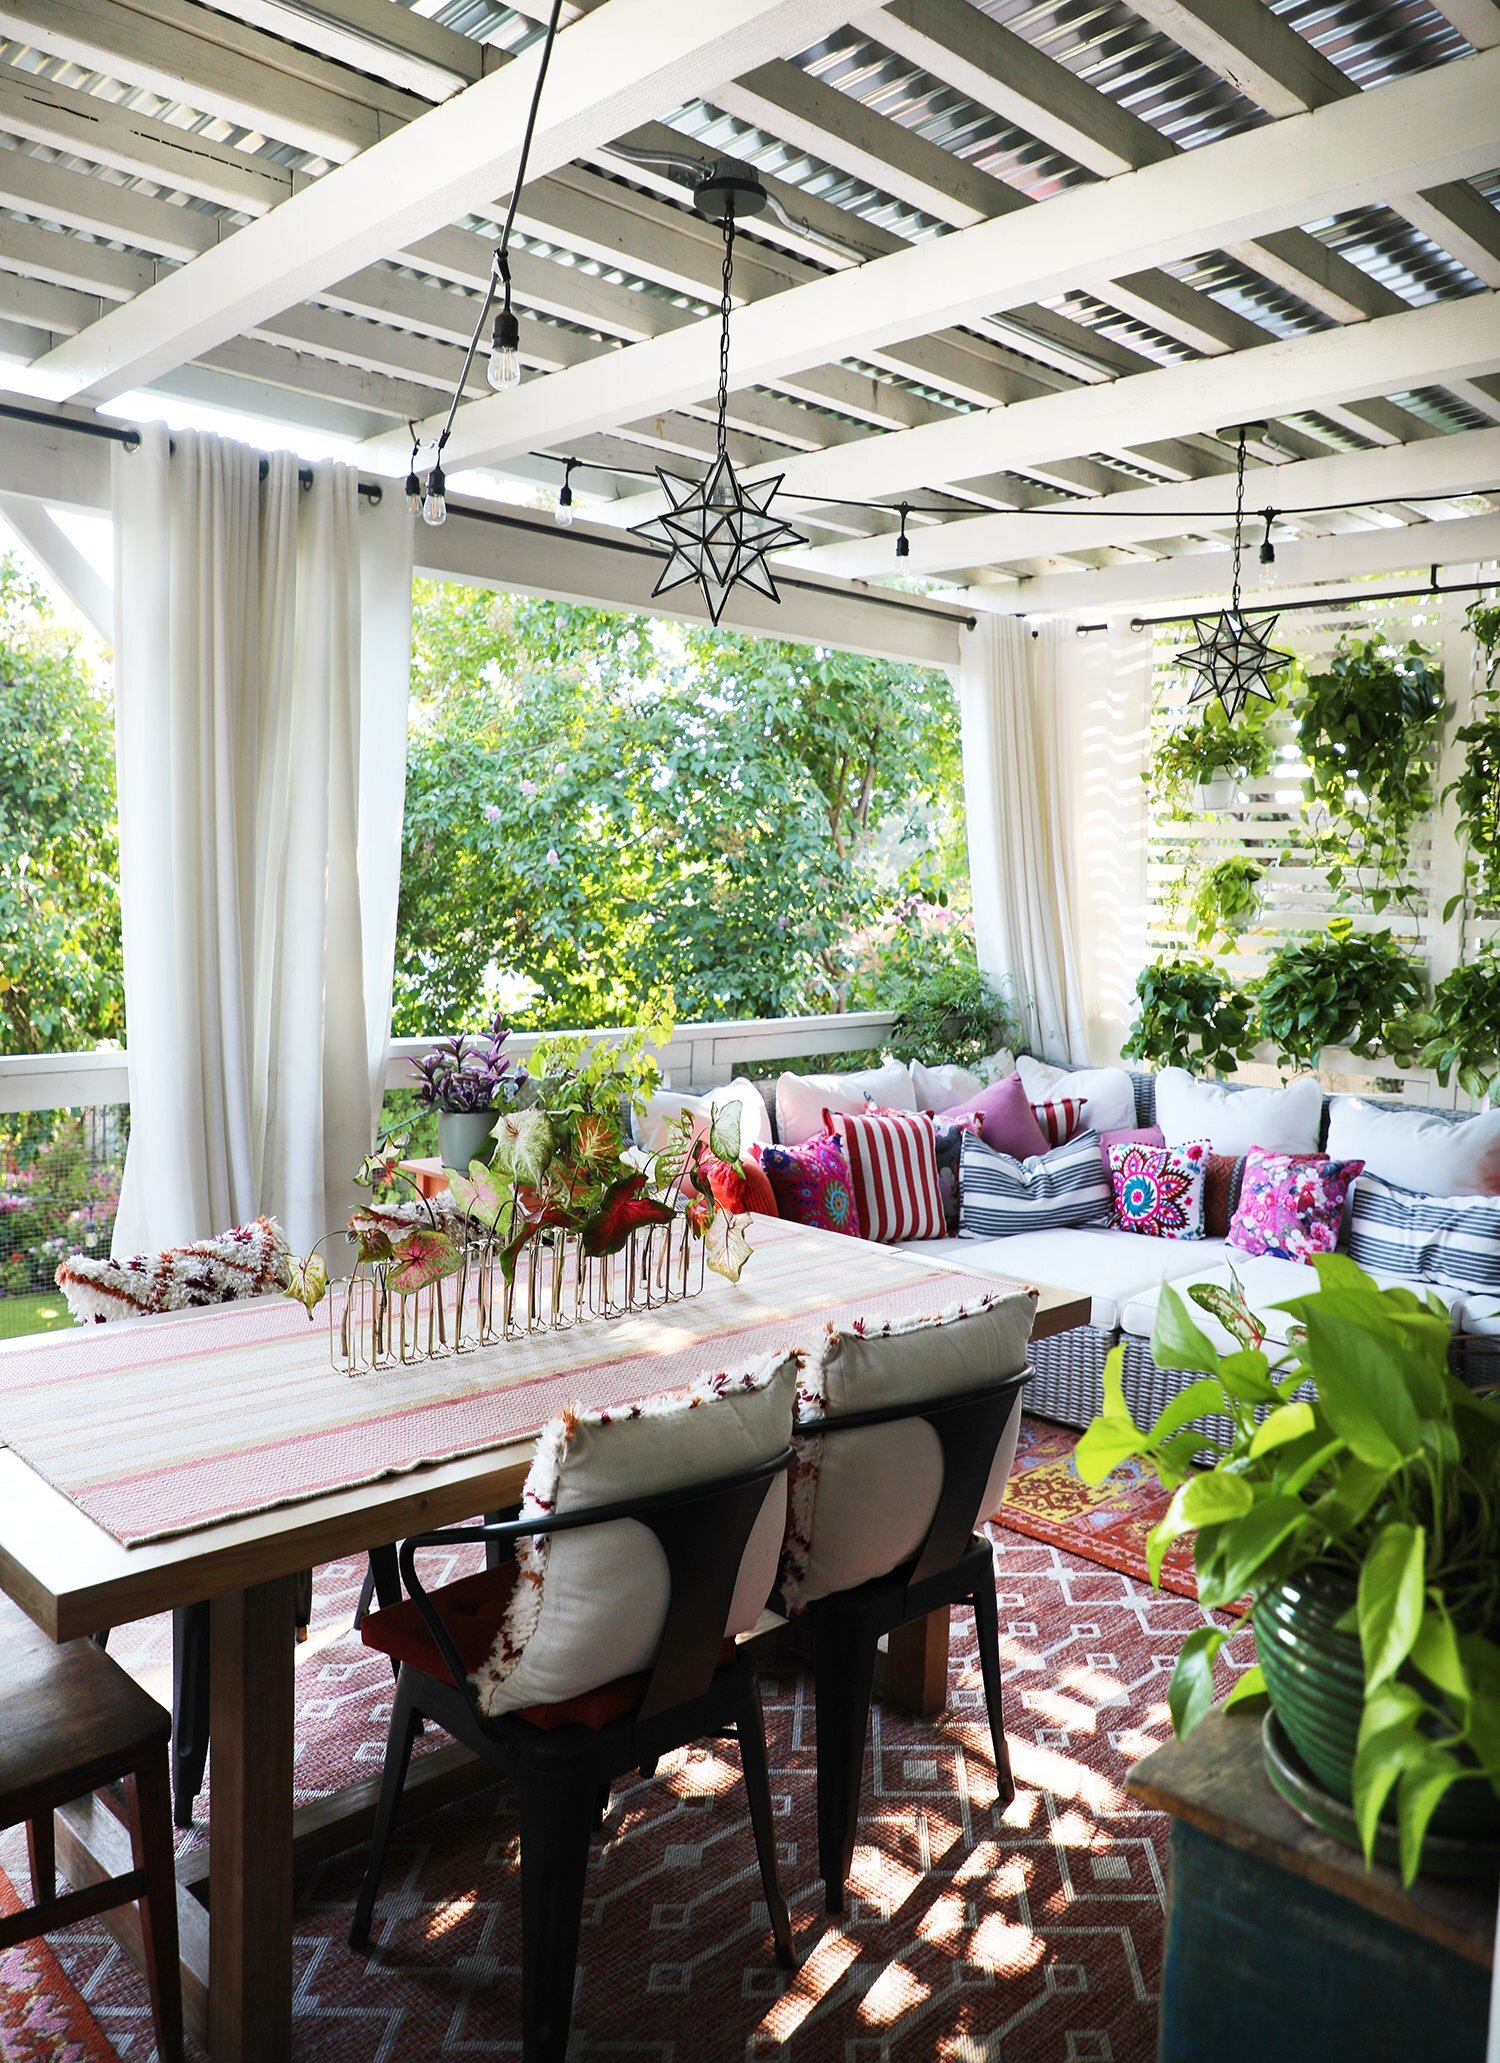
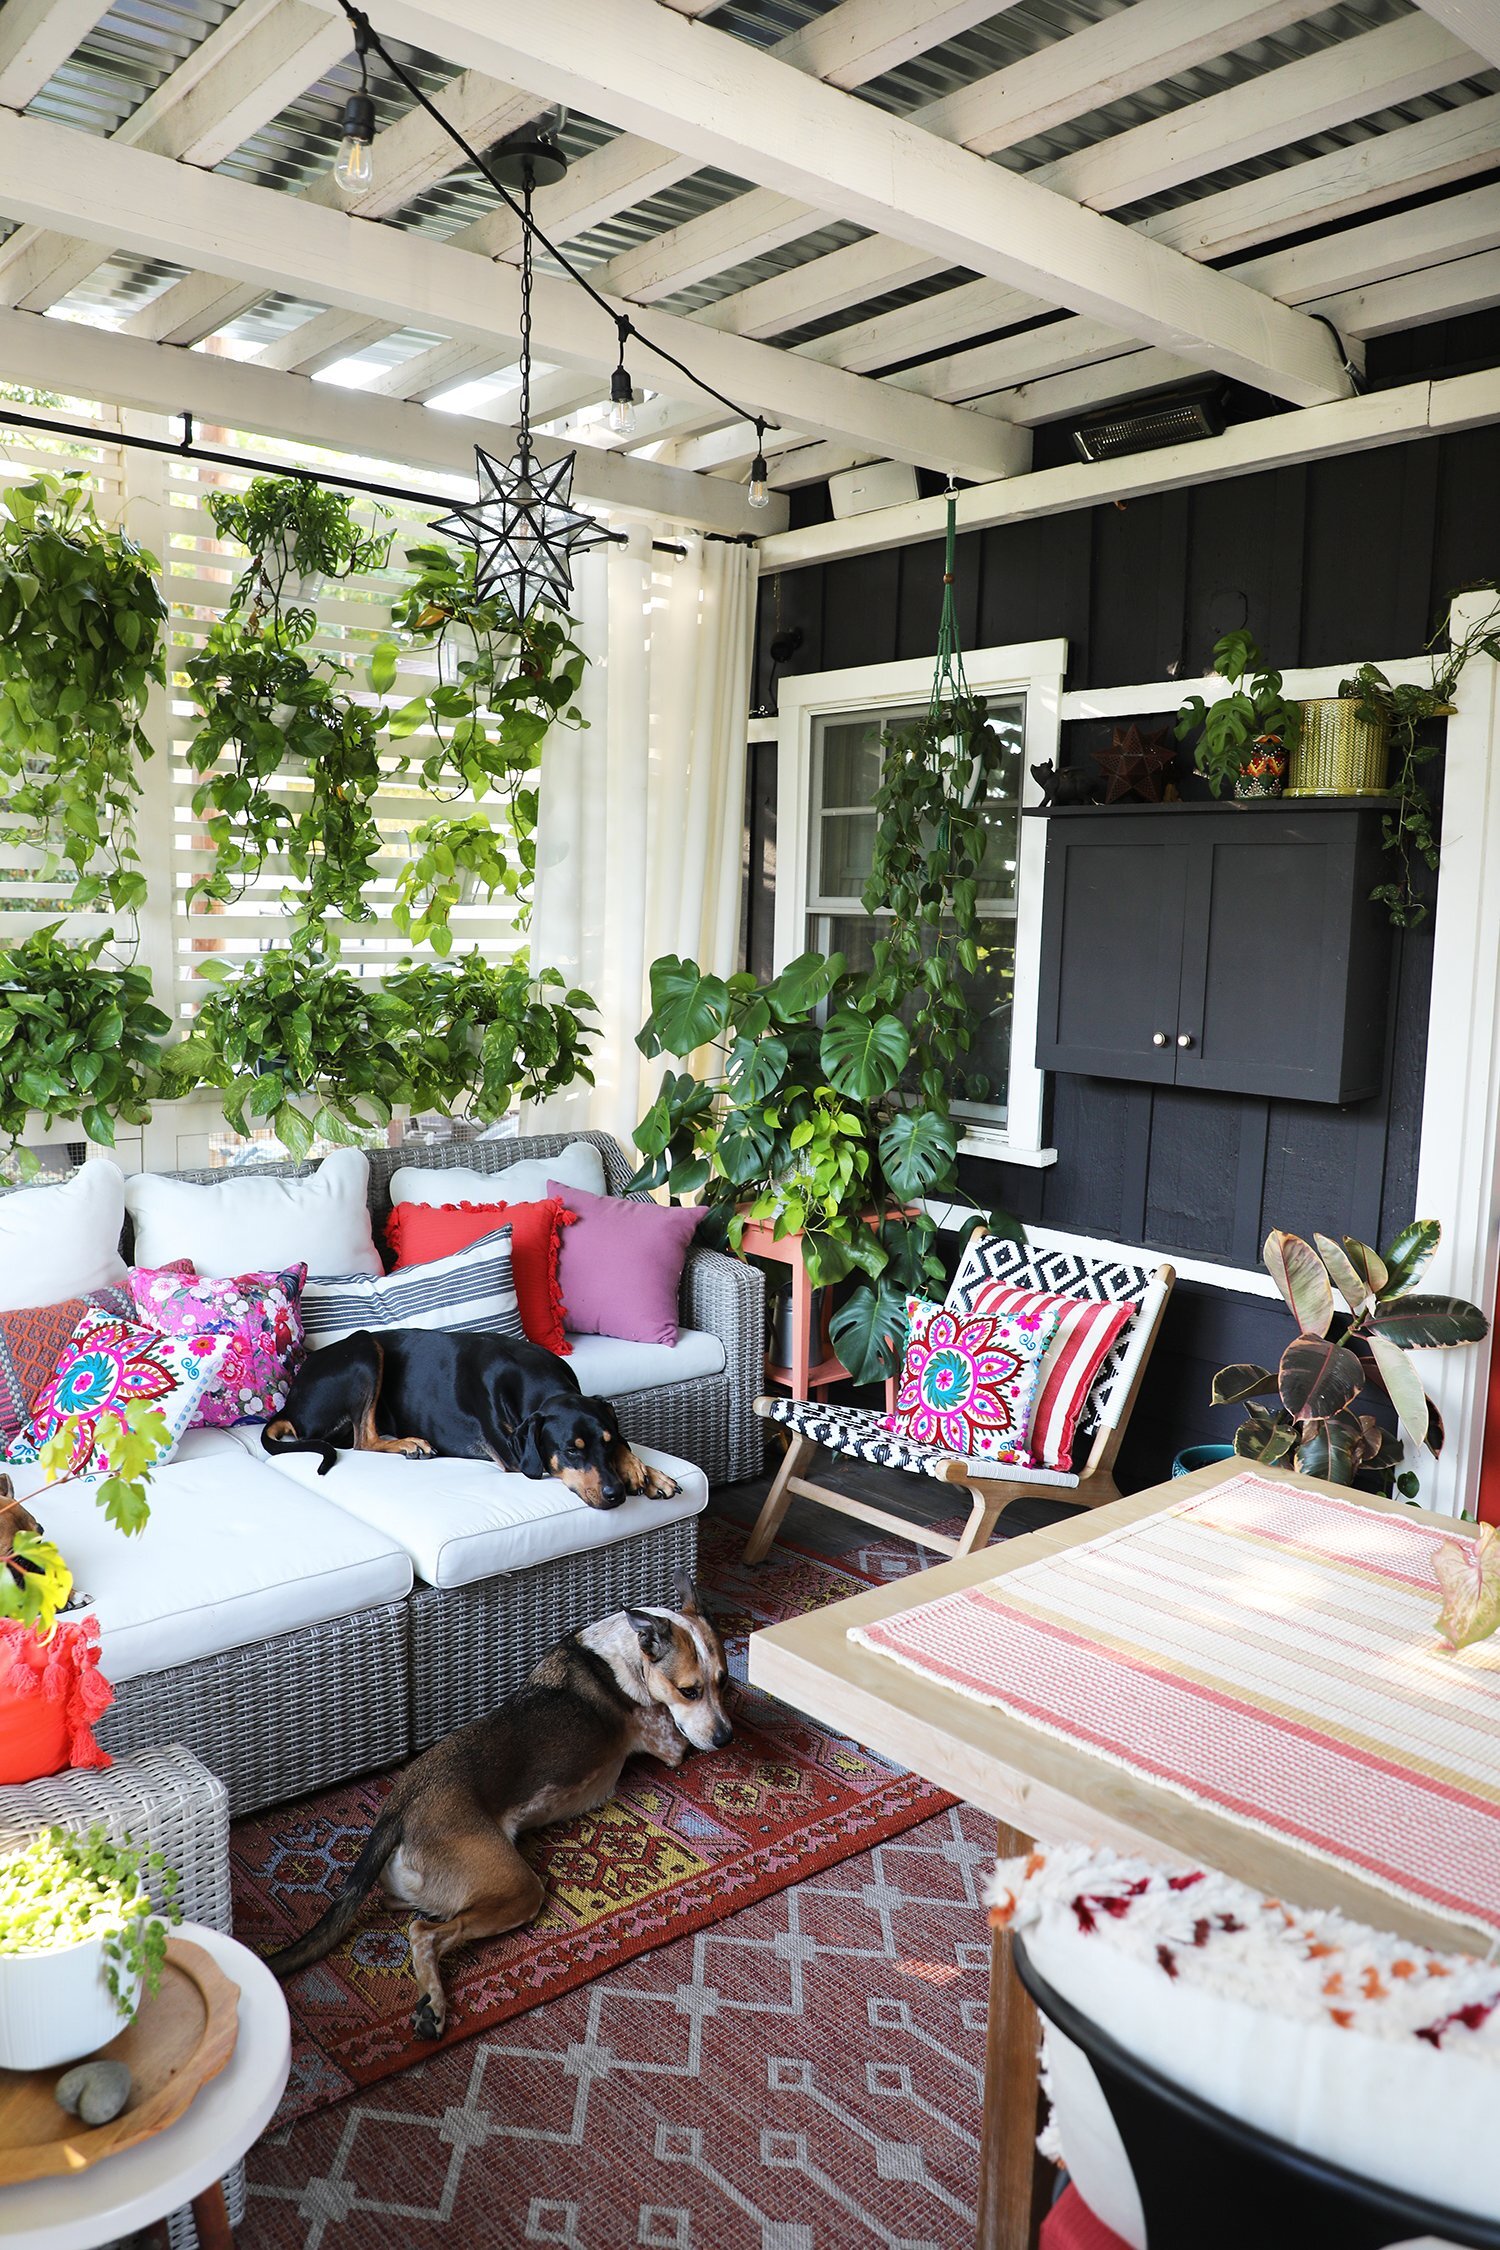
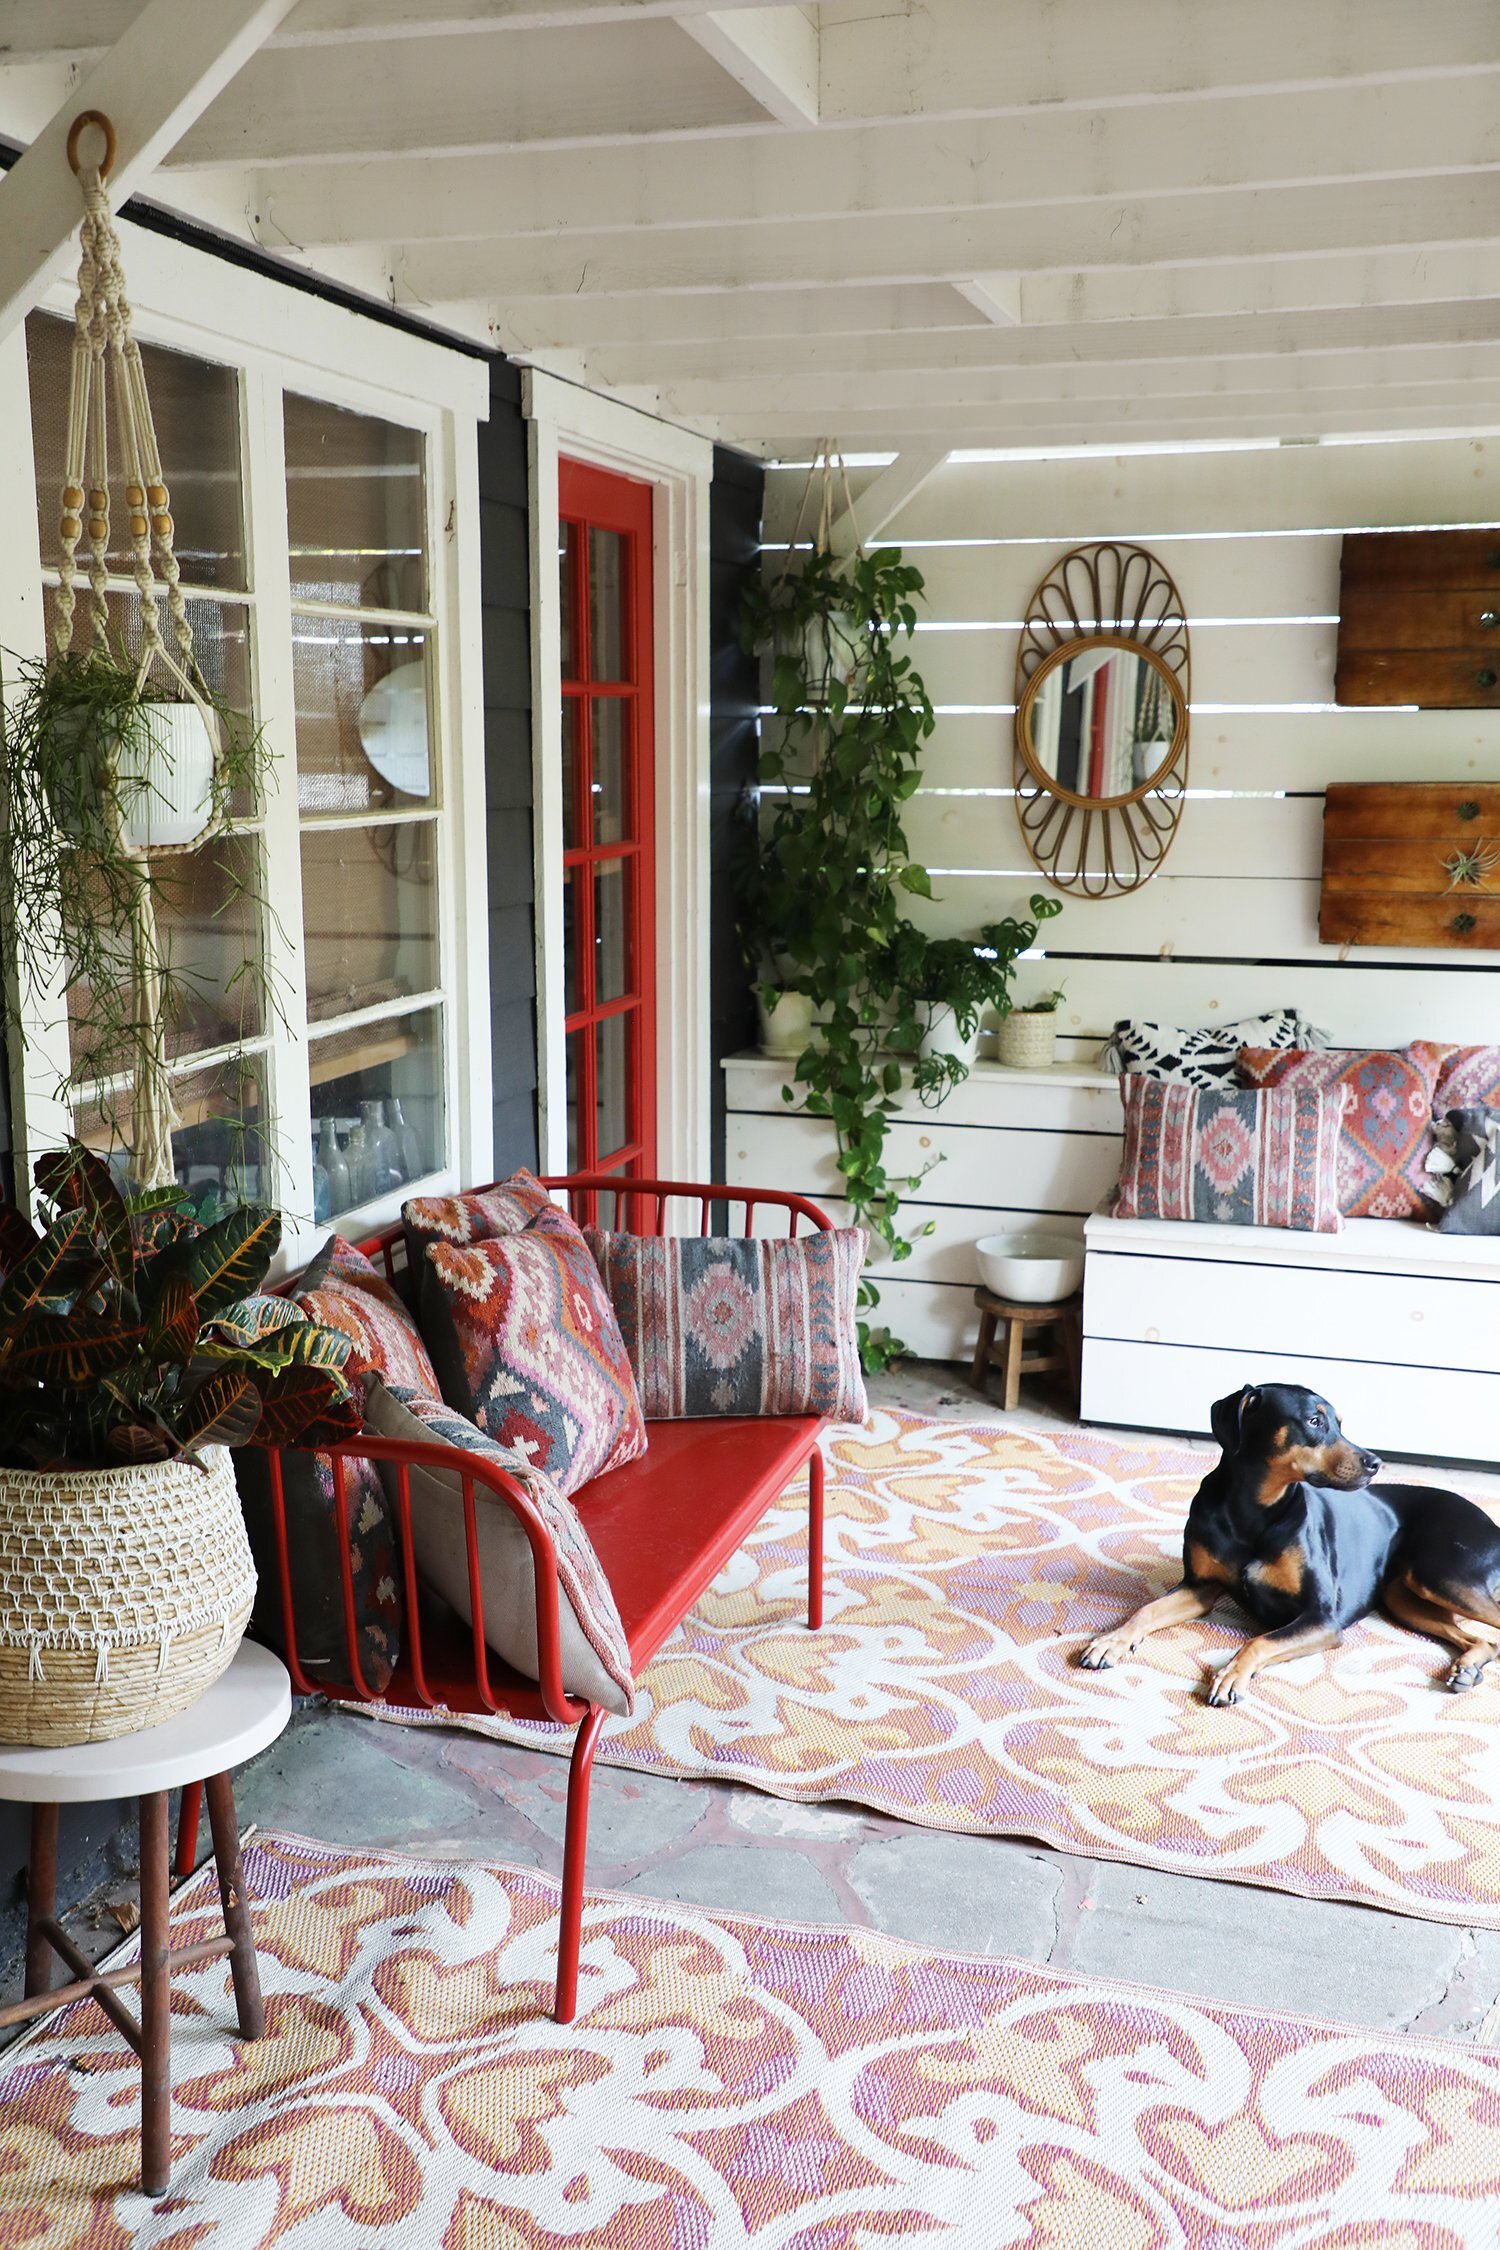
After. Everyone freaks out about how we keep these white couches clean…but they are outdoor fabric that I literally just turn a hose on when they get dirty. This has been the best couch! Sources listed at end of post.
After. I do love me some glorious caladium leaves. But yes, they are toxic to pets, so keep them tucked where nobody can get to them plzzzzzz. (Also toxic: the trailing philadendron and pothos on the plant wall, some of which are technically where my dogs can reach them, but they don’t mess with them).

After.
It was important for us to have a TV out here so that this space doubled as an outdoor living room, but I wasn’t super keen on having a TV just visually hanging out on the wall. So we built that little cabinet to conceal it from view when it wasn’t being used.
After.

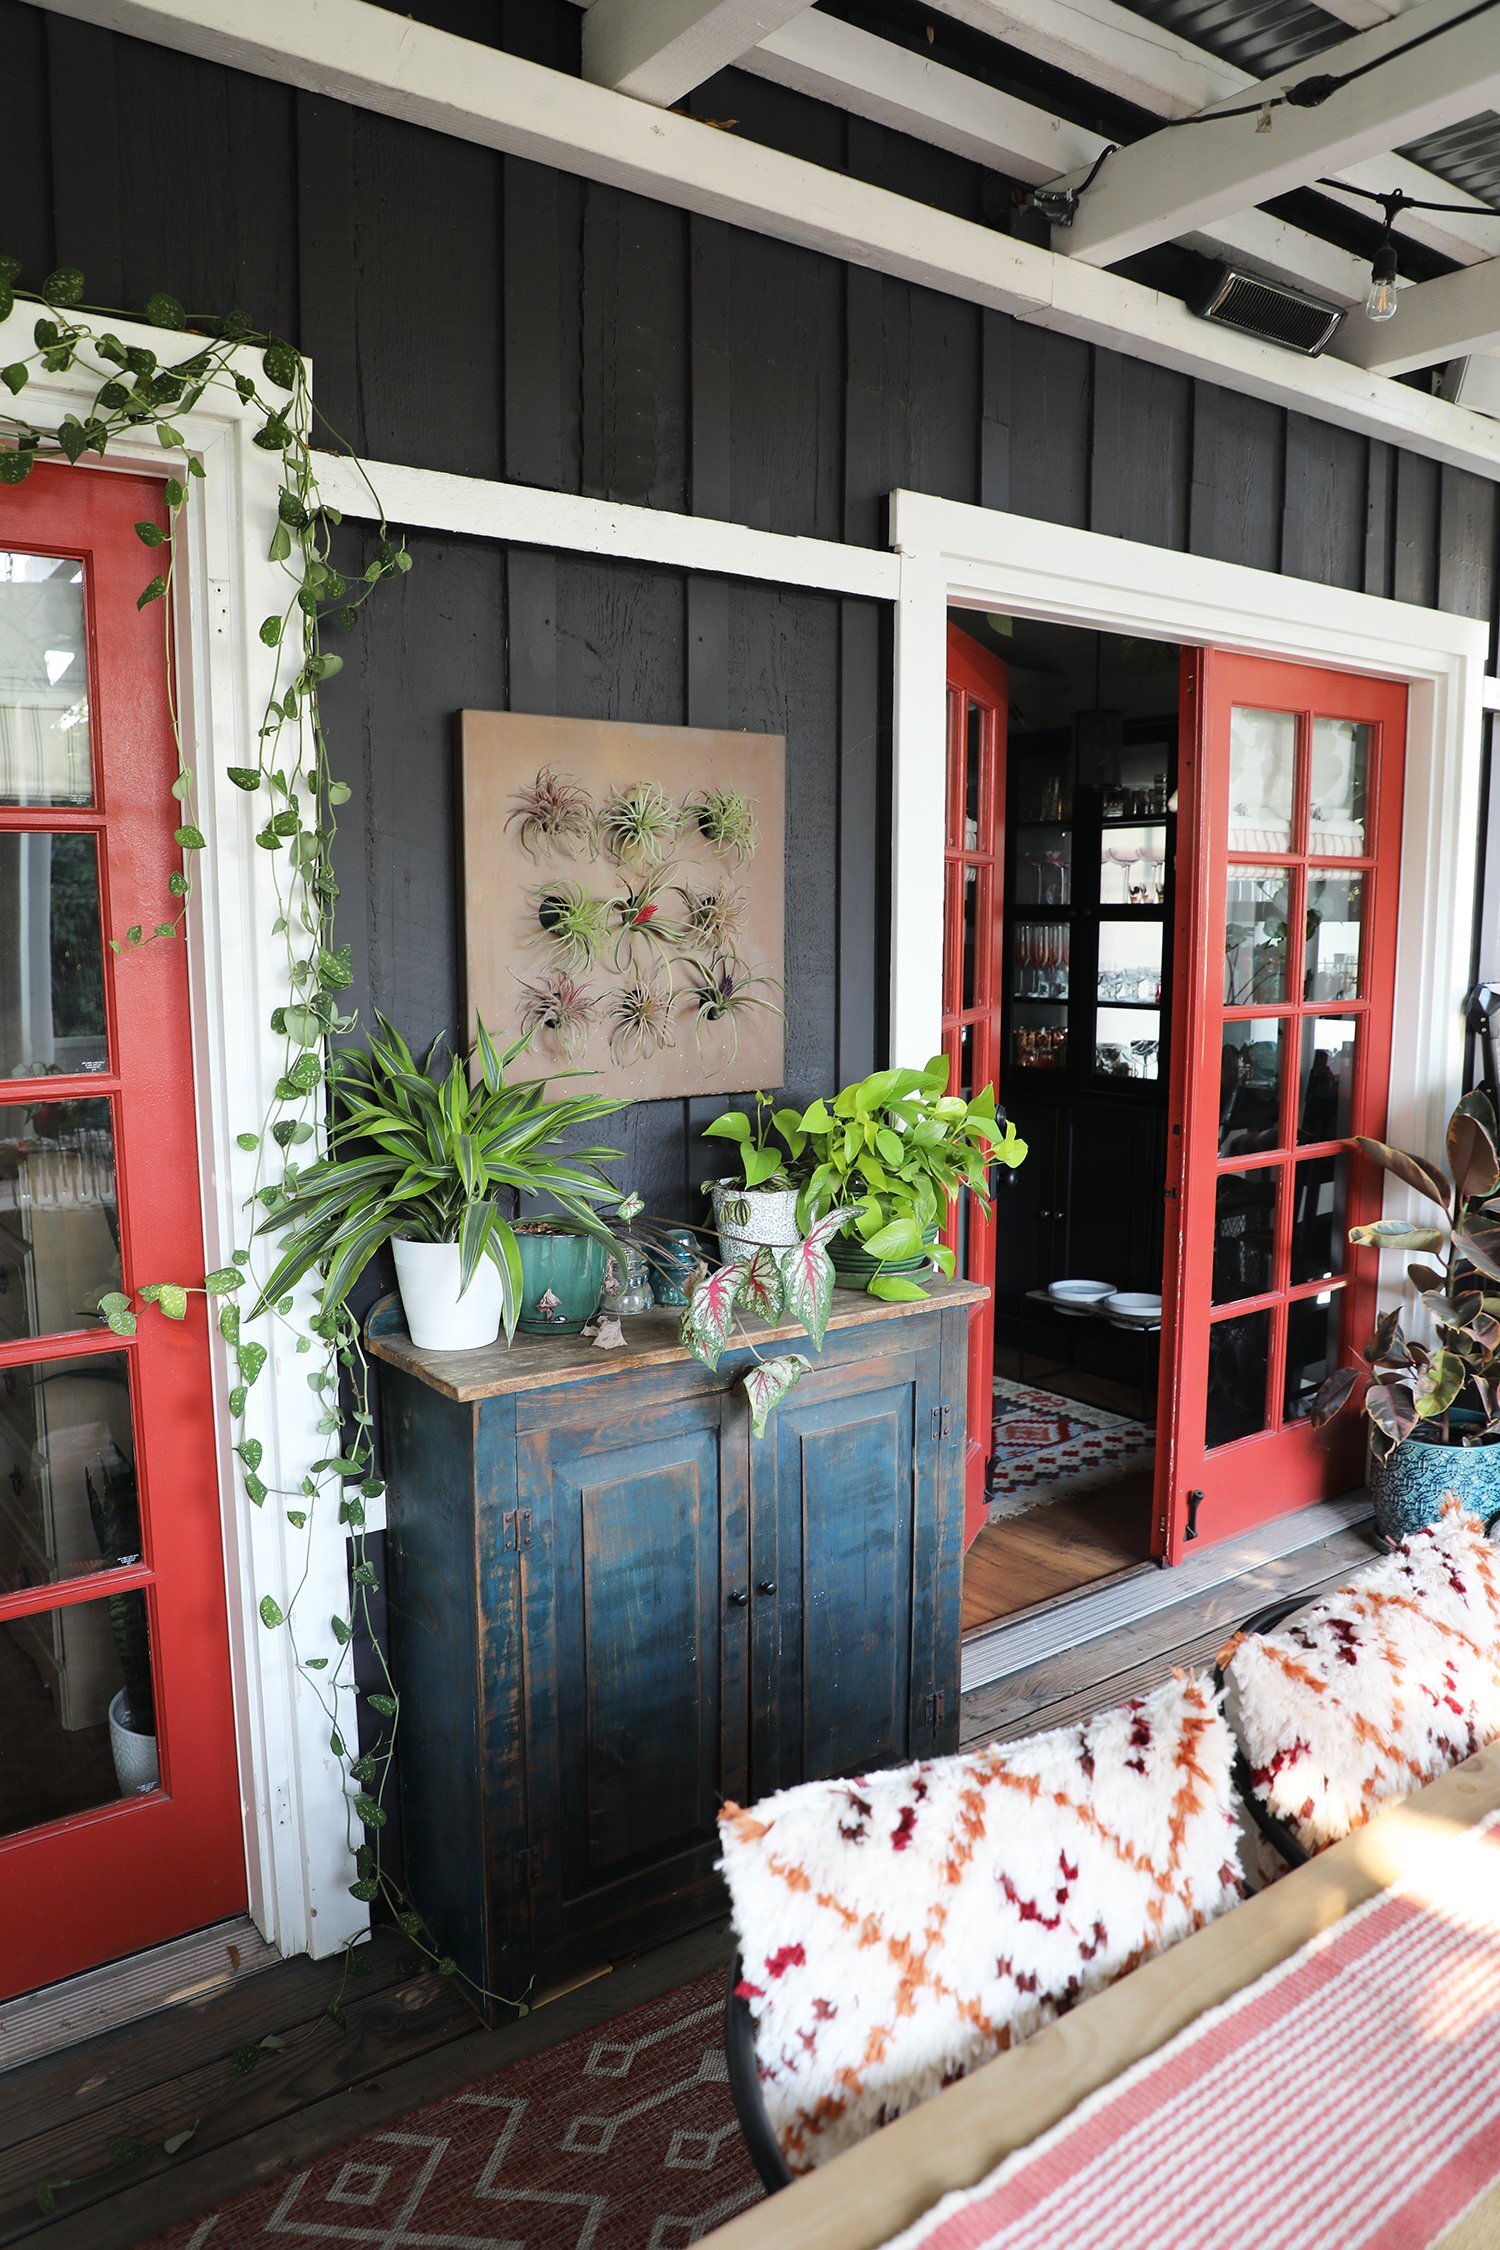
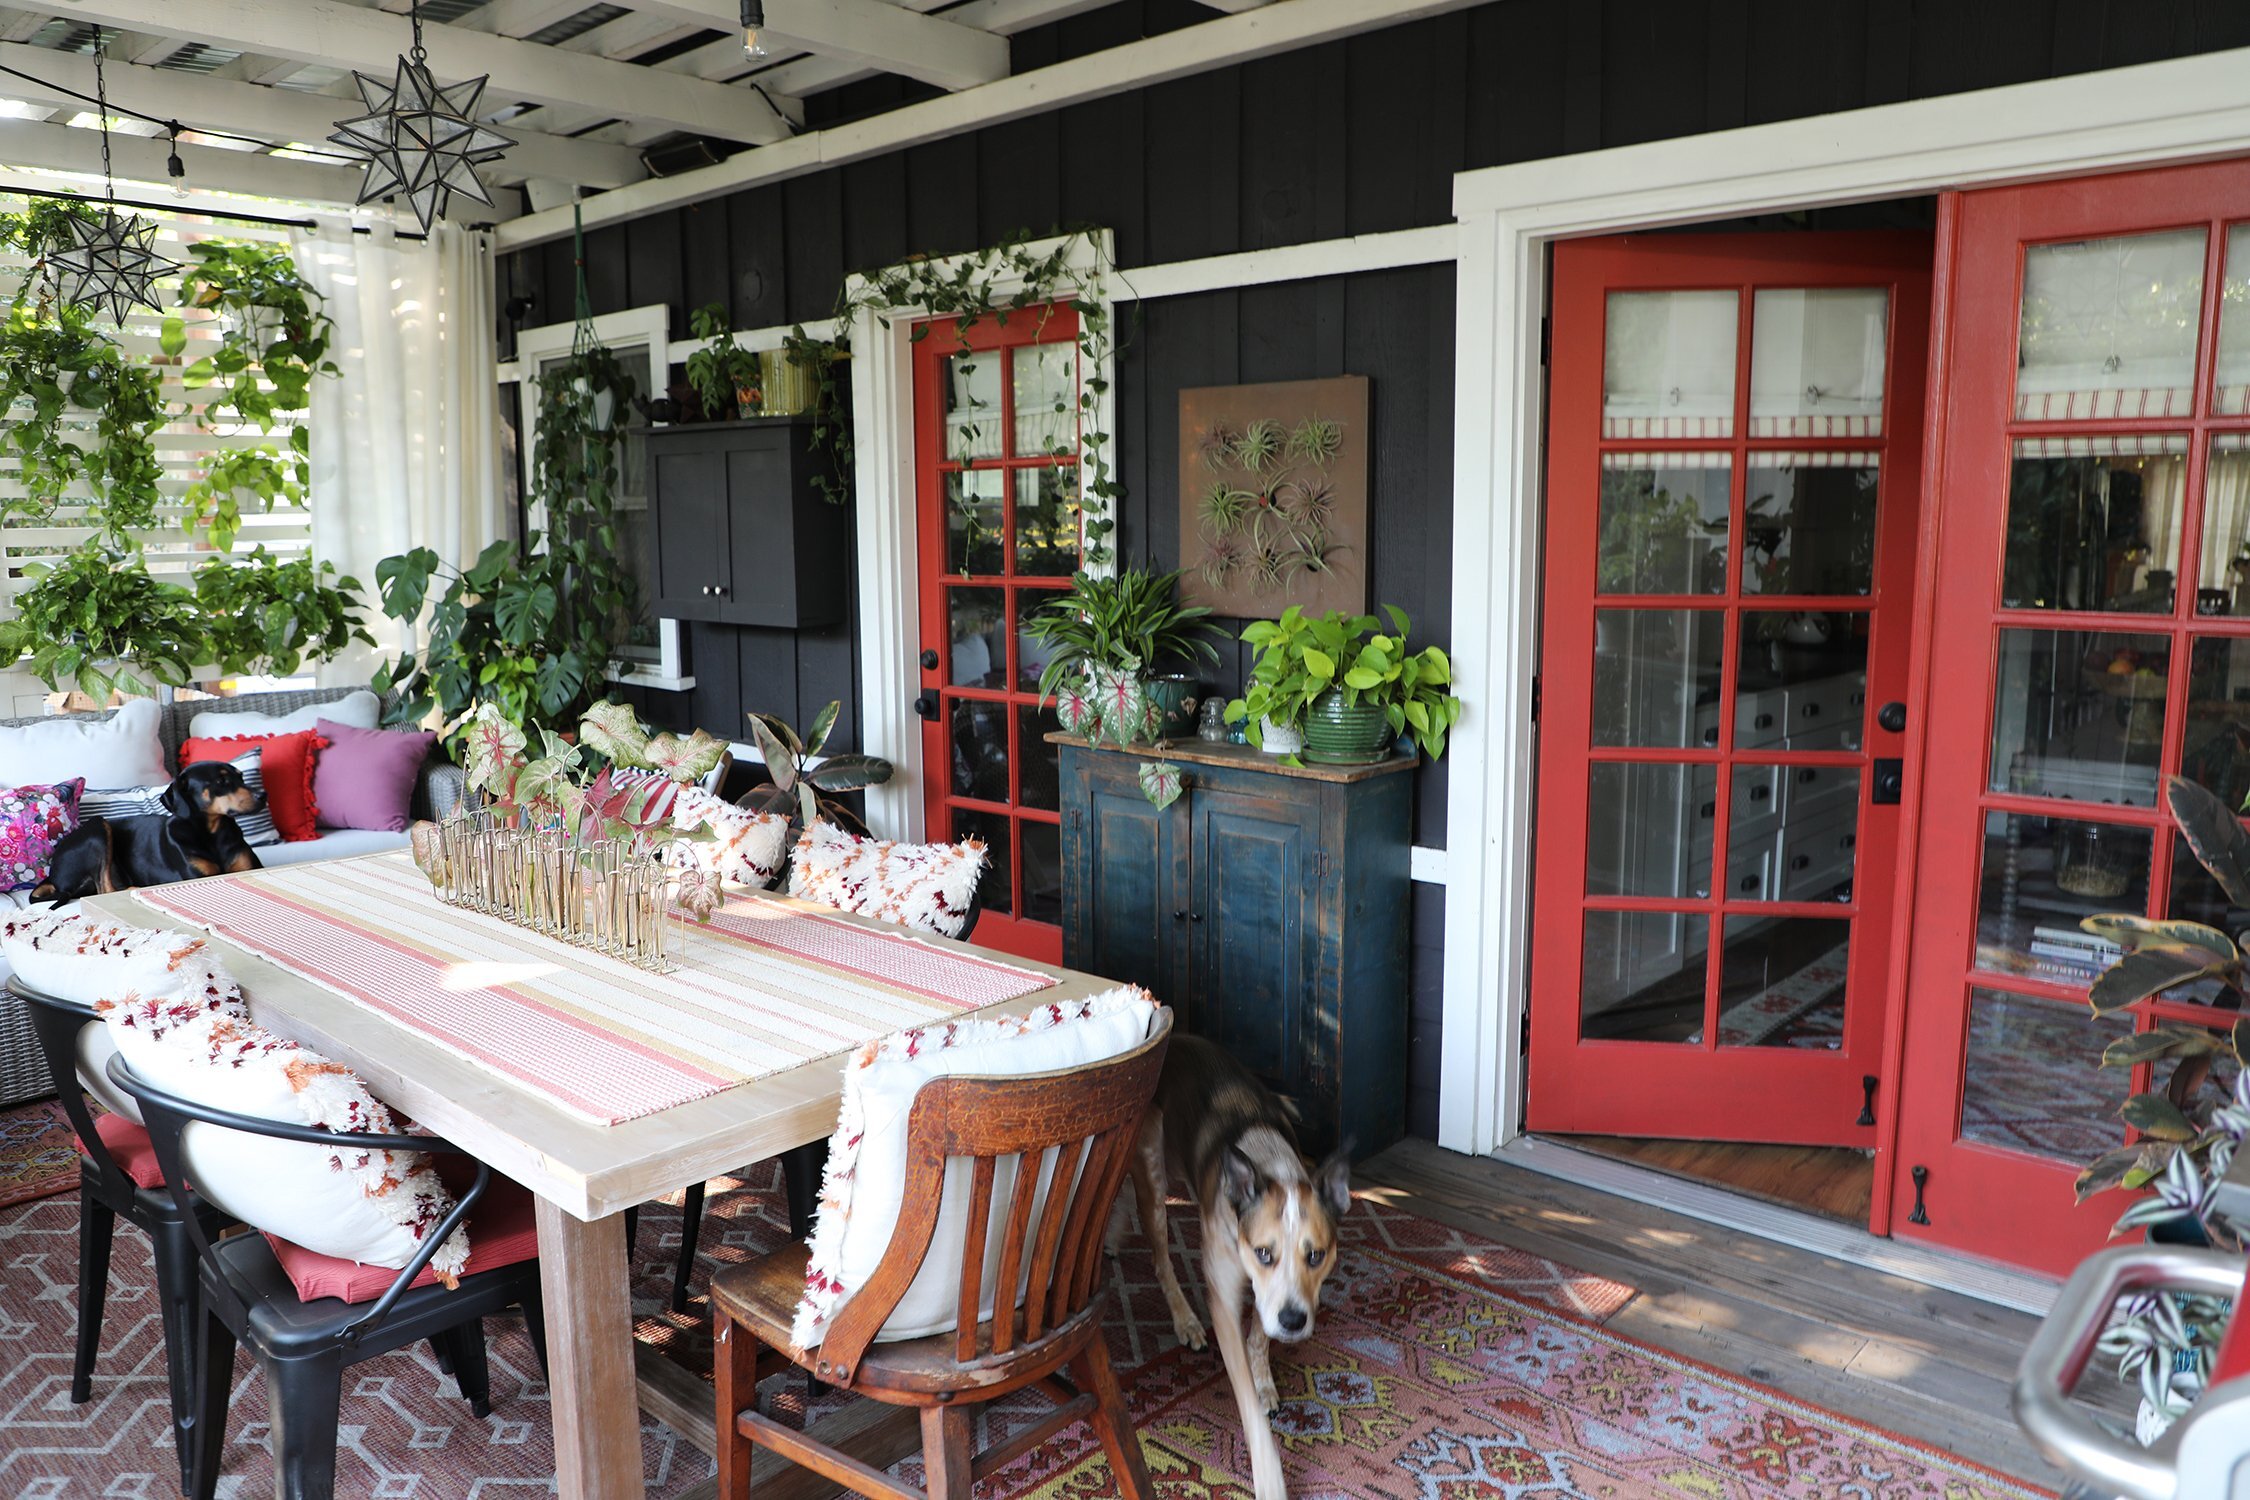
After. The double french doors from the kitchen leading out onto the deck.
The single original door that led from the house onto the old deck was replaced with double french doors which open into the new kitchen. The new single door to the left of the kitchen doors leads into the primary suite.
After.
After.
After. The dogs really hate it out here.

After. Truly, the dogs can’t stand being on the deck.
Okay, that’s probably more than enough photos of the upper deck—-let’s move on to the downstairs patio. This is the area that our guest room and office open out onto.
After.
Yet again, I’ve failed with before shots. I know I have more. I just can’t seem to find them.
Before.
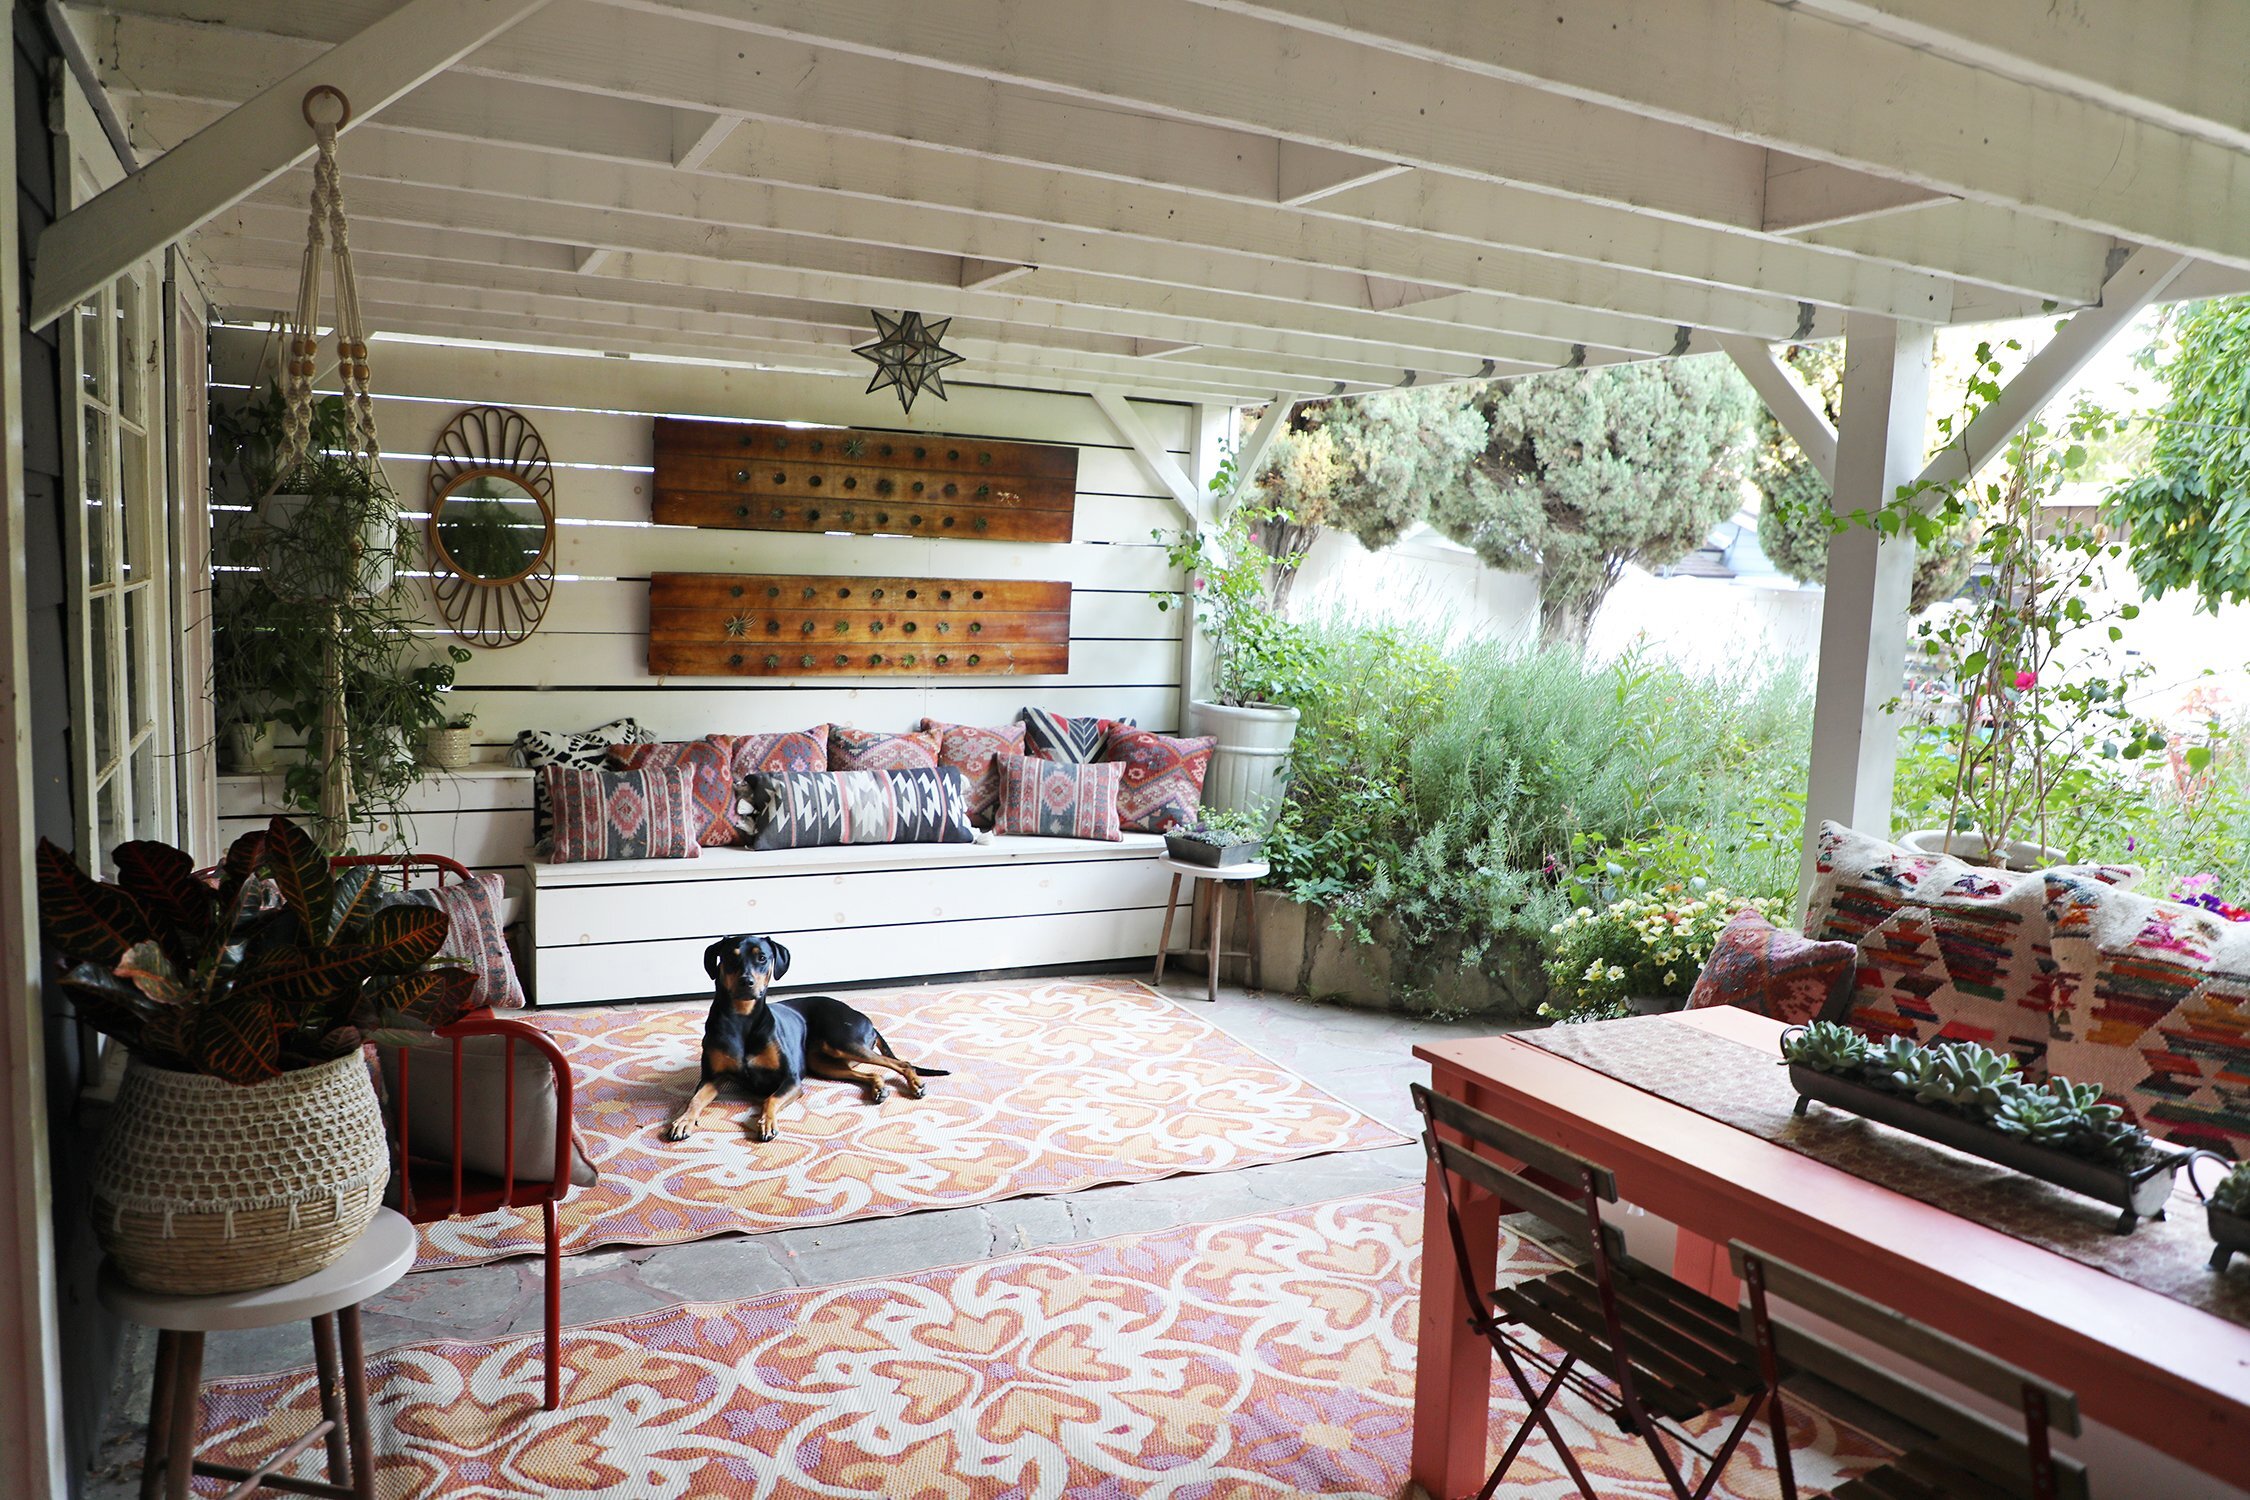
In the above image, you can sort of see what was originally going on on the patio. At some point (probably in the 60’s when the downstairs renovation/addition happened), someone created this patio out of reclaimed concrete chunks that mimic flagstone. Which I think is super neat. What I don’t really like is that they then went and painted the grout lines of the “flagstone” with some sort of gnarly red epoxy that we have tried desperately to remove…unsuccessfully. Which is a giant bummer. (I guess it could be worse—at least red is an ongoing theme in our decorating color story). I always have kind of loved the cement flagstone and want to leave it…but the veins of red are…kinda odd. So I throw outdoor rugs down and call it a day. Ha!
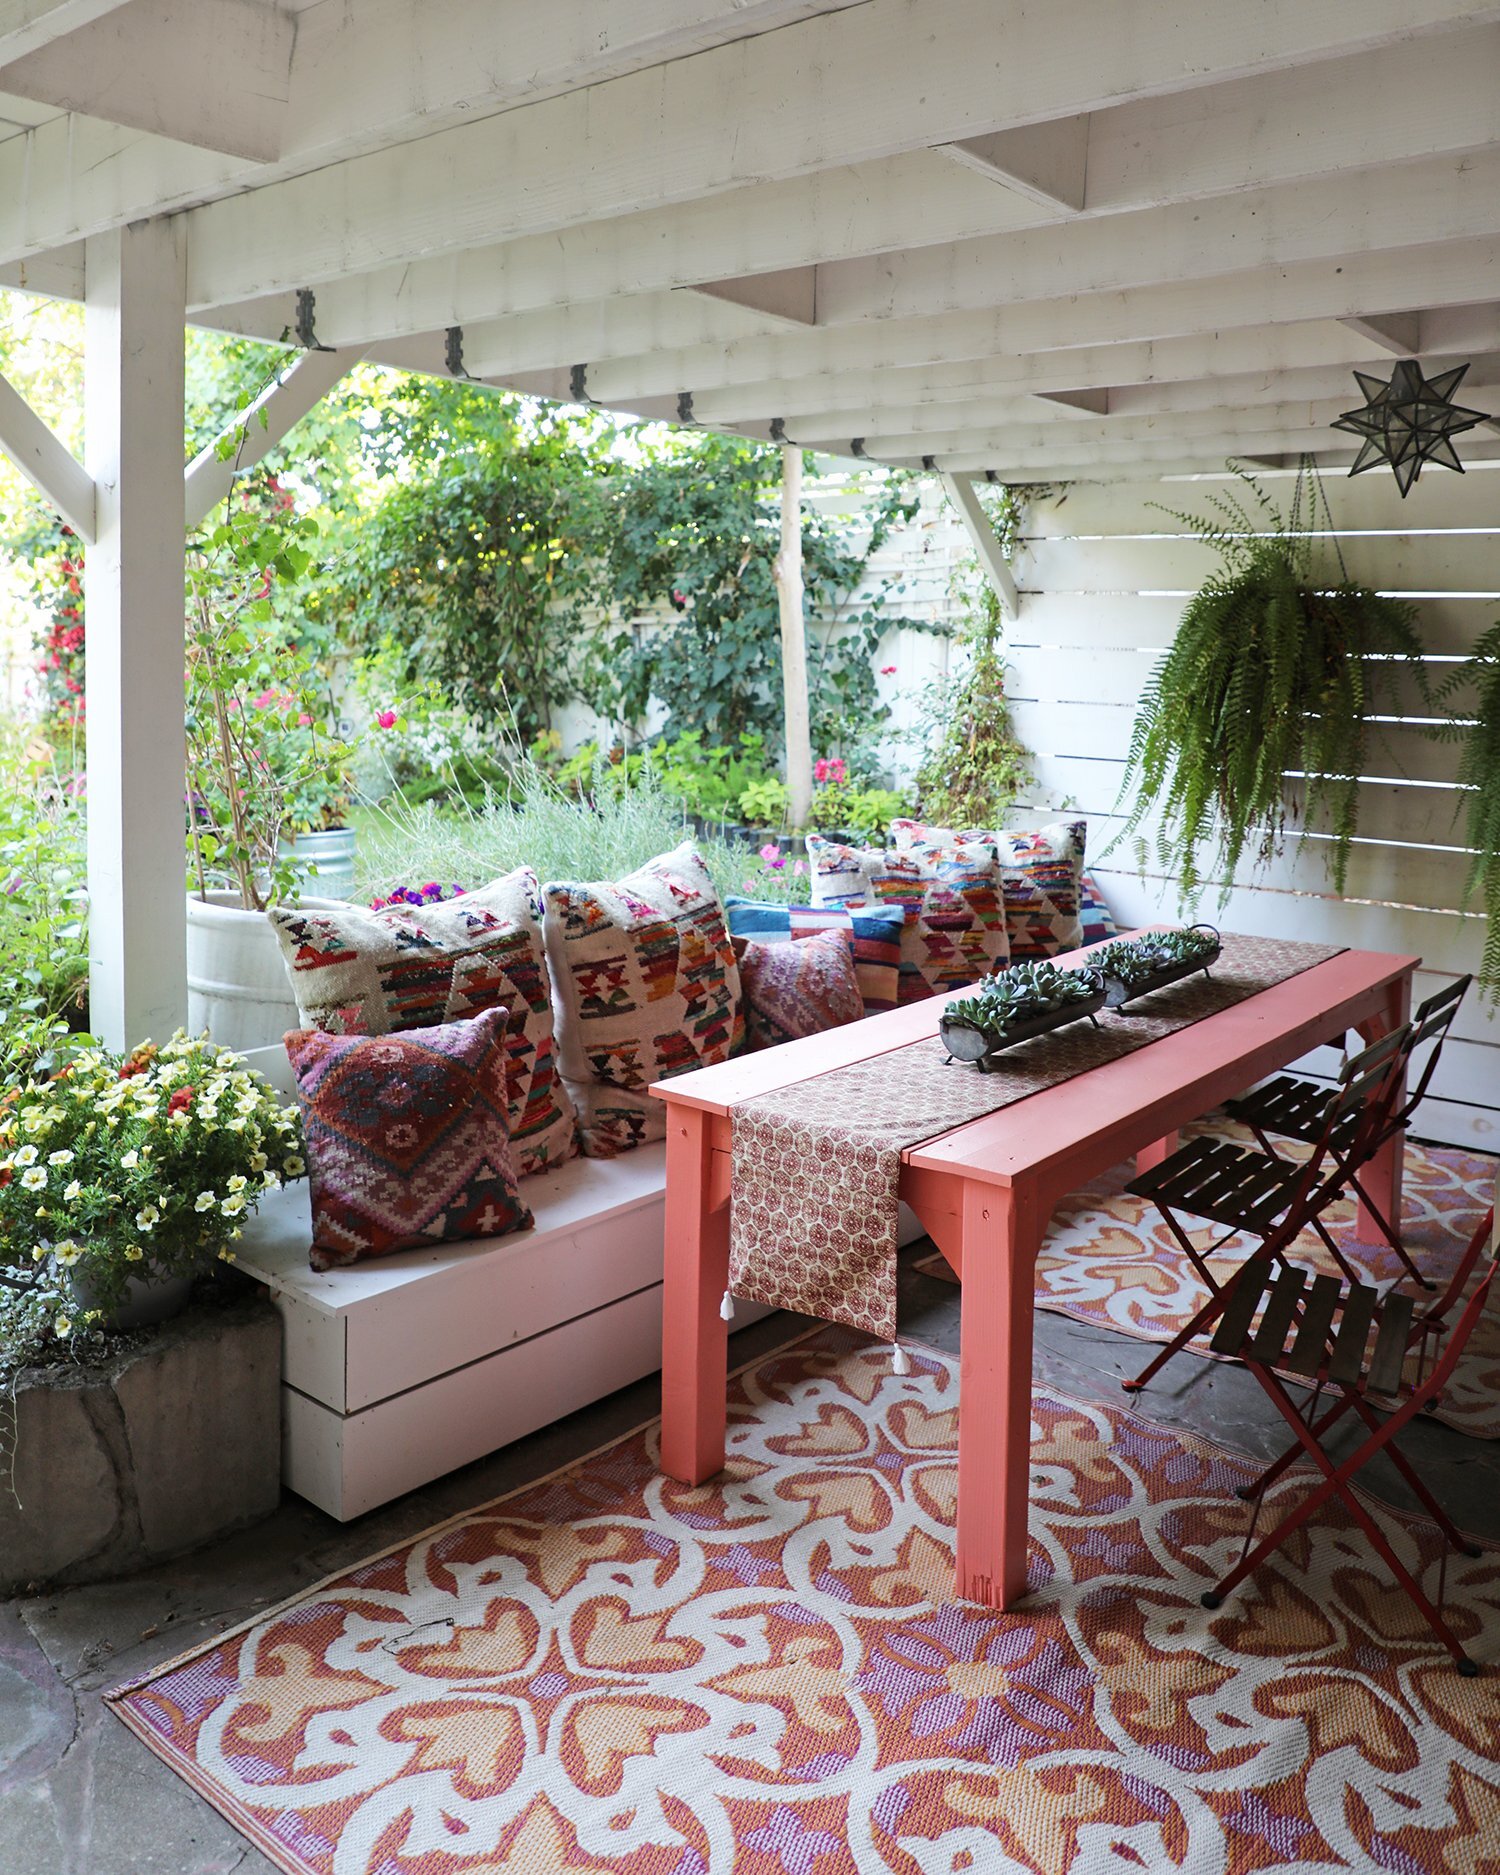
Also, in the above photo you can kind of see how there were oddly-shaped and sized steps leading down into the sunken patio. They were a pretty big hazard, along with other weird little cemented over bumps and half walls surrounding the patio. We didn’t know what to do with any of it and didn’t want to mess with the structure, so we wound up building a series of benches and plant shelves around them. So the entire patio area is now flanked in built-in benches, which makes for a pretty awesome hang out and seating area (especially during parties…awwwww…remember parties?).

After.

After. Here’s a pretty great shot that shows the weird red grout in the flagstone floor. Also, you can see on the right the built in bench and plant platform.
Before. This image was taken just after the yard had been cleared and the new fence put up.
After. Another built-in bench flanks the yard side of the patio.
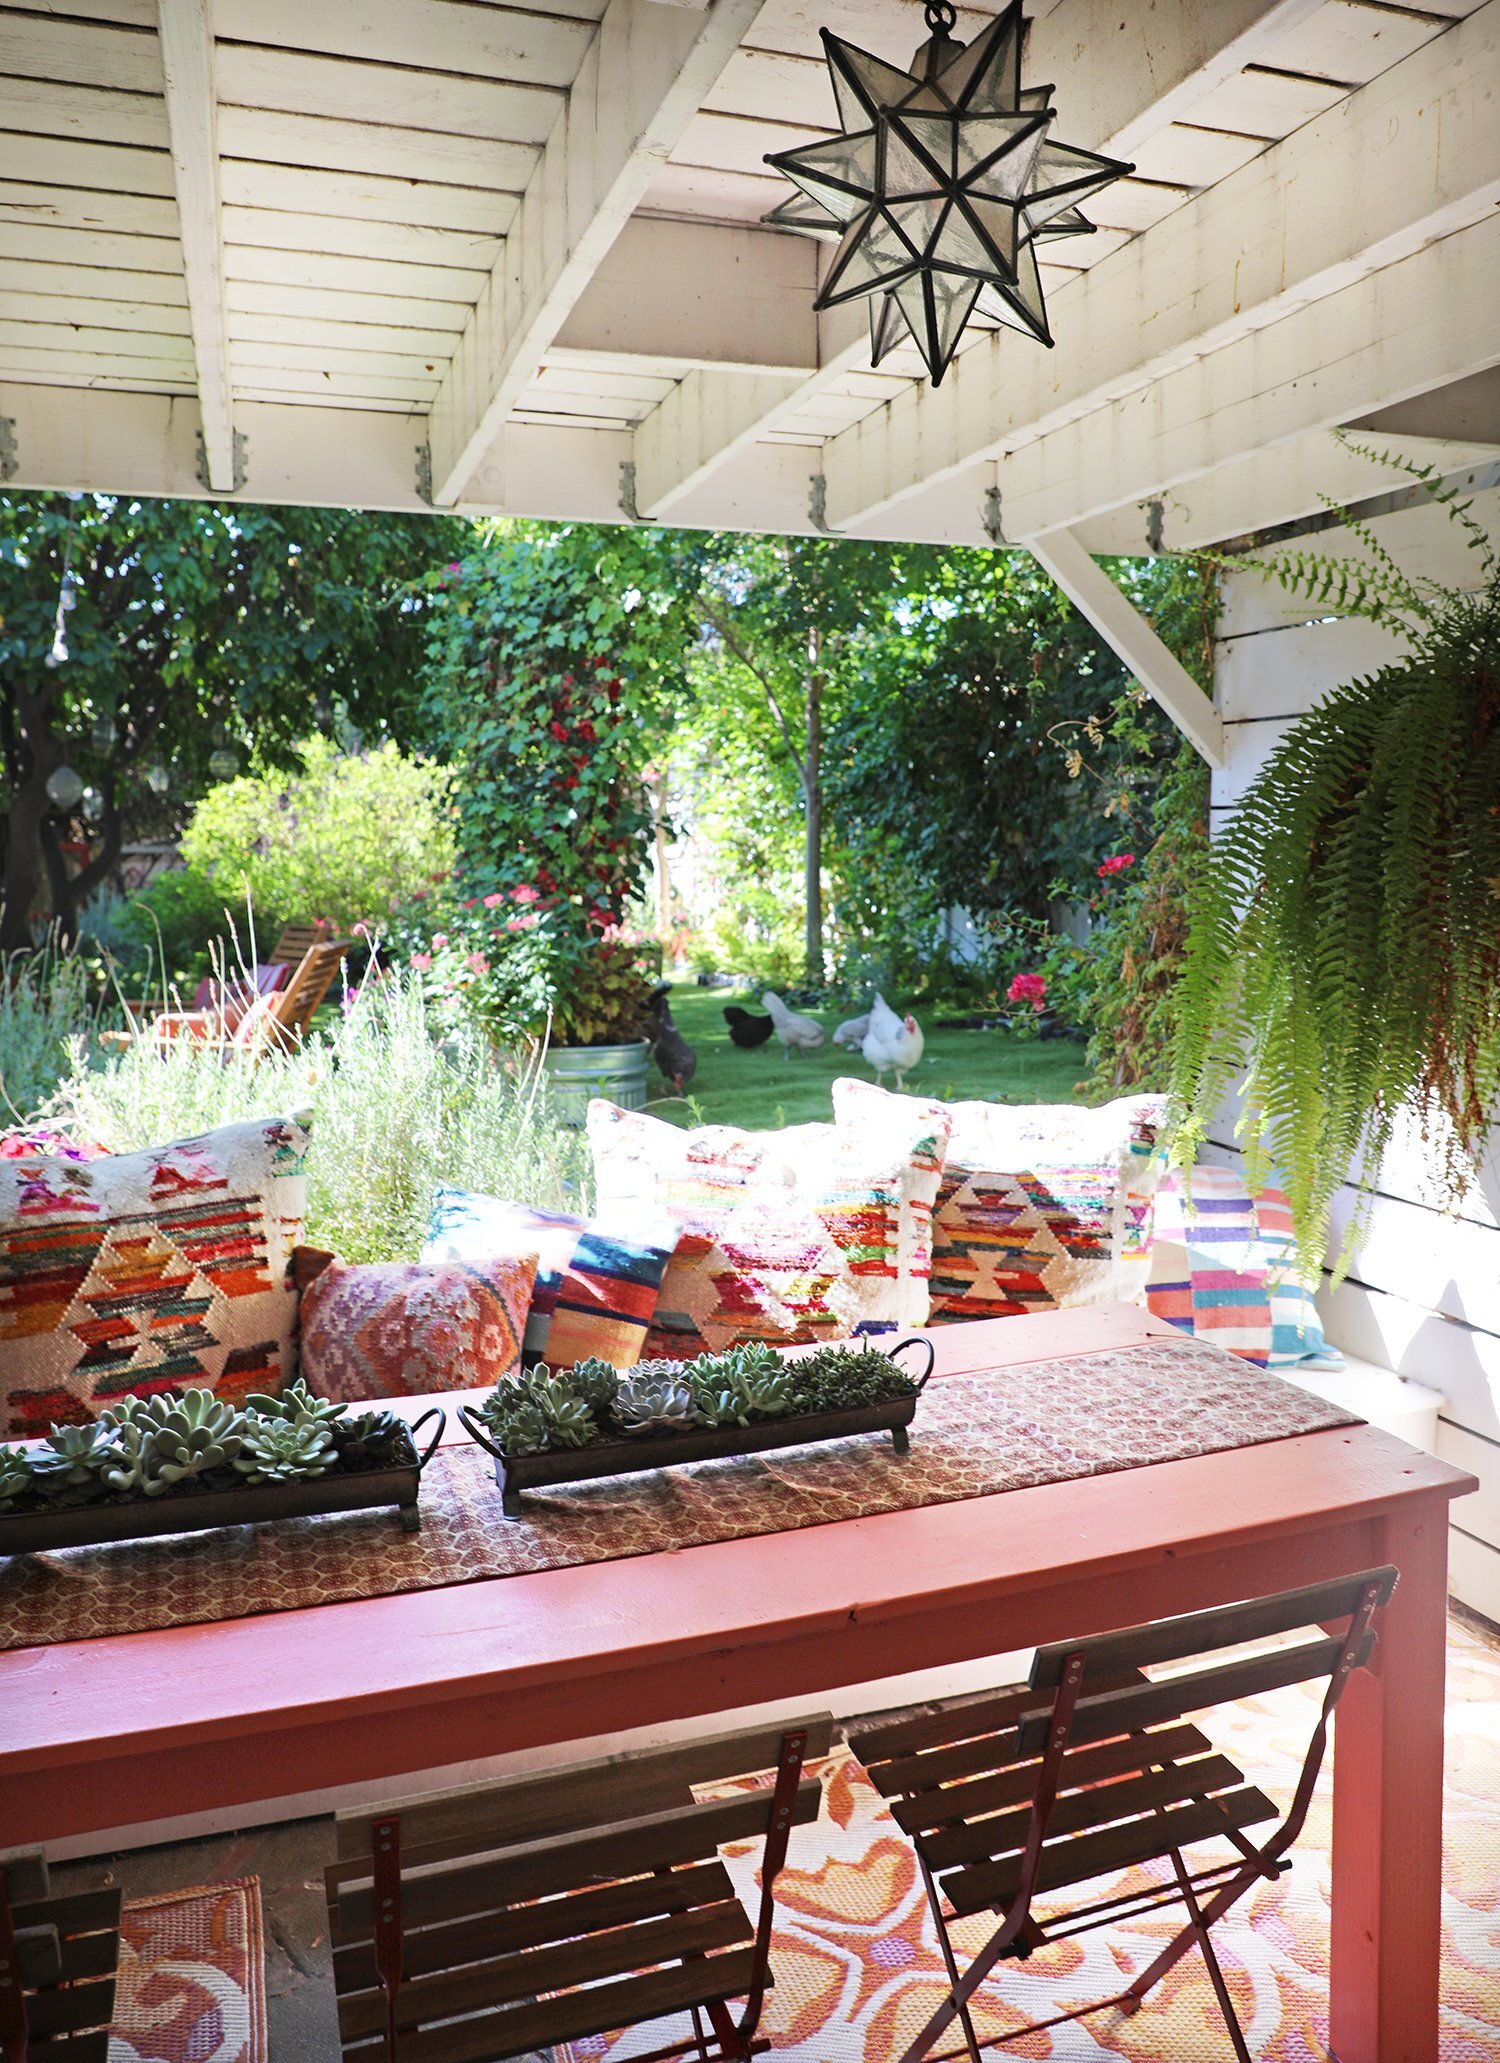
After. Optimal chicken-free-range-viewing seats.
After.
Here’s a good shot of the built-in bench seating that covers all the wonky retaining walls and odd cement steps. Above the bench seat are two wine riddling racks that I have had forever and never, surprisingly, used to store wine. Air plants. They are air plant storage.
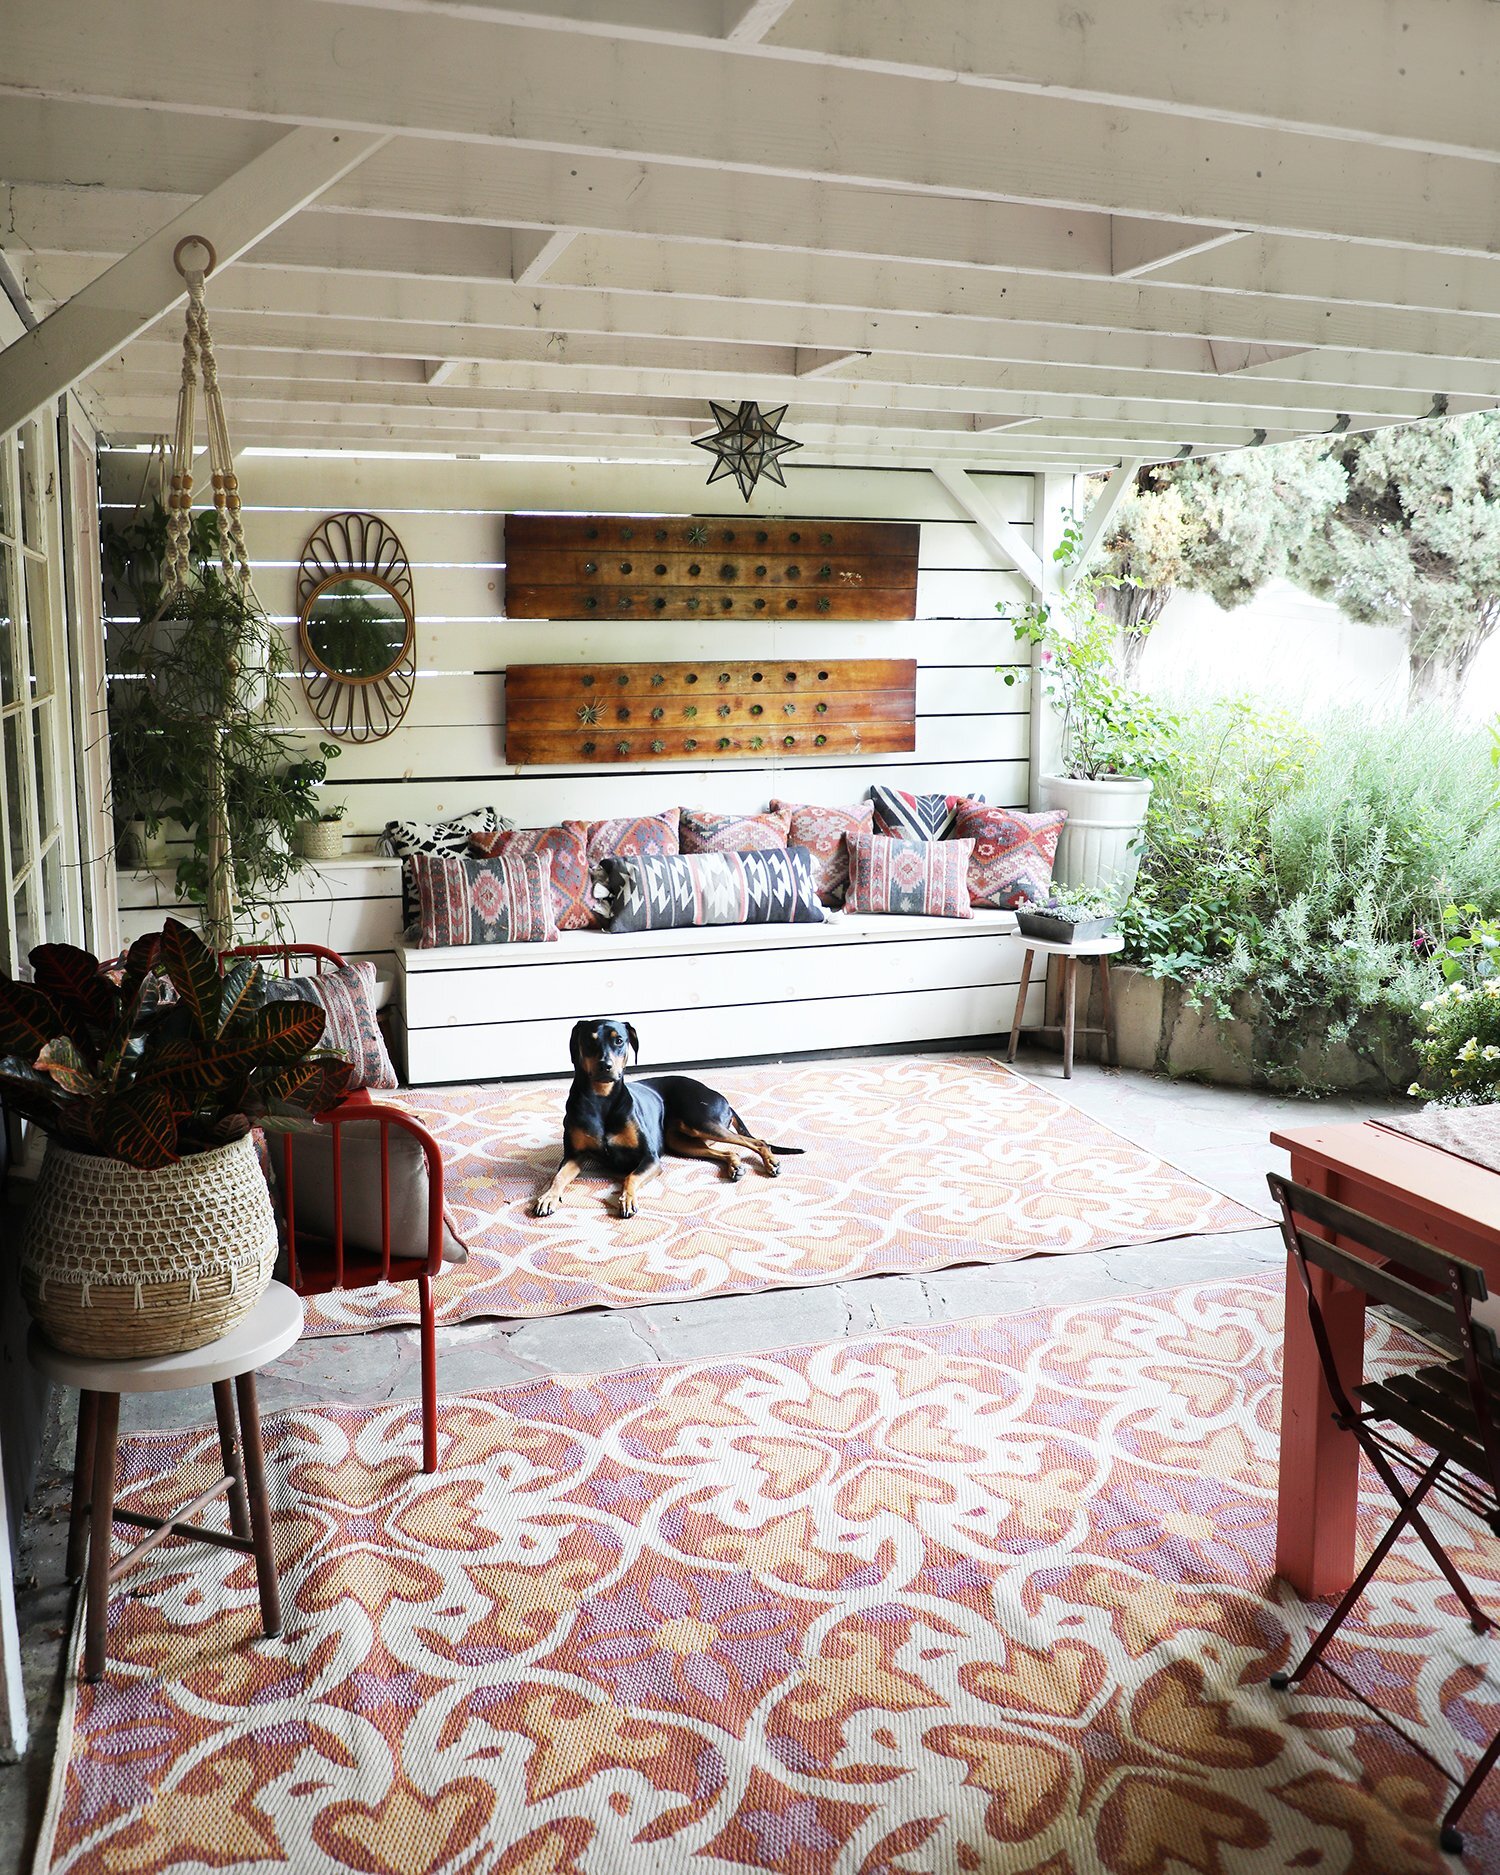
After. Rigby loves these rugs because the midday sun warms them up and makes them a perfect spot for being a sun piglet.
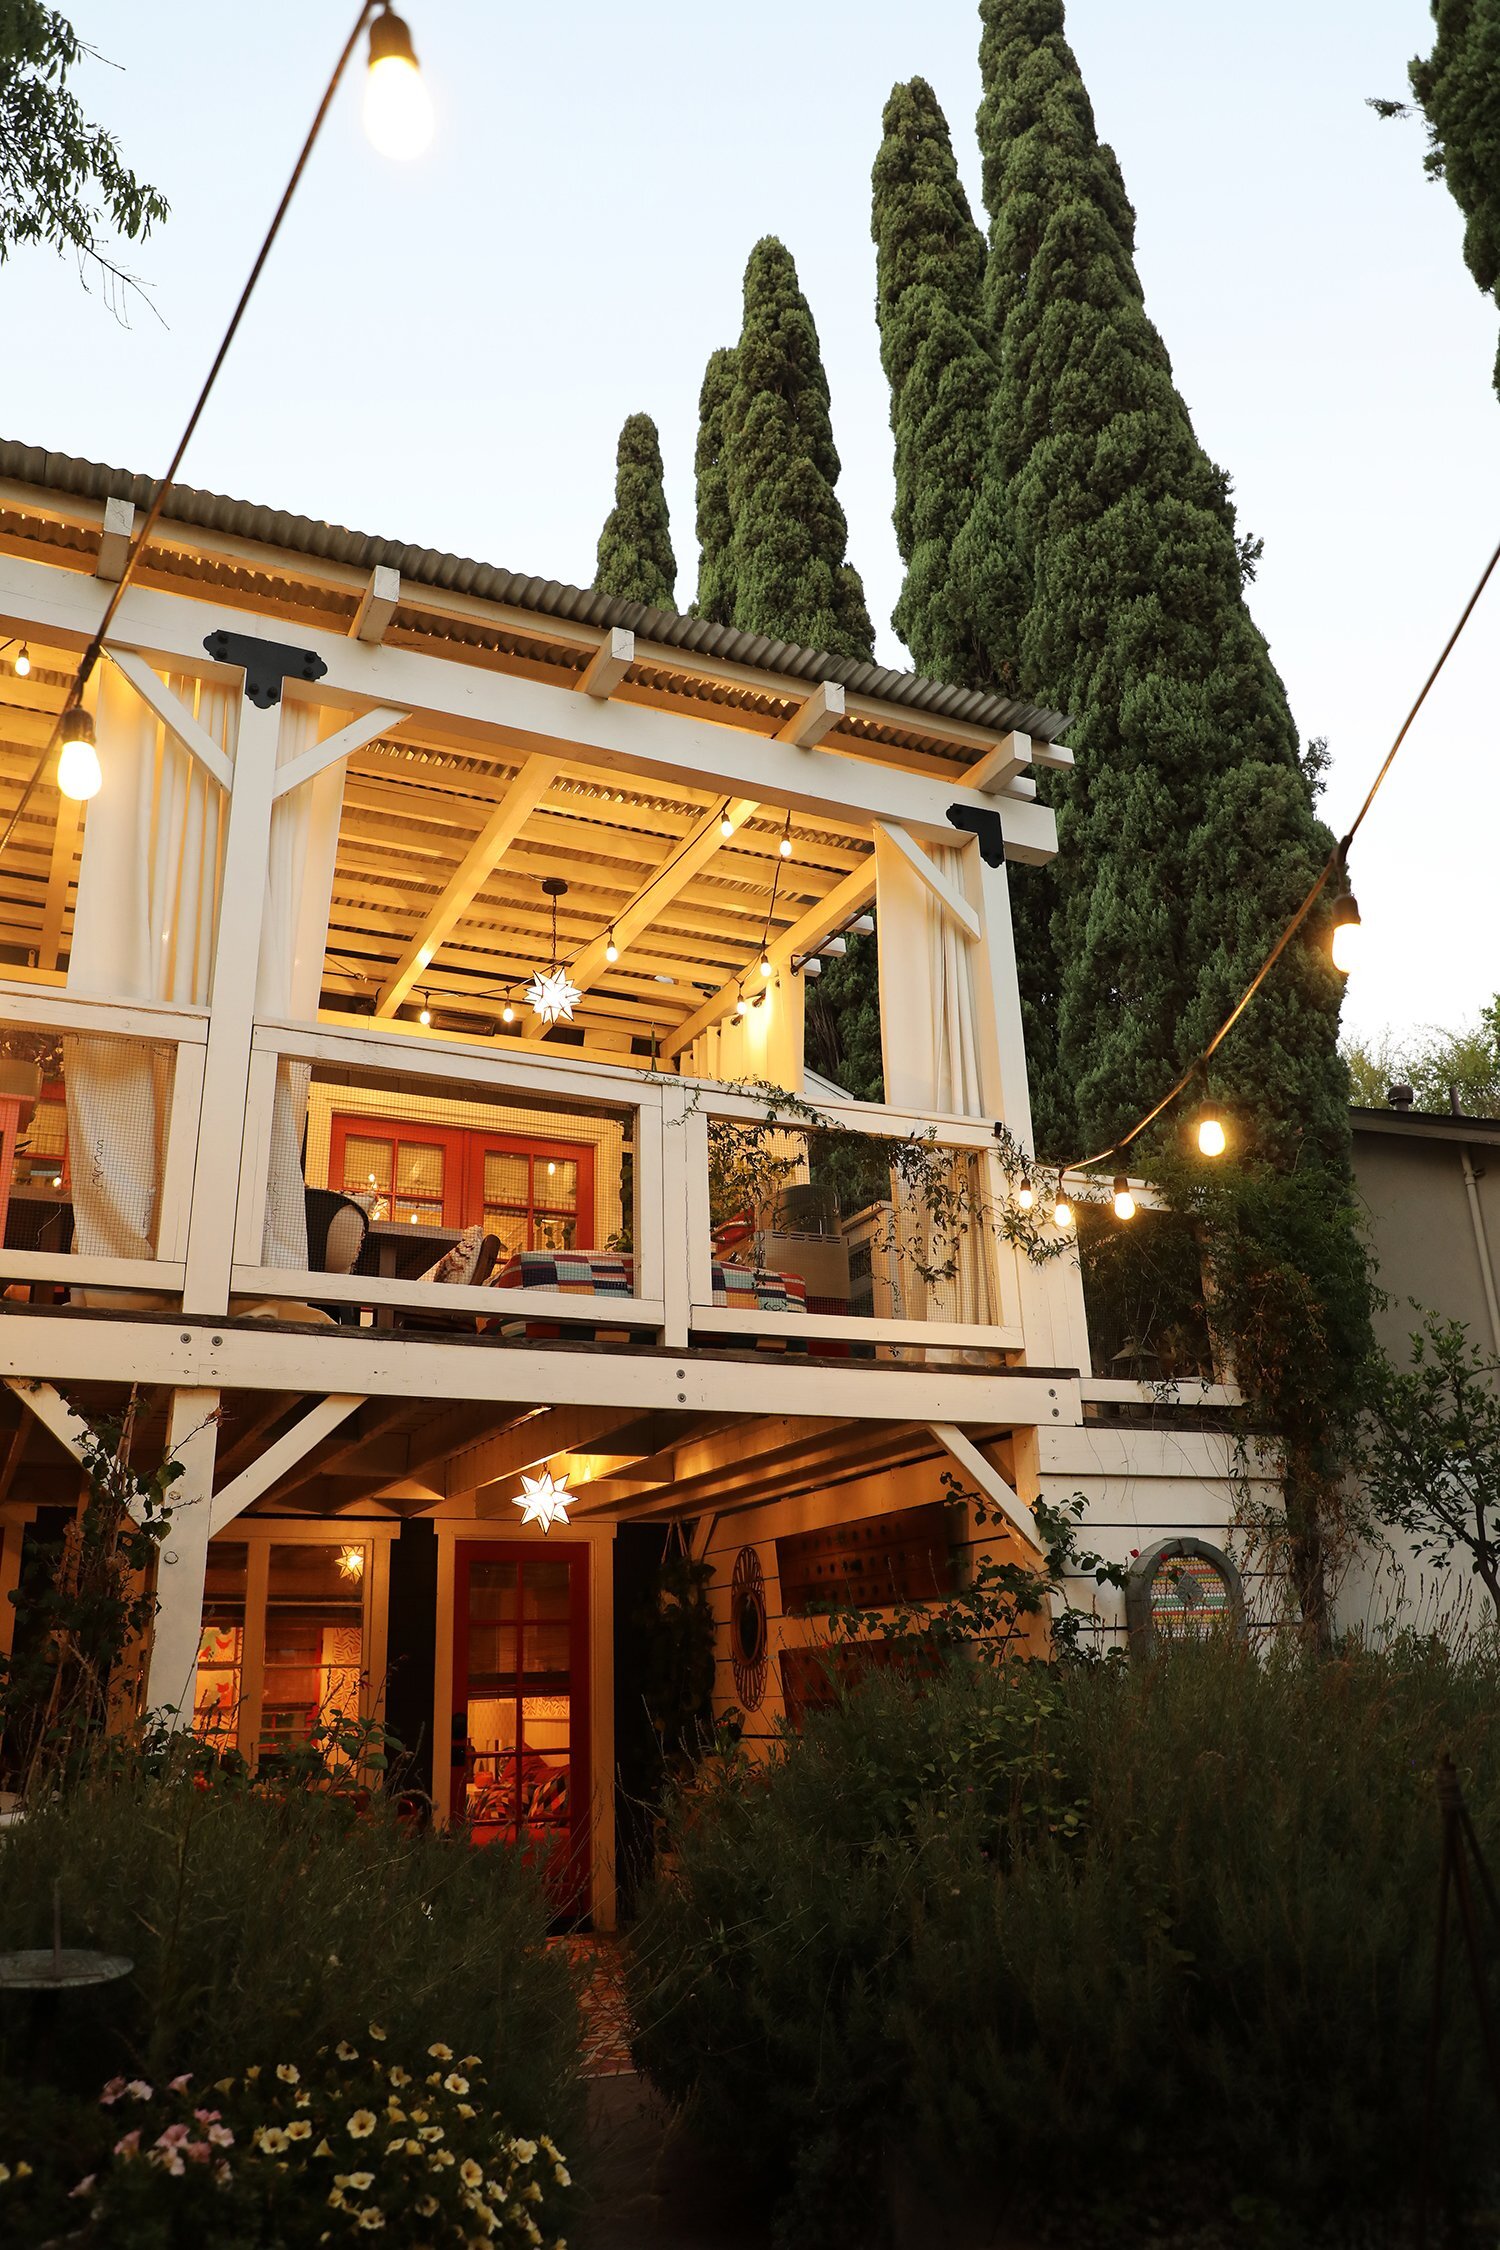
Finally, I would be remiss if I left out some evening views of the back of the house. She looks mighty purdy all lit up.

After.
After.
Product SOURCES:
All paint by Behr
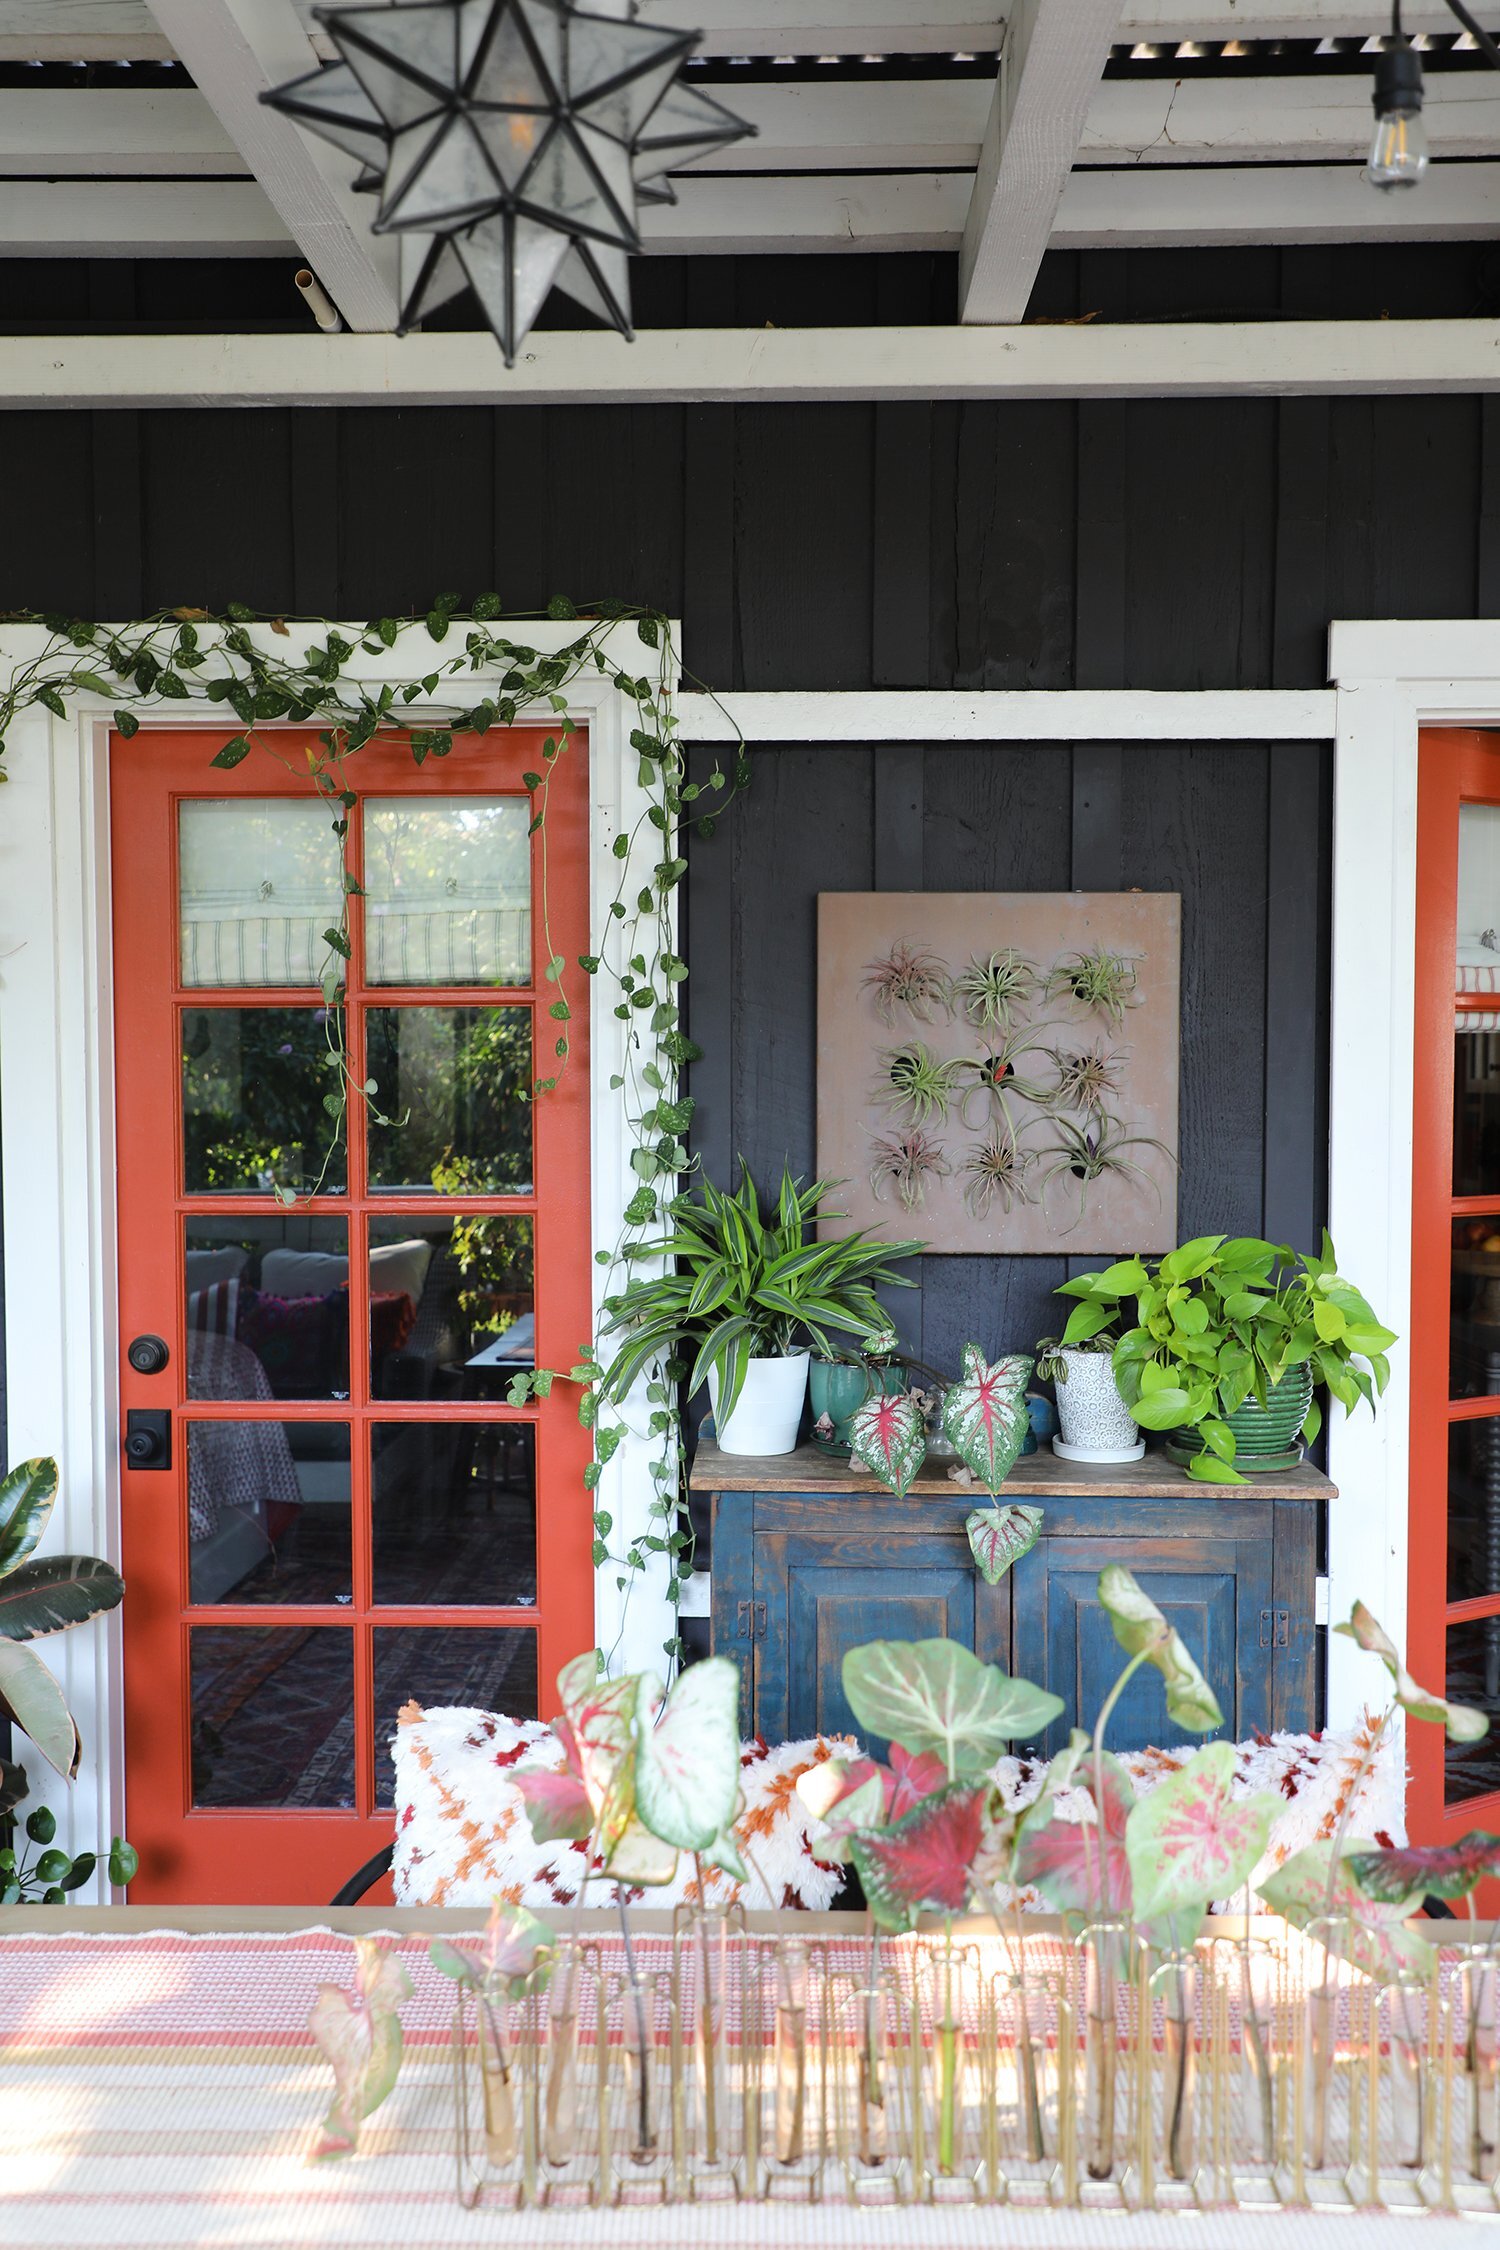
Exterior house walls: Private Black
Exterior trim: Swiss Coffee
Exterior doors: Farmhouse Red
Deck Sources:
Table: World Market (no longer available)
Black metal dining chairs: I stole them from my friend, Sarah, but similar ones can be found on Overstock.com
Reclaimed wood end chair: heirloom from our family business
Dining chair shag pillows: World Market
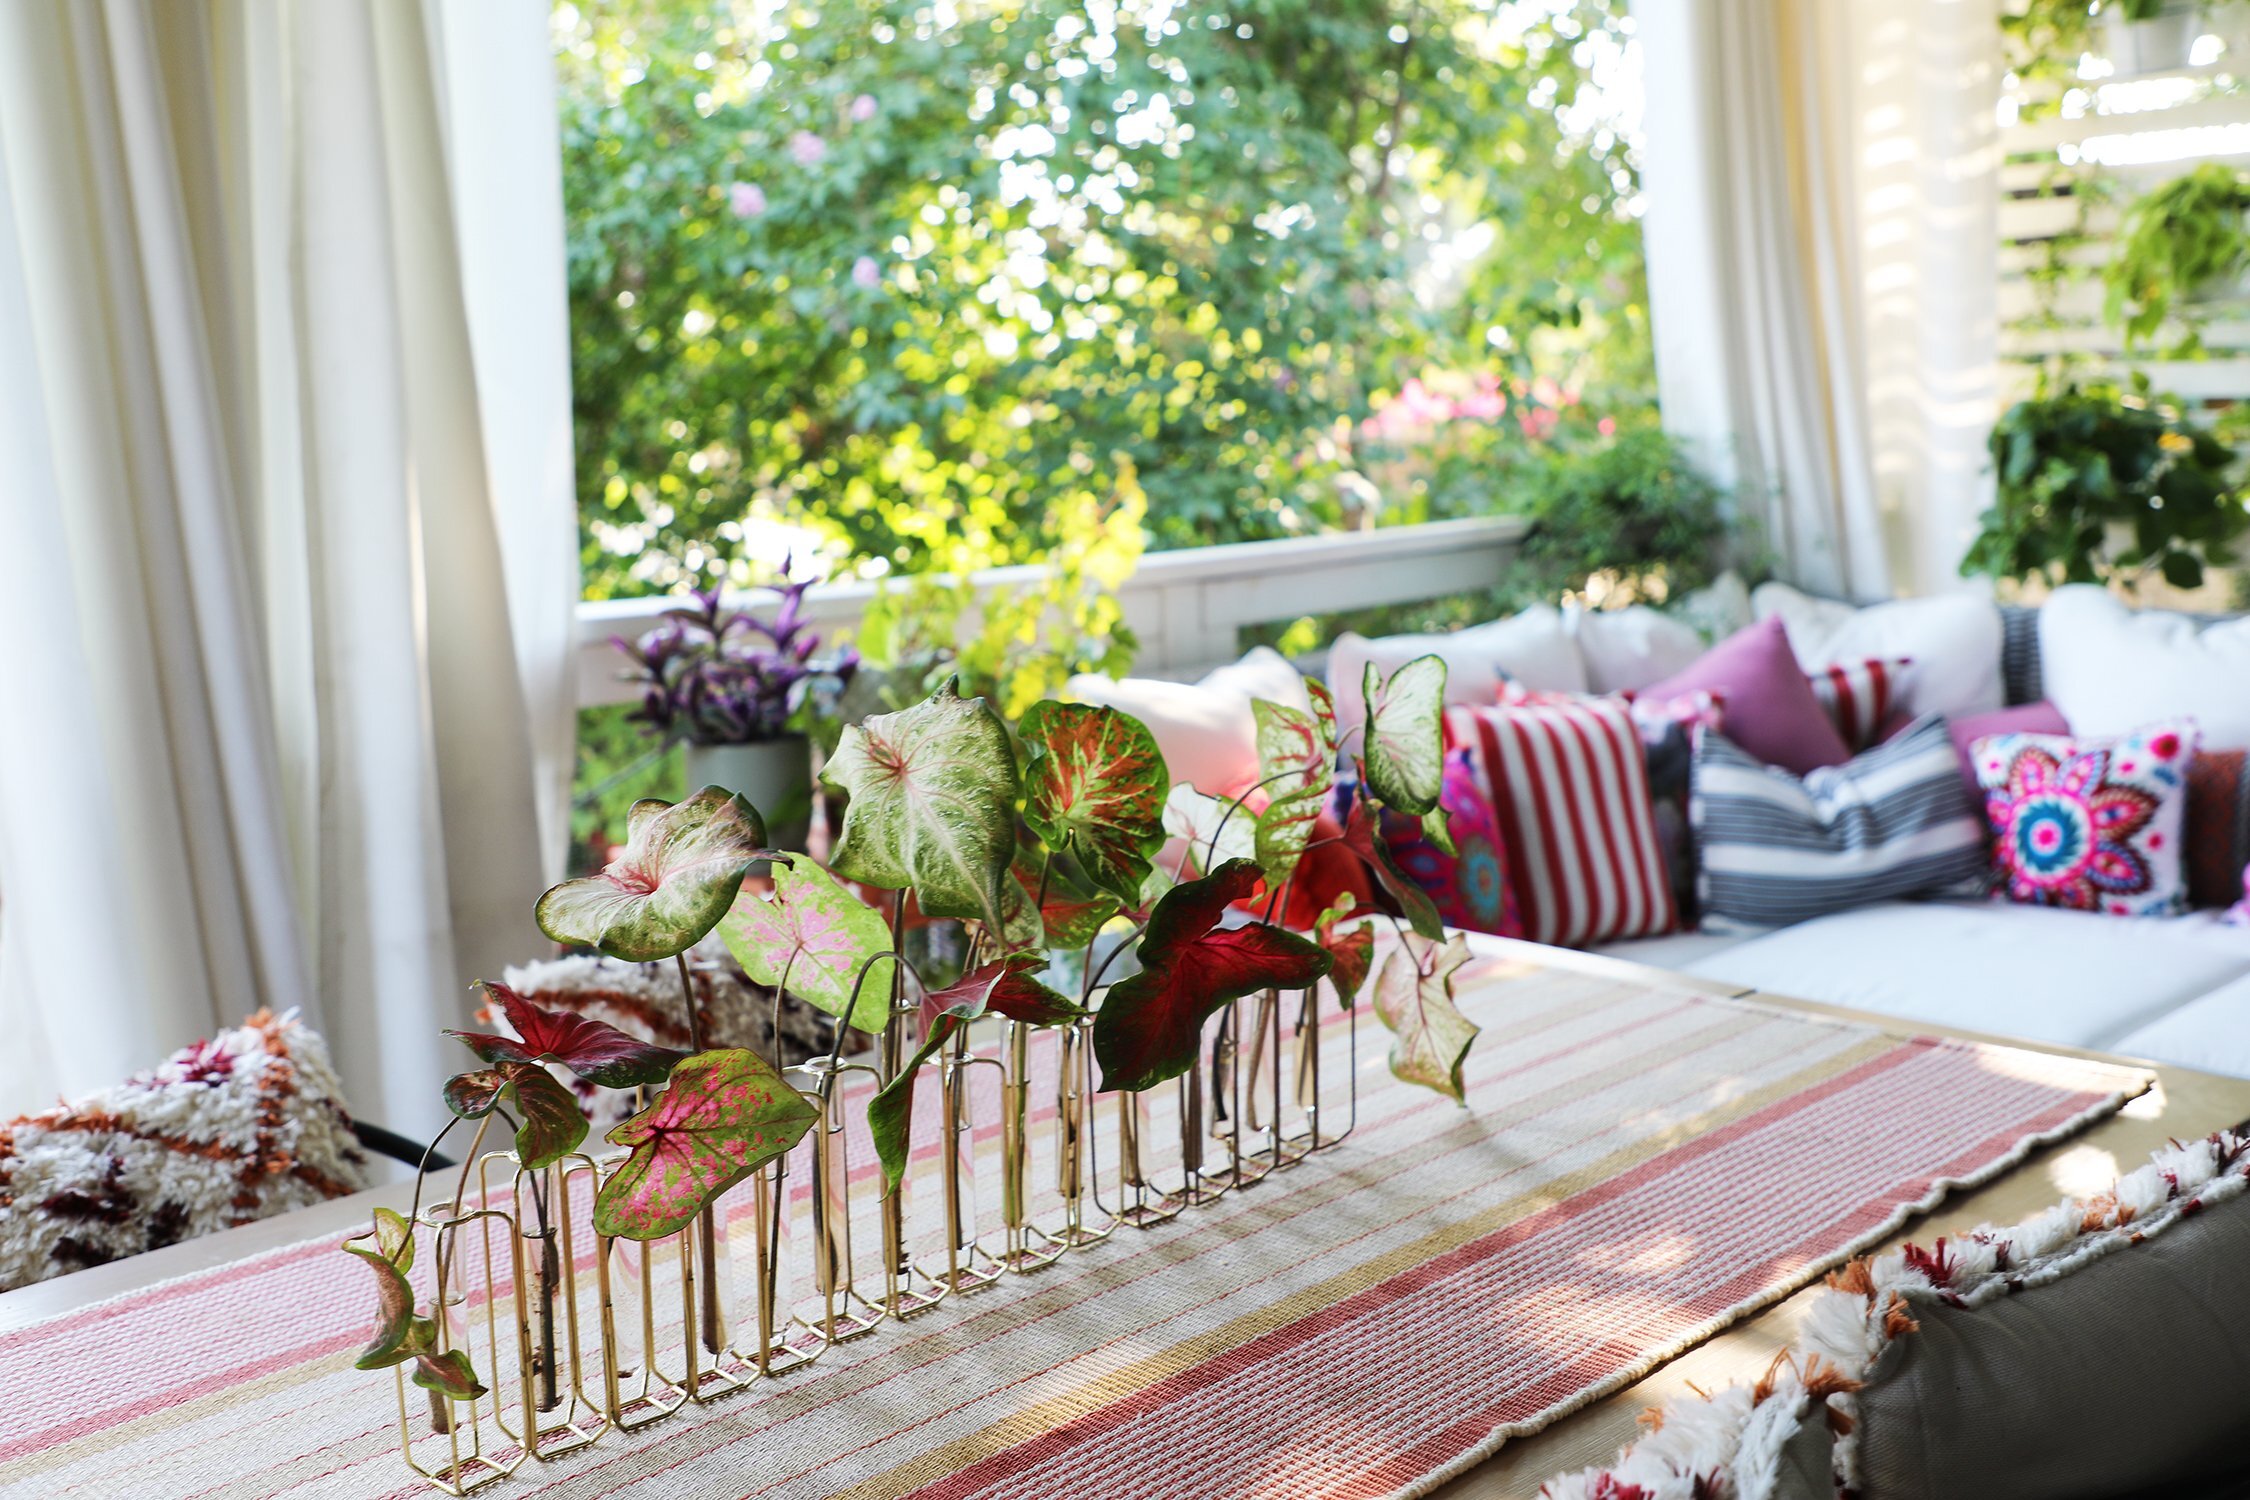
Test tube bud vases: World Market
Table runner: this is actually a rug from AnnieSelke.com
Star pendant lights: Pottery Barn
Central large rust outdoor area rug: Rugs.com
Smaller colorful outdoor rugs: Markandday.com Nuil rug in Burnt Orange
Outdoor sectional couch: World Market (currently out of stock and only seems to come with grey cushions now)
Patio Sources:
Various assorted outdoor pillows which may or may not still be in stock: World Market
Outdoor rugs: World Market (this exact design is several years old, but they have similar ones every Spring, also please check out similar recycled plastic mats from FabHabitat.com)
Red metal bench: IKEA Brusen Outdoor “Sofa”
Peach table: built by us.
Red folding chairs: IKEA Tärnö Chair (currently not available in the red)
Star pendant lights: Pottery Barn
Rattan floral mirror: World Market
Riddling racks: PotteryBarn….they don’t have the exact same one anymore (these are 20+ years old—VINTAGE PB!!!) but they do have this one and I find it hilarious that they now show it hanging on a wall with succulents and air plants in it.
As per usual, if you see anything you have questions about, drop me a comment below!